
Egg Bites Recipe
Easy copycat egg bites recipe for weekday breakfast meal prep.
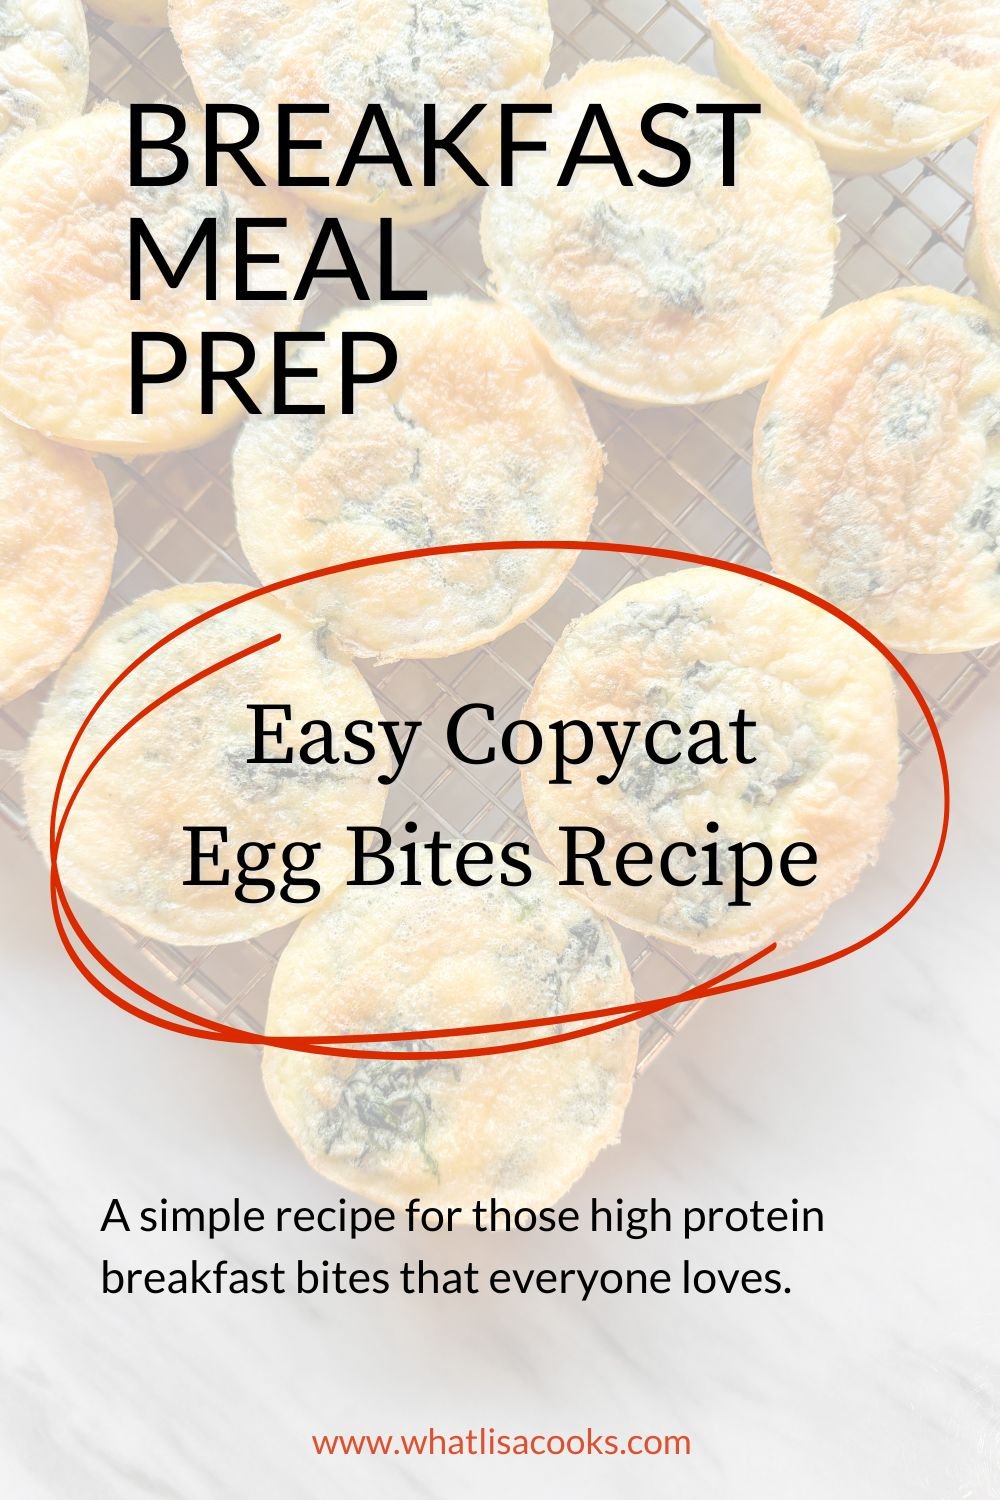
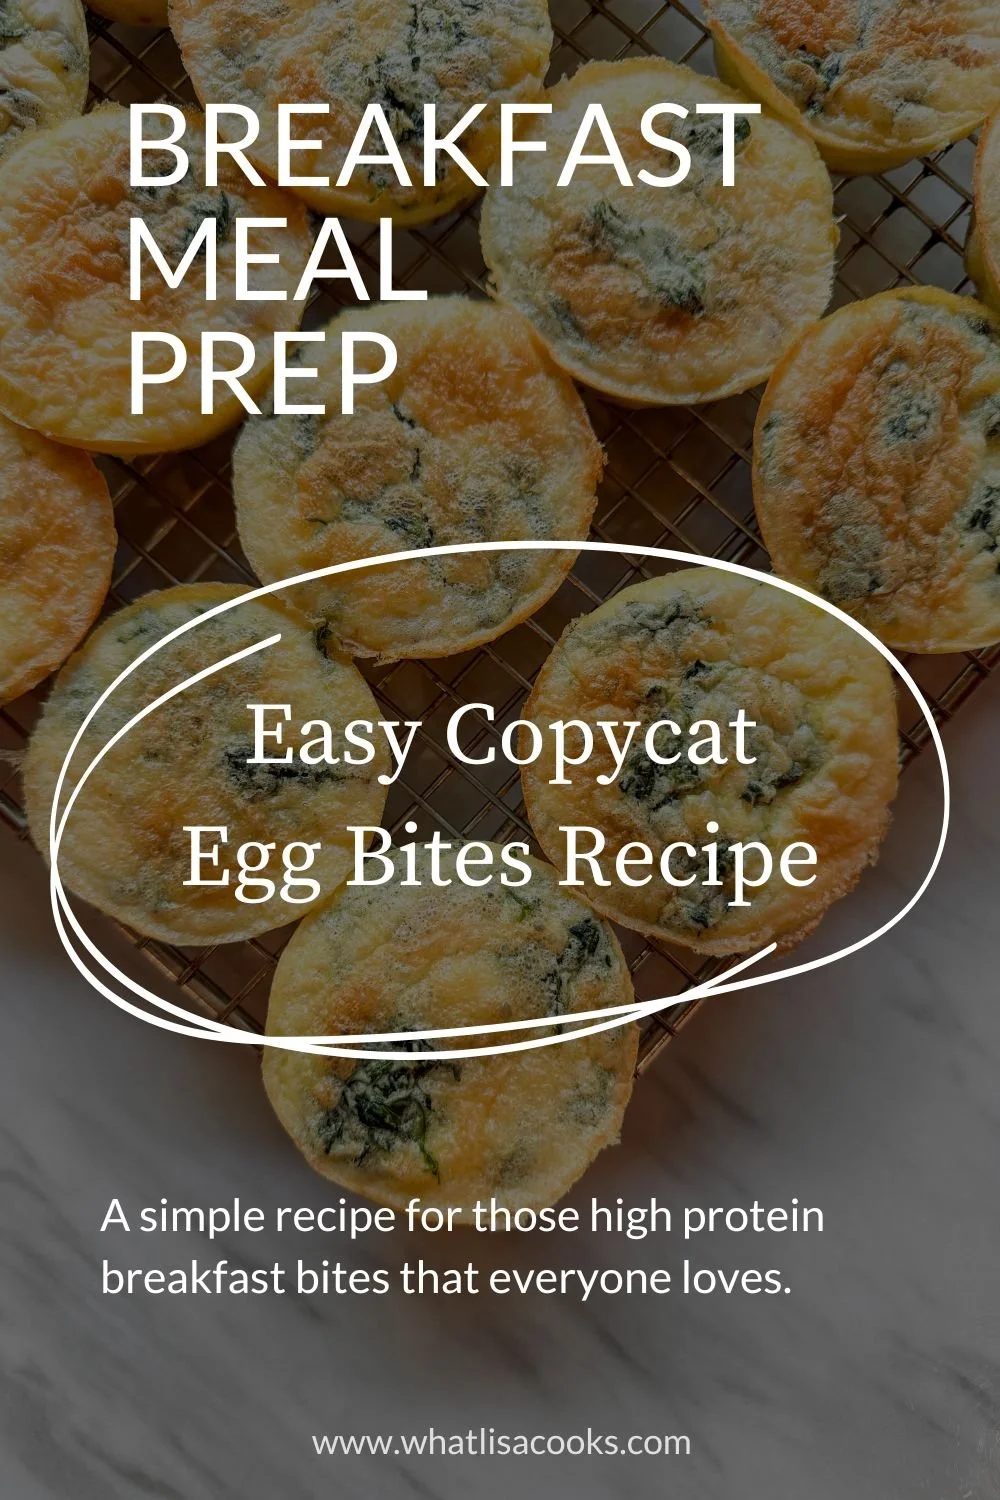
Here is my version of the popular copycat egg bites recipe that everyone loves.

My kids and I love those Starbucks egg bites as much as anyone, but they get expensive fast. There are other brands of egg bites too that you can buy at the store and are great for easy school day breakfasts, but those also get expensive when you are feeding a family of six. Once you figure out how to make them from scratch at home you will never have to be without a quick grab and go school day or work day breakfast again.
The secret to the texture is the cottage cheese all blended in with the eggs. That’s how you get that light, fluffy, creamy texture. I know you think you don’t like cottage cheese, but I can guarantee that you would never know it’s in these if I hadn’t told you.
I make up big batches of these for my teens for school mornings. They are a great protein packed easy breakfast. I usually put half in the fridge and then package up the other half two at at time in little snack bags and freeze, then they can just grab a single serving out the freezer and pop in the microwave for about 45 seconds for a quick weekday breakfast.
My version here is adapted from several different recipes and adjusted to suit our tastes and needs. This one probably makes more than a lot of other recipes you’ll find, because I always like to make lots of things that can be frozen for easy meal. You can use any combination of cheese, meat, and veggies you like. I’ve tried lots of combinations but our favorite is gruyere cheese (like the Starbucks ones), with a little bacon and spinach. So that’s how I’ve written the recipe, but you can easily customize with any combinations you like.

To make this egg bites recipe you will need:
Scroll down for the recipe card with the exact quantities.
eggs
cottage cheese
cheese (gruyere or sharp cheddar or other cheese you like)
bacon
salt & pepper
cooked chopped bacon (optional)
spinach or other veggies (optional)
spray oil
muffin pans, ideally silicone

If you haven’t already cooked the bacon you will want to do that first. Chop it up and cook until crispy. I like to buy big packs of bacon and dice and cook it all at once, then I have bacon to use for this recipe and lots extra for salads and topping in other recipes.
How to make these easy meal prep egg bites:
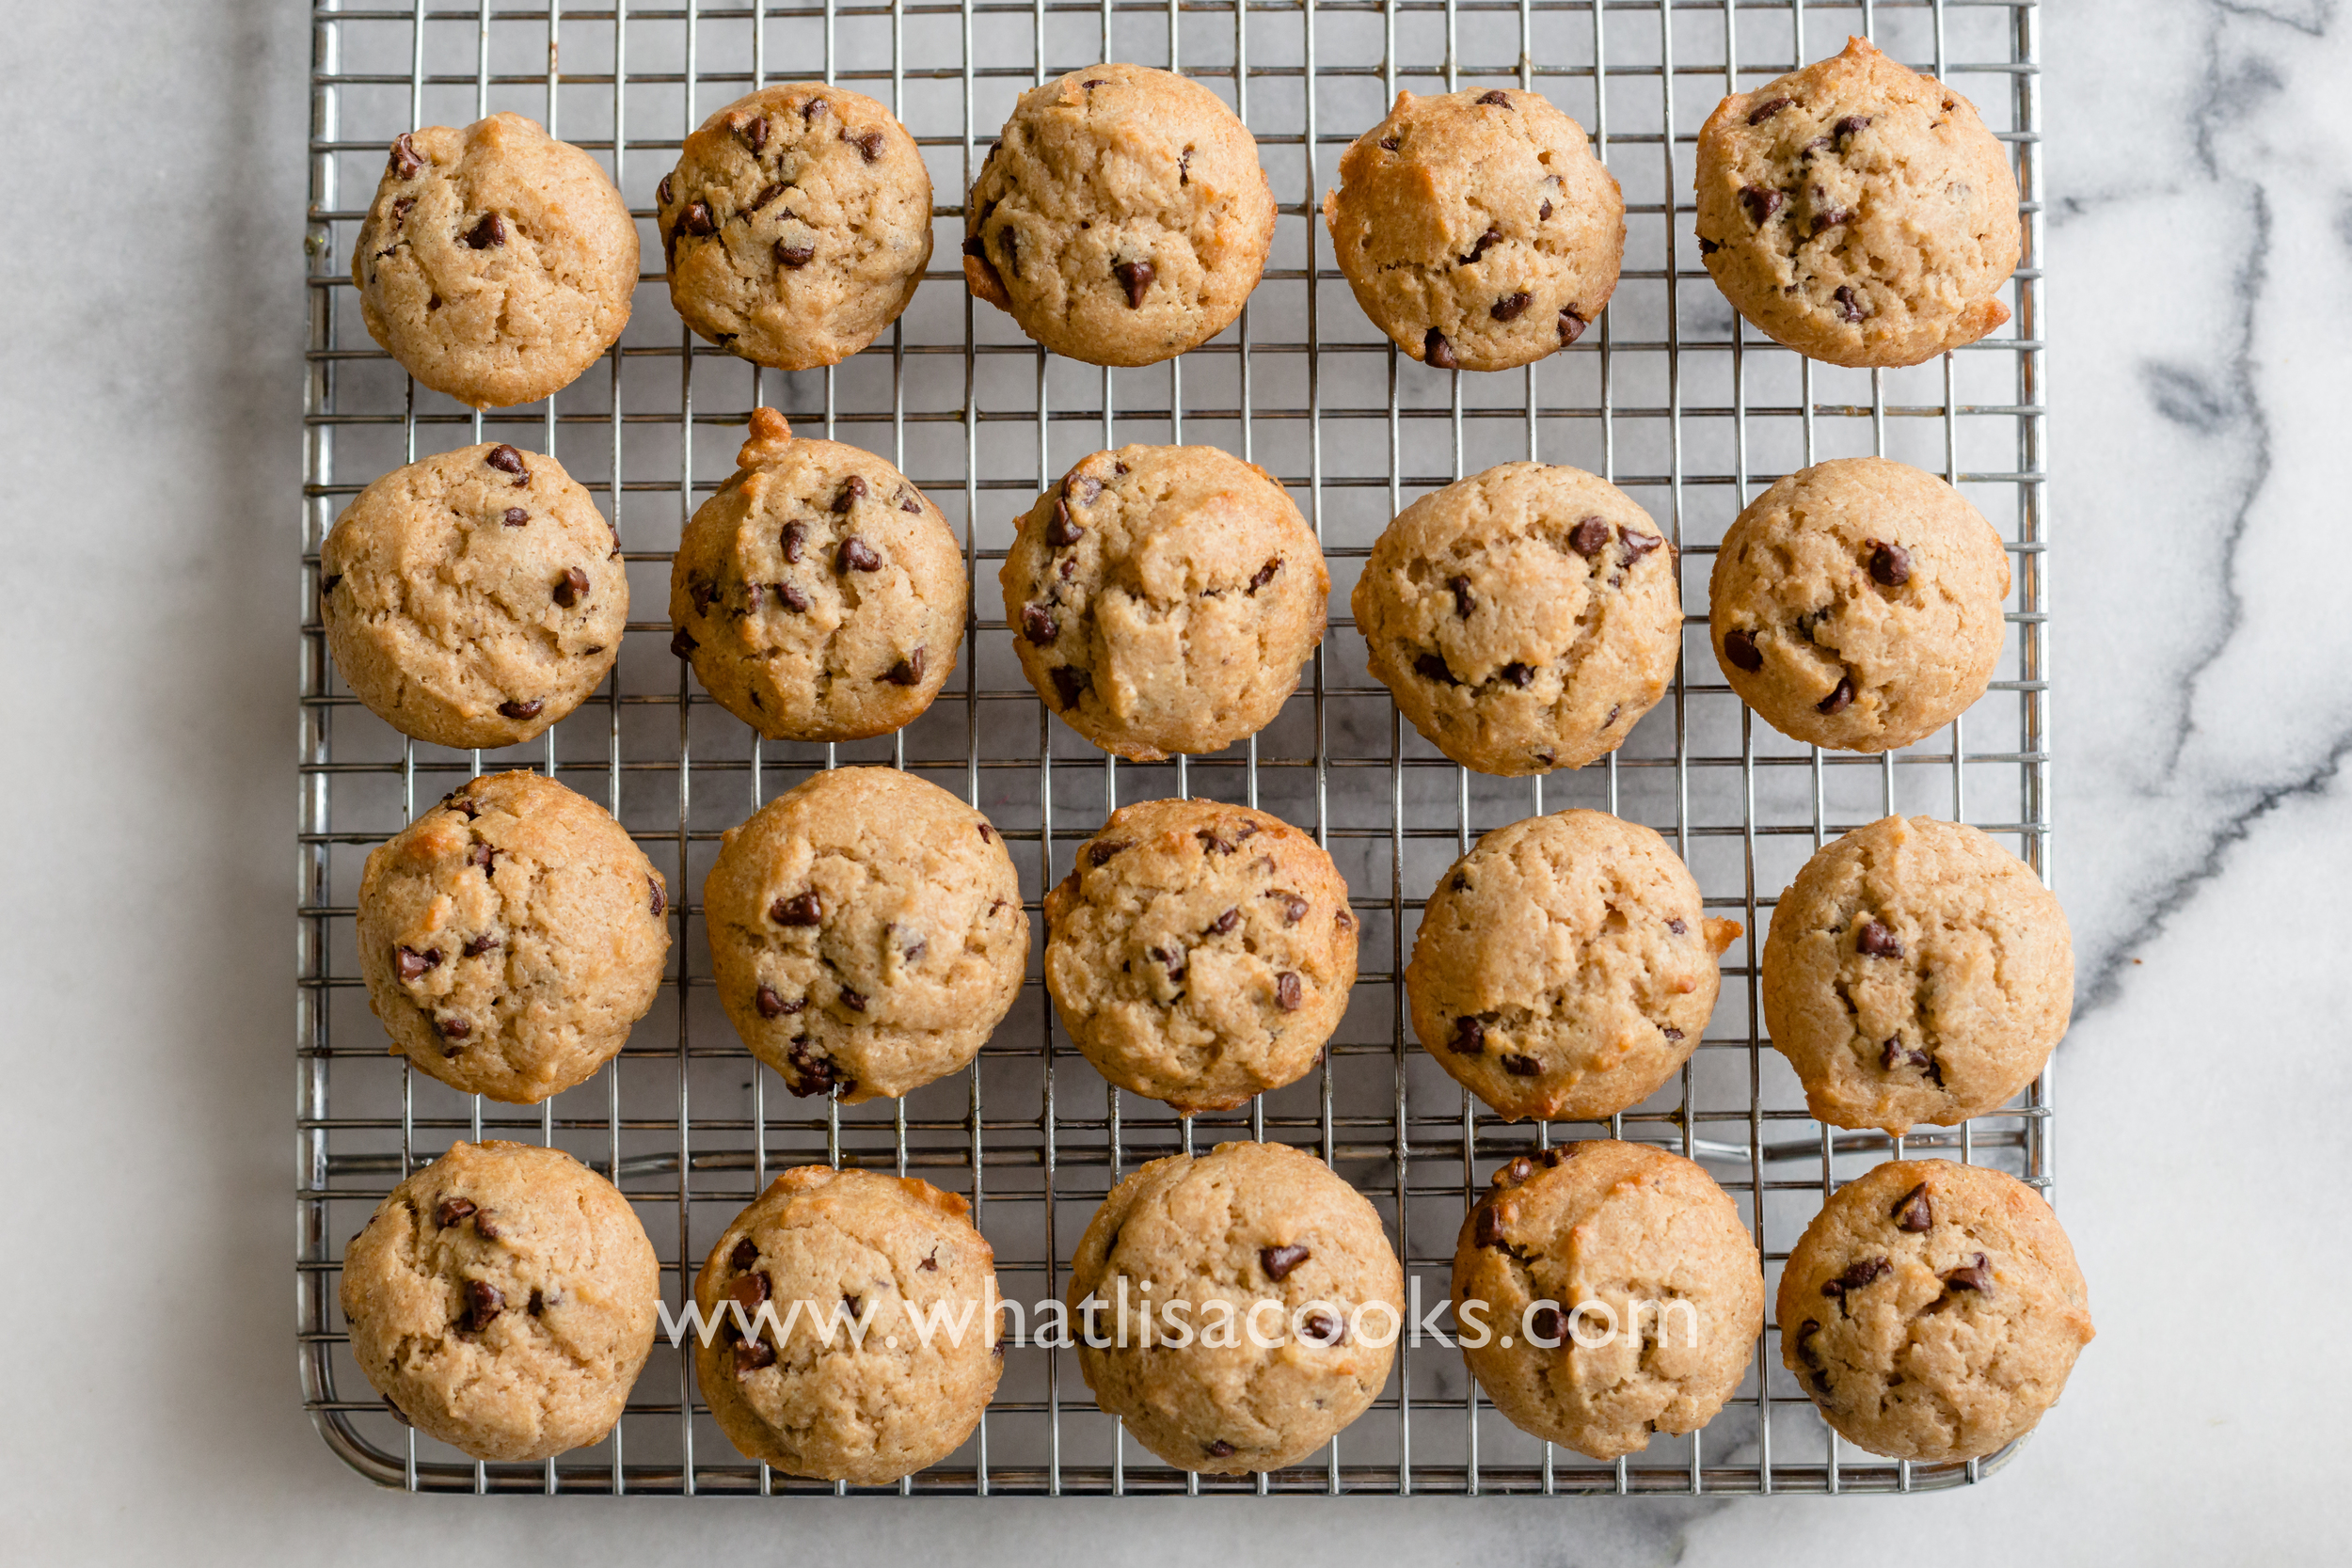
Preheat your oven to 300 degrees convection (or 325 regular bake). Place your silicone muffin pan in a deep sheet pan, and spray the muffin pan with cooking oil.
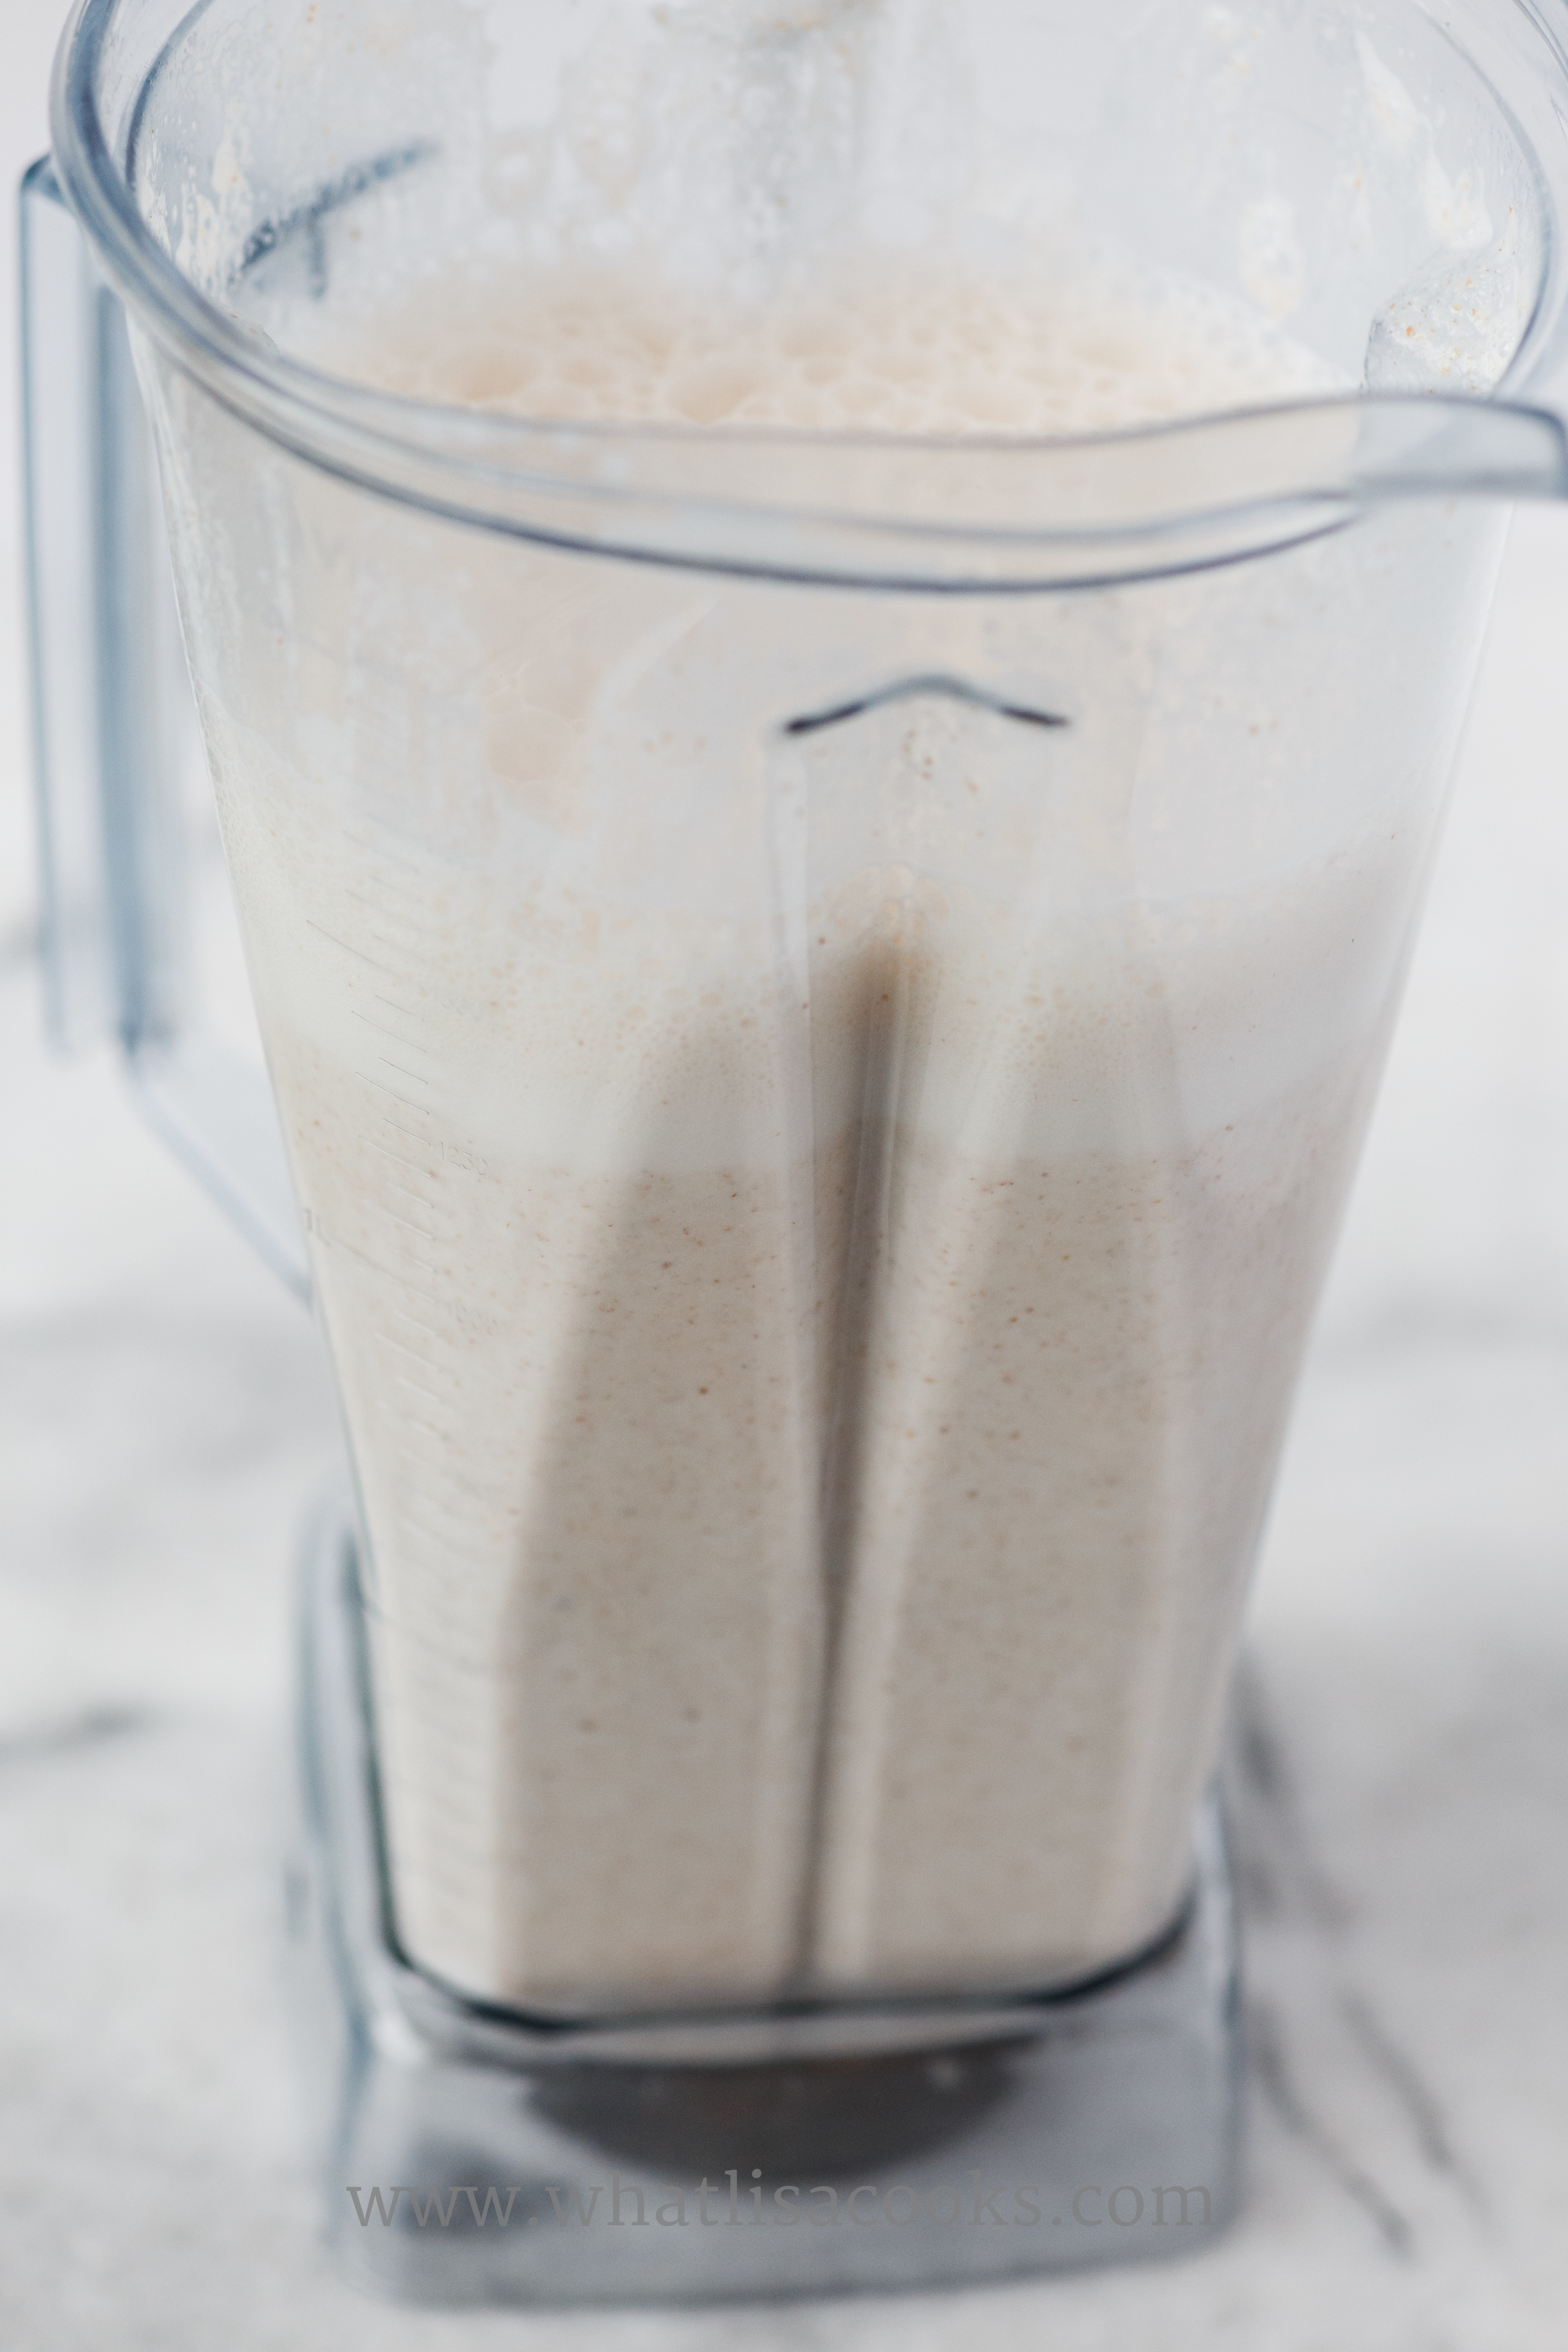
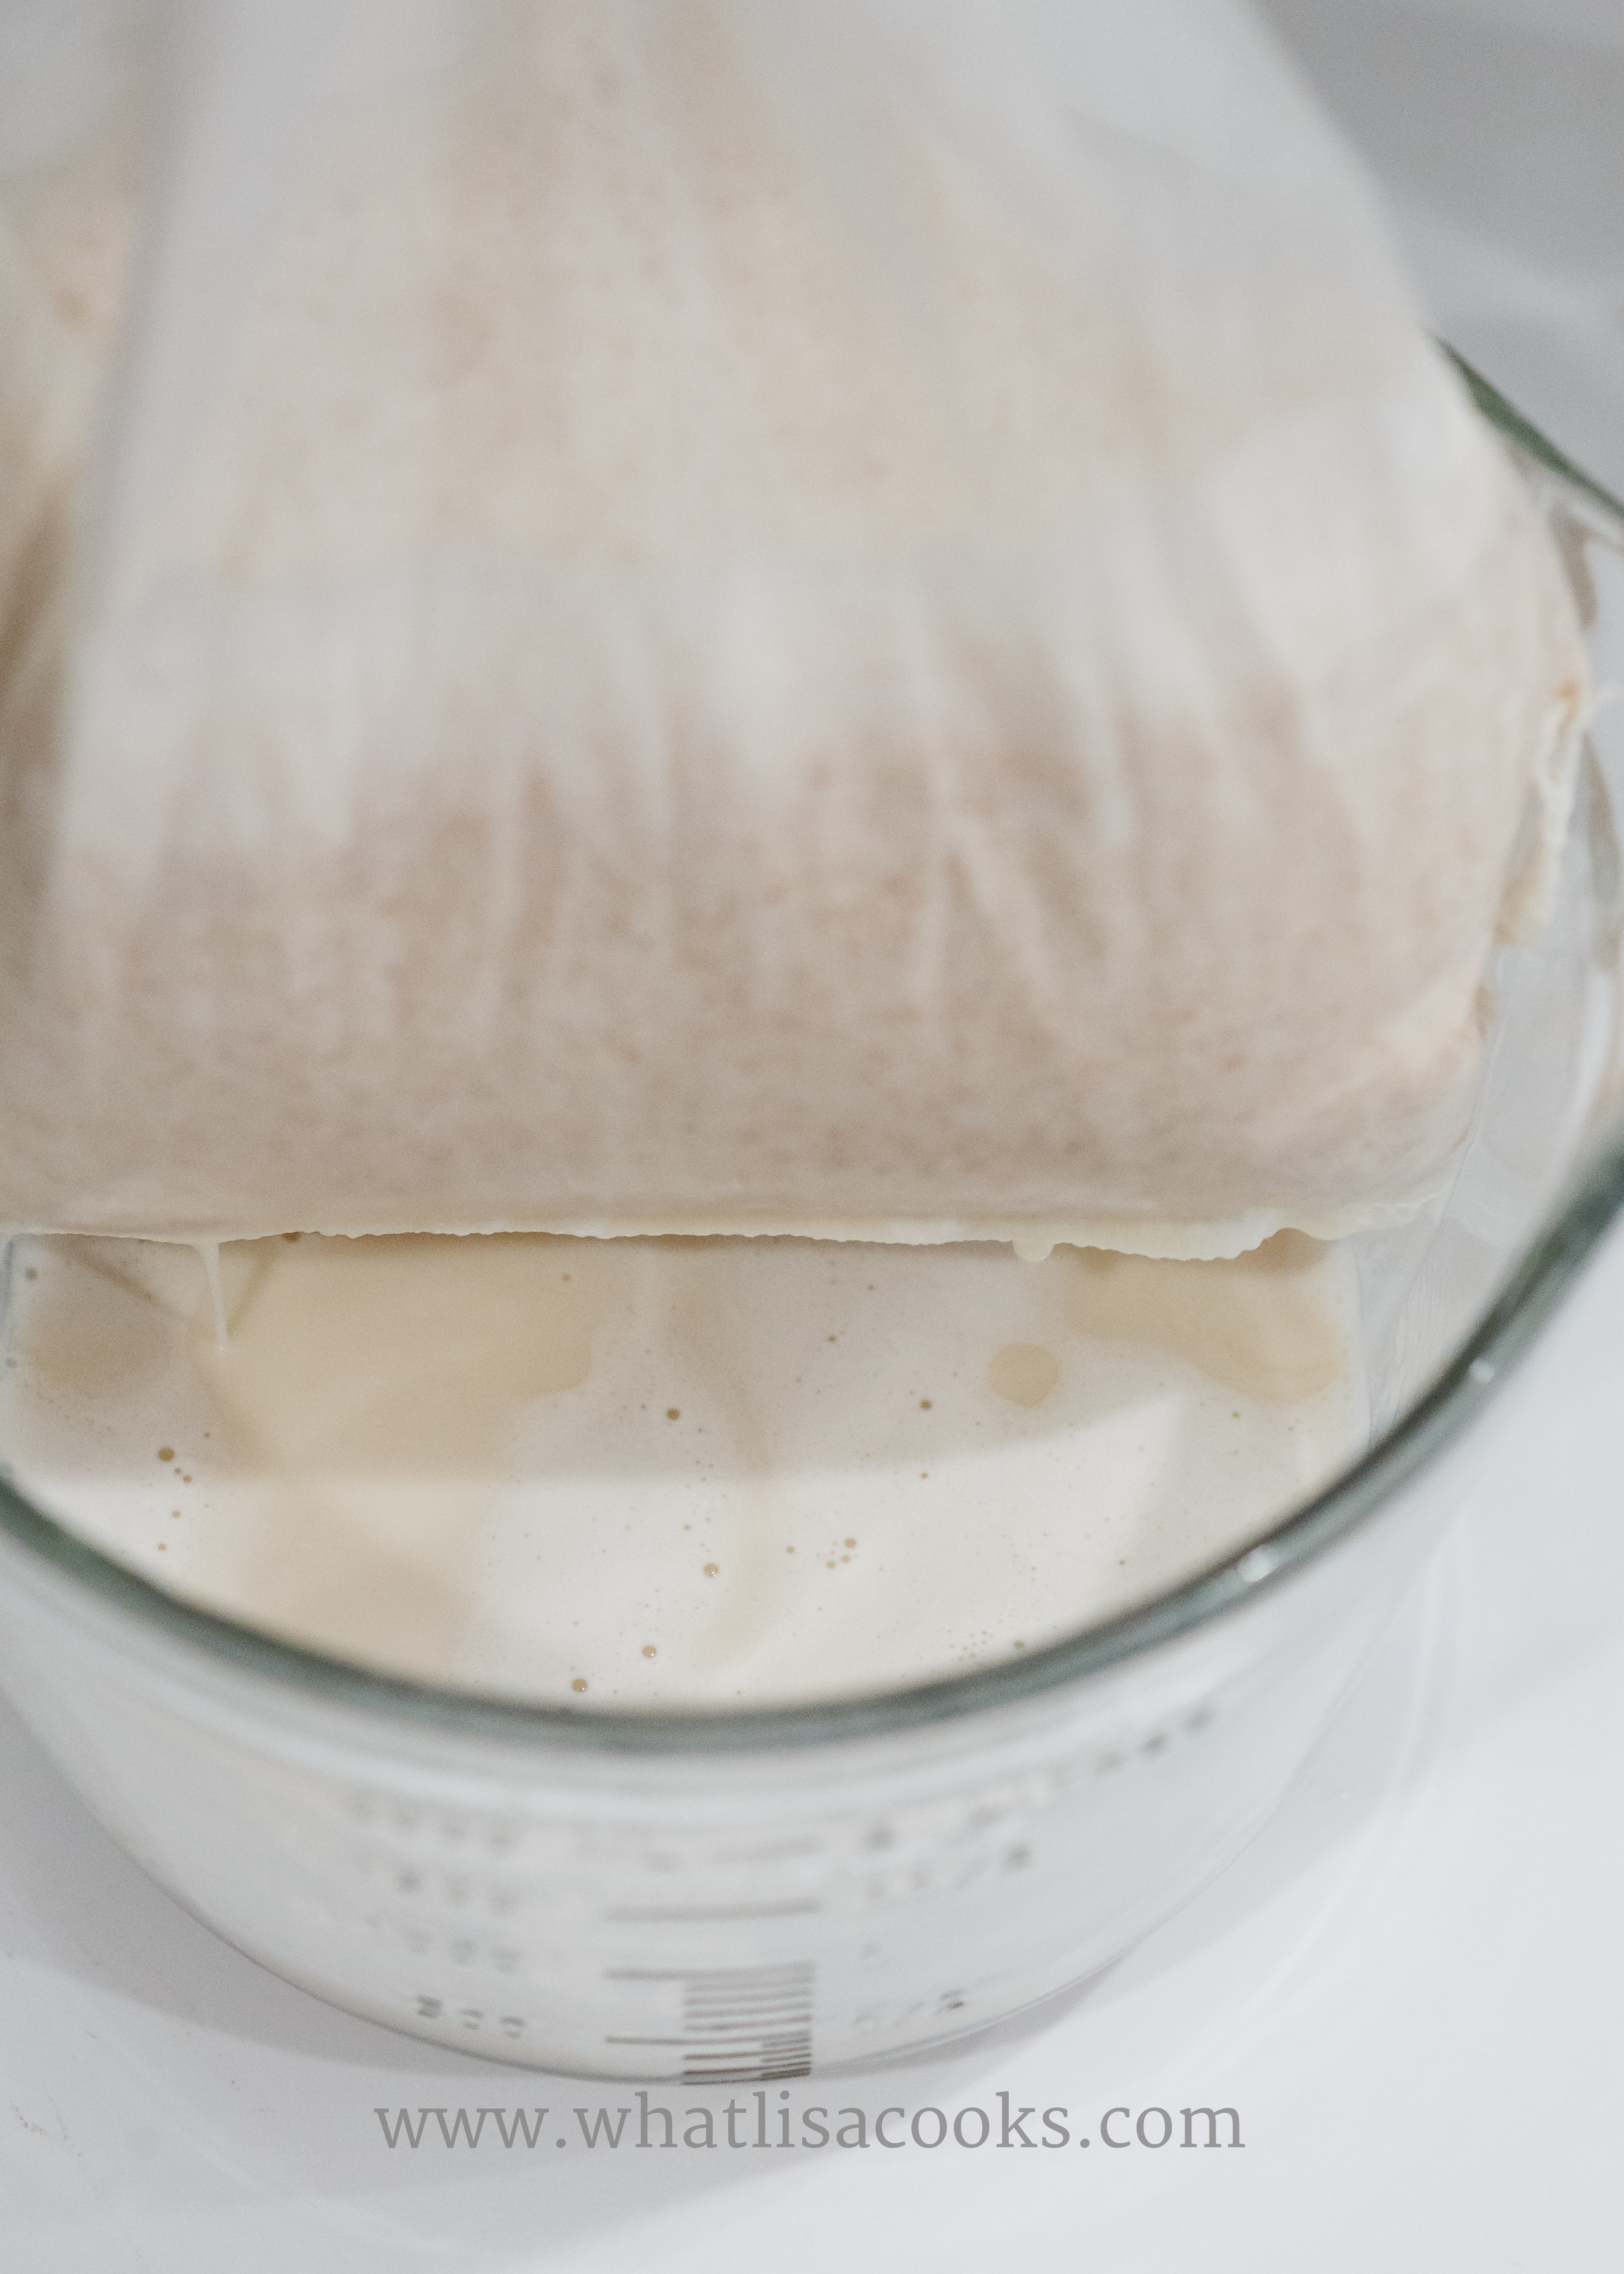
Put all of the ingredients except the bacon & spinach in the blender and blend until well combined.
Fill each muffin cup with a little spinach and bacon, or whatever other meat or veggies you are using. Then label the egg mixture into each one, to about 3/4 full.
Put the pan in the oven and fill the sheet pan with hot water to about half way up the muffin pan.
Cook for 25 minutes, and then I dare you to try not to eat several before you can get them put away for breakfast.

Egg Bites
Ingredients
Instructions
Notes
You can do this without the water bath in the pans if you prefer, I just think it gets you a slightly nicer, creamier texture that more closely mimics the Starbucks sous-vide egg bites texture that we all love. And this is especially useful if you don't have a convection oven, for more even cooking.
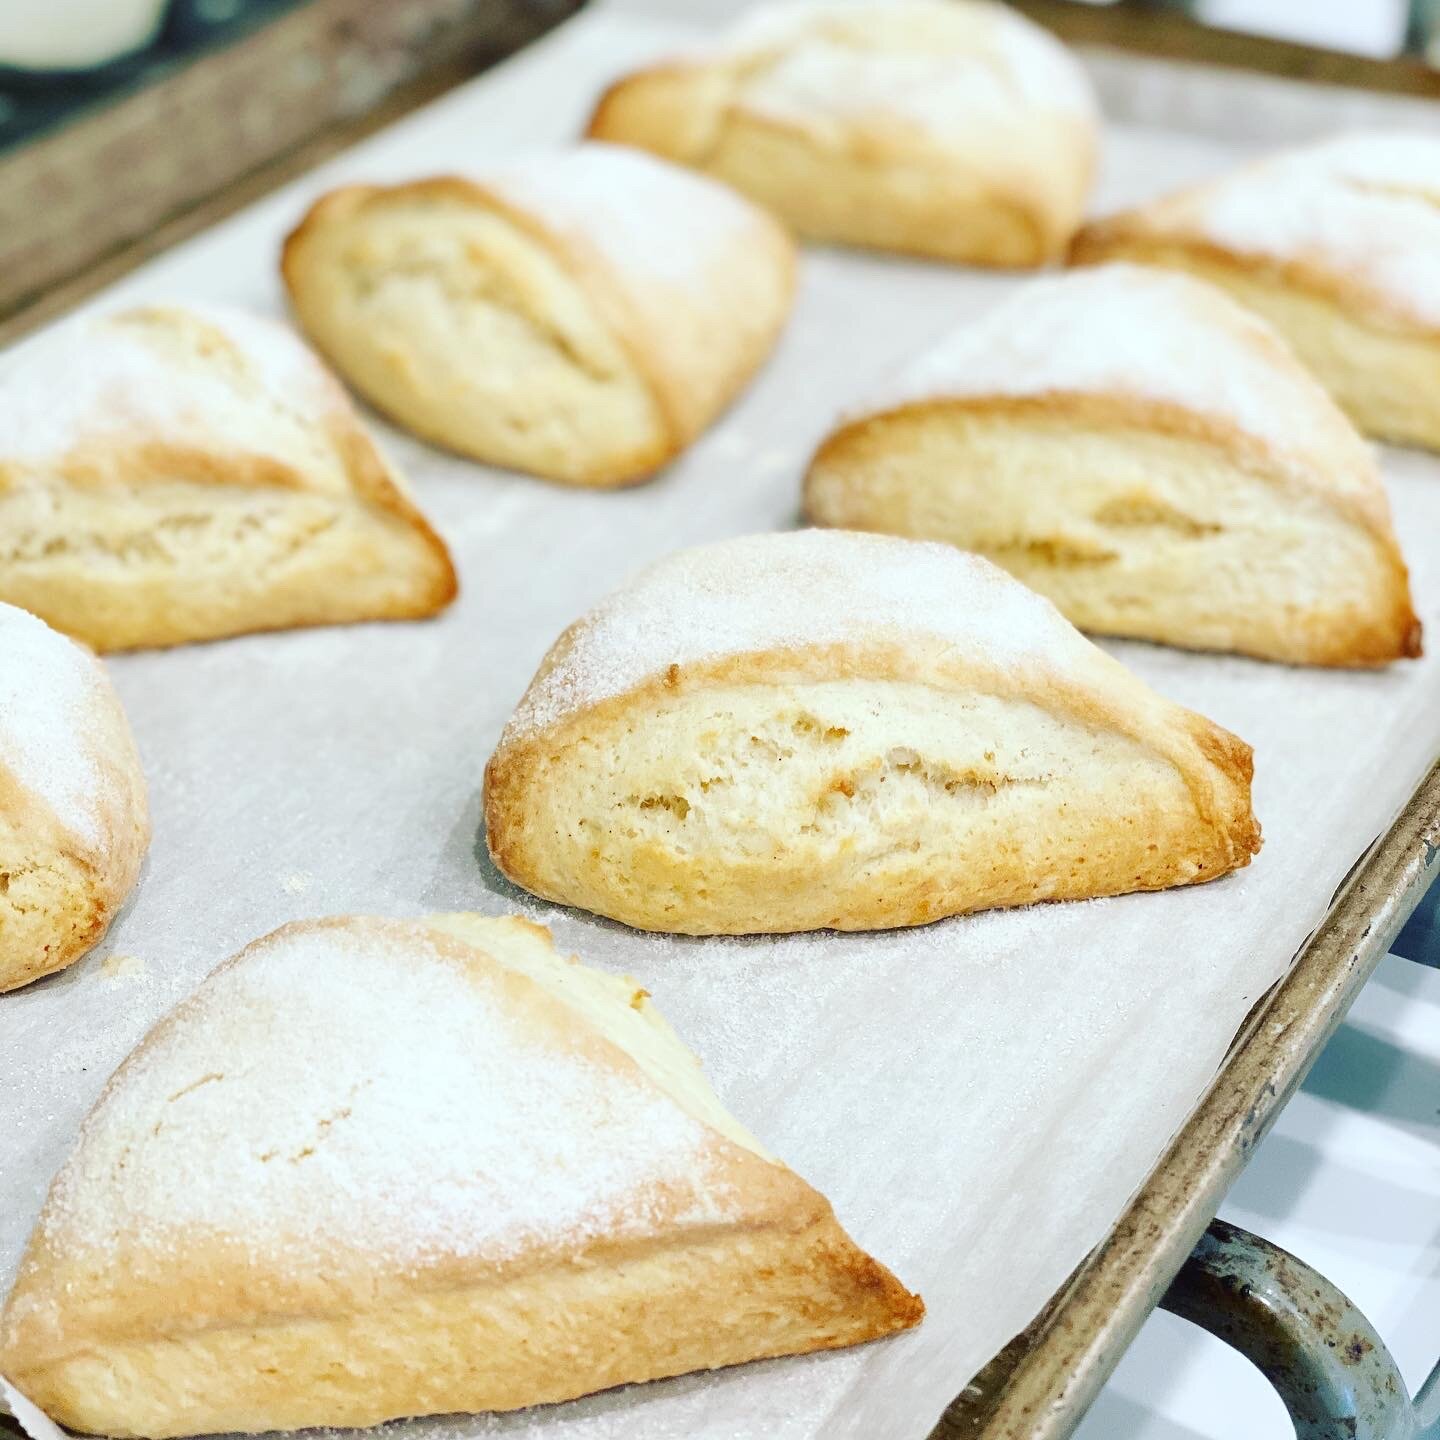
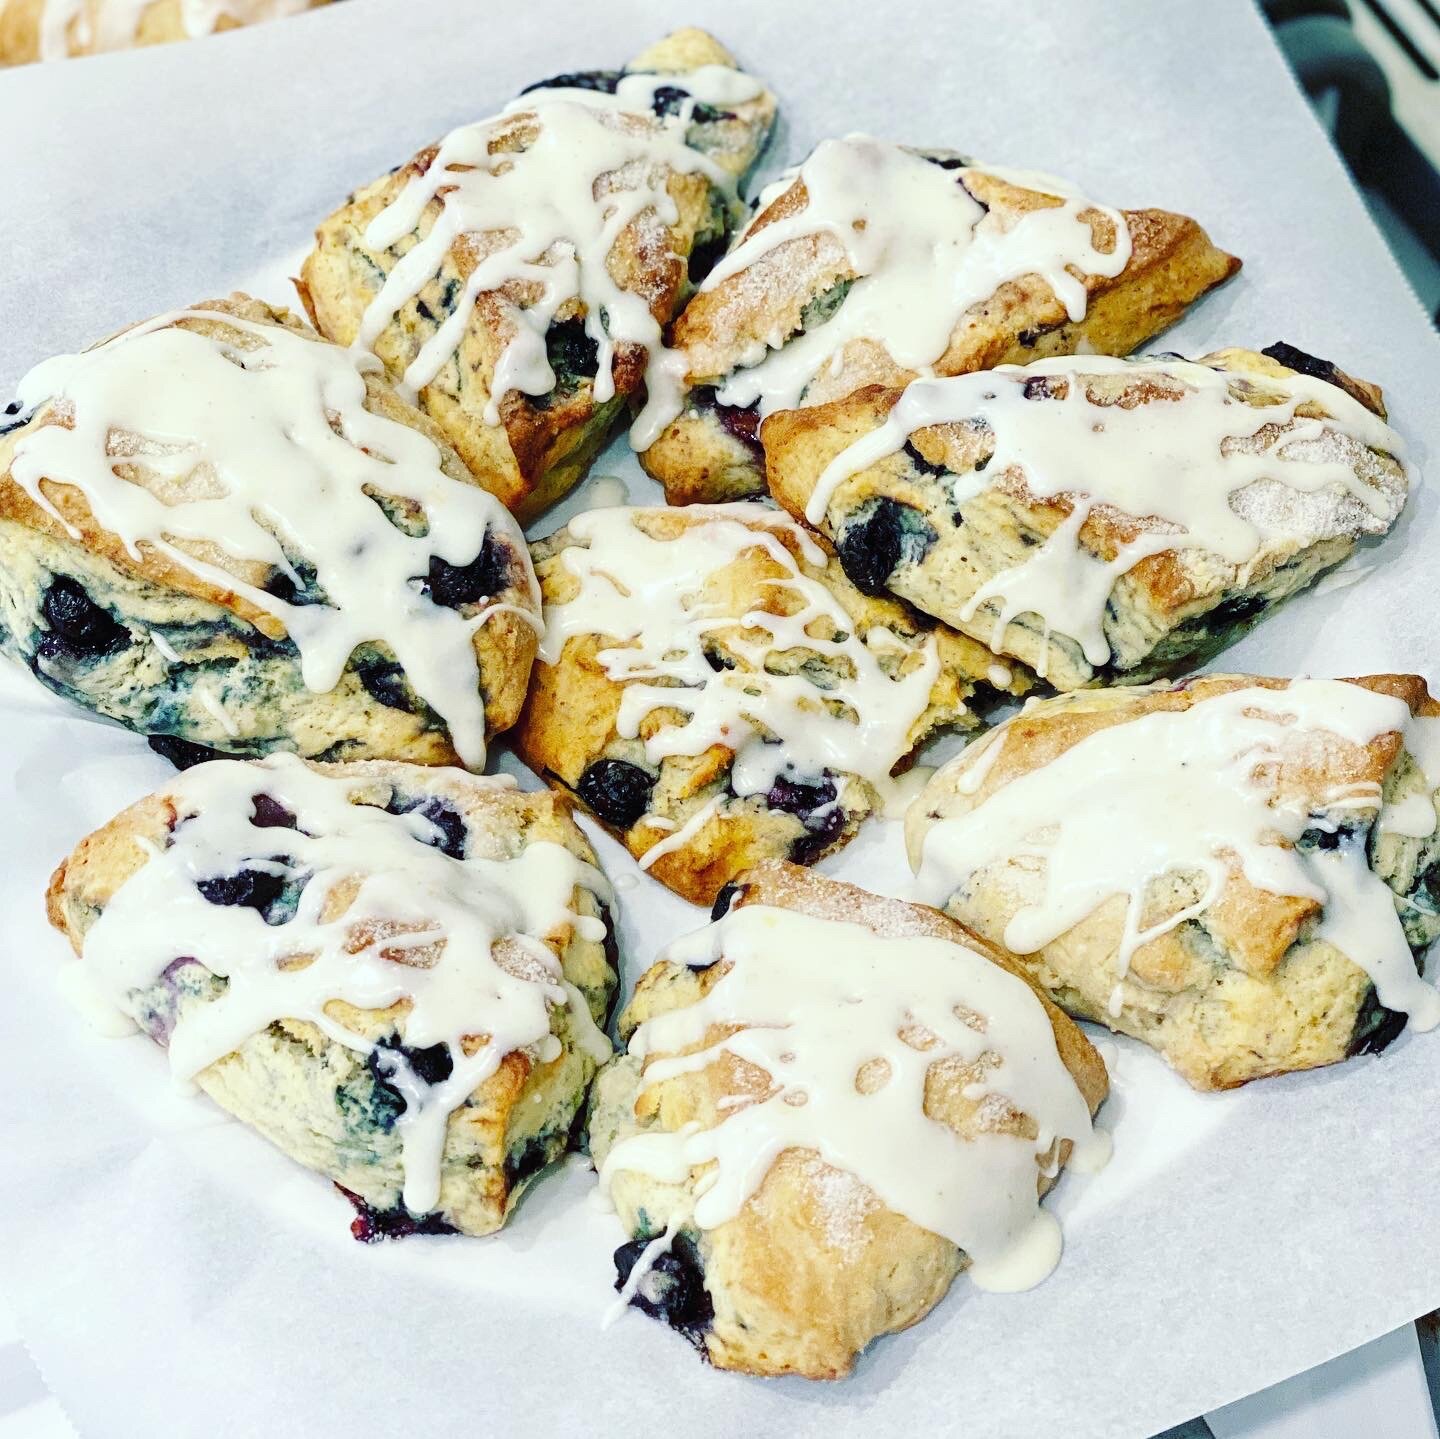
Family Favorite scone recipe
Light and flakey fresh baked scones can’t be beat. This recipe is versatile and works with lots of flavor combinations.
I love a recipe that is versatile and flexible and works in a lot of different versions. I have made many versions of this scone recipe for many years now and they turn out great every time. It’s a flexible recipe that can be cut in half or doubled, and made in a variety of flavors and sizes.
One of our favorite family christmas breakfast treats are these scones make with a cranberry orange flavor. Something about that combination of flavors just feels festive to me.
My husband loves blueberry scones and I feel like the kind you buy are too often dry and crumbly, but I think the buttermilk in these keeps them flakey and moist and they make the best blueberry scones I’ve ever had.
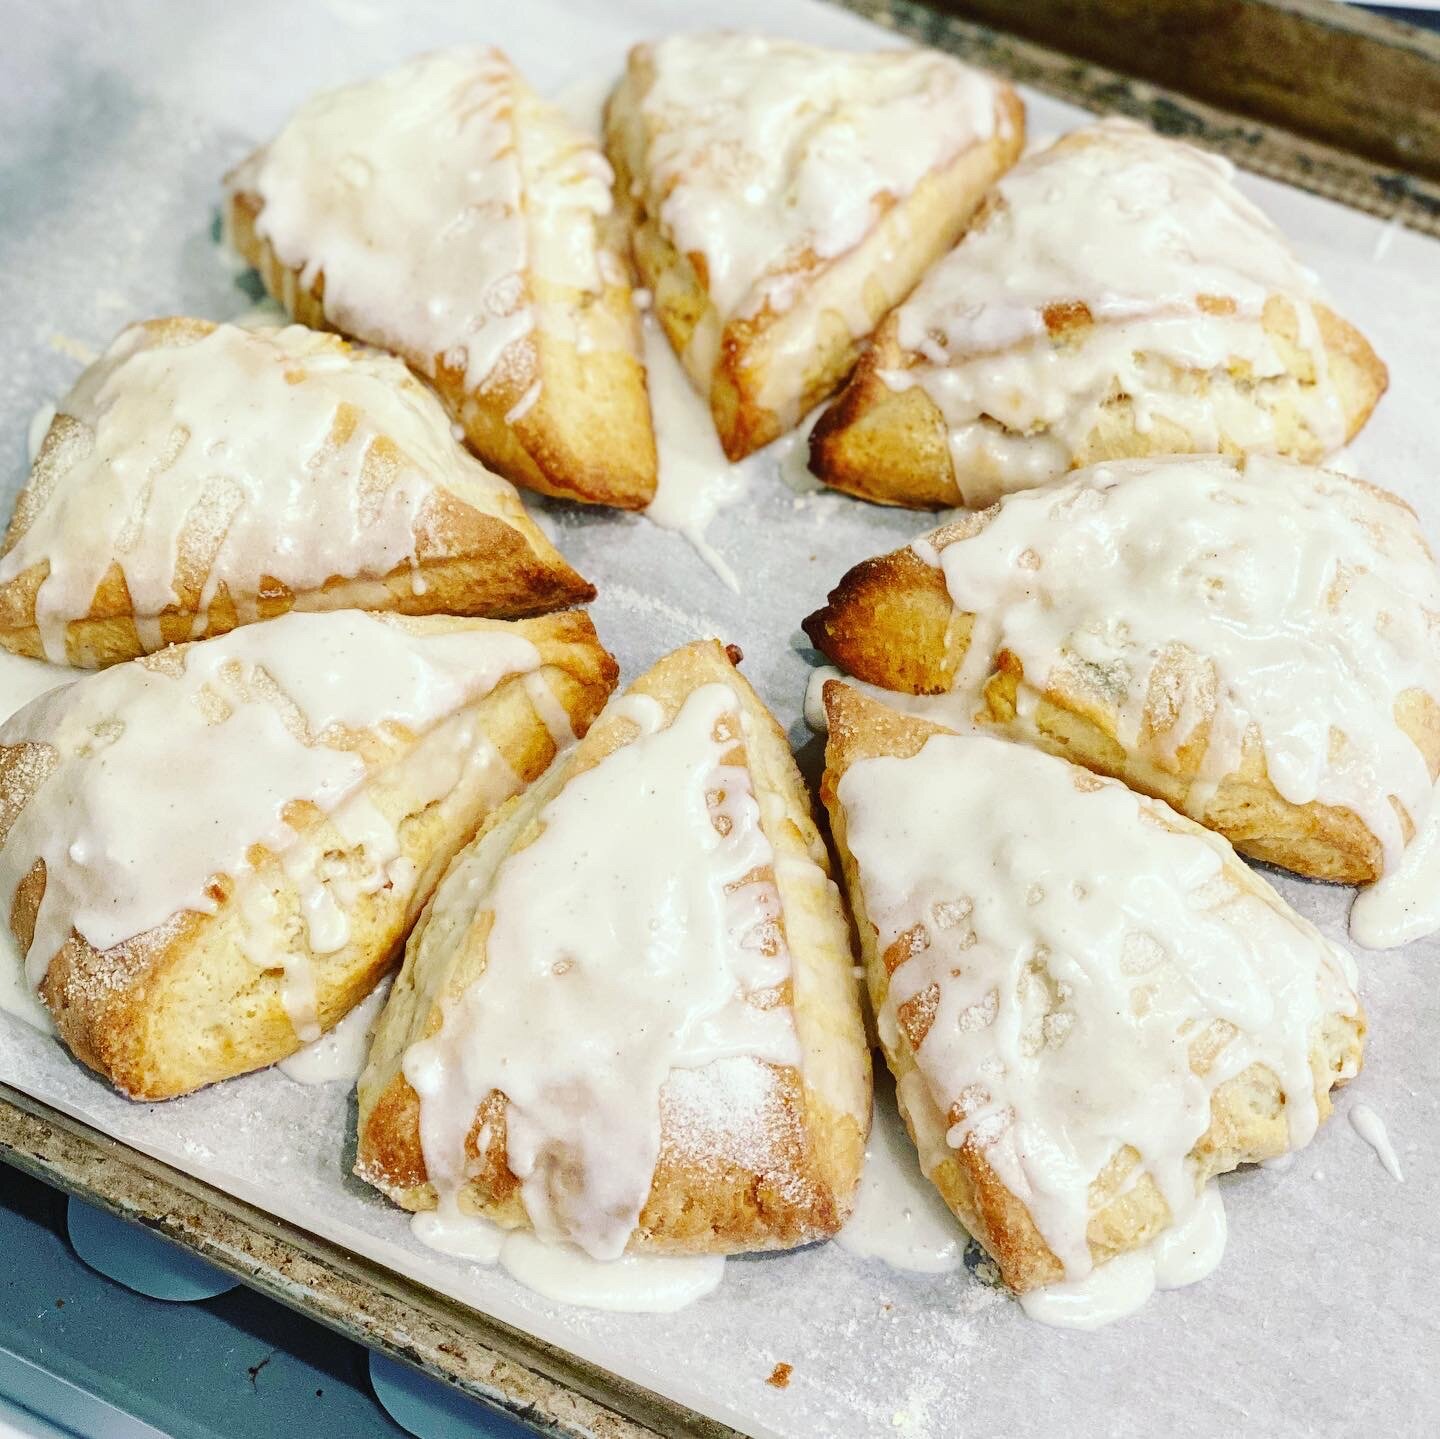
And most recently I have been using this recipe to make a copycat version of the Starbucks Petite Vanilla Scones - my kids absolutely love those but it’s too expensive to buy very often. Trader Joe’s also sells a bag of little vanilla scones which are pretty good too. But neither of those are as good as these.
Scroll on down for the basic recipe, and be sure to read the notes where I tell you how to make some of our favorite variations. But even the plain version is amazing fresh out of the oven with a little butter or jam.

Scones
Ingredients
Instructions
- Preheat oven to 425
- In a large bowl combine flour, sugar, baking powder, baking soda, and salt.
- Add cubed butter and cut in and combine until mixture resembles fine crumbs.
- If using dried fruits, nuts, chocolate chips, vanilla beans: add to crumb mixture before adding wet ingredients.
- Combine buttermilk, egg, and vanilla.
- Add wet mixture to dry mixture and combine until it comes together into dough. Turn out dough onto a floured surface and knead several times until well mixed.
- Divide dough into quarters and press each quarter into a 1⁄2 inch thick circle.
- Cut each circle into 6 wedges.
- Alternatively, you can roll the entire dough out to 1⁄2 inch thick and cut in squares, or use a round biscuit cutter to cut circles.
- Place on parchment lined baking sheets. Brush with buttermilk and sprinkle with a little sugar. Skip this step if you plan to add icing.
- Bake for 12 – 15 minutes or until lightly golden brown.
- Allow to cool and then drizzle with icing if desired.
- You can make this dough ahead and refrigerate or freeze until ready to bake.
Notes
Starbucks copycat petit vanilla scones:
- divide the dough into 8 rounds instead of four.
- Bake for 10-12 minutes.
- Top with vanilla bean icing after cooling
Vanilla Bean Icing:
- Combine powdered sugar and milk until smooth.
- Scrape vanilla beans in and mix well
Blueberry scones:
- It works best if you use frozen blueberries and mix them right at the end and then work fast to get your scones rolled out before the blueberries thaw.
Lemon scones:
- Add the zest of one lemon to the dough
- Replace a tablespoon of buttermilk with lemon juice
Lemon icing:
- replace one tablespoon of milk in icing recipe with lemon juice.
- add the zest of one lemon to the icing.
Orange Cranberry Scones (our holiday breakfast favorite)
- Add orange zest and about a cup of dried cranberries to the dough


Extra Creamy Scrambled Eggs
A simple secret for extra creamy scrambled eggs.
One of my favorite quick and easy tips for making amazing scrambled eggs every time: mayonnaise.
I said what I said. Add mayo. You know what mayo is made of right? It’s eggs and oil, with some seasoning, mixed into a creamy emulsion. So adding that to eggs makes them extra creamy and adds seasoning and flavor.
I usually do at least 6 - 12 eggs at a time because I’m always cooking for a crowd so I add a couple tablespoons of mayo. Experiment for yourself and decided how much you like.

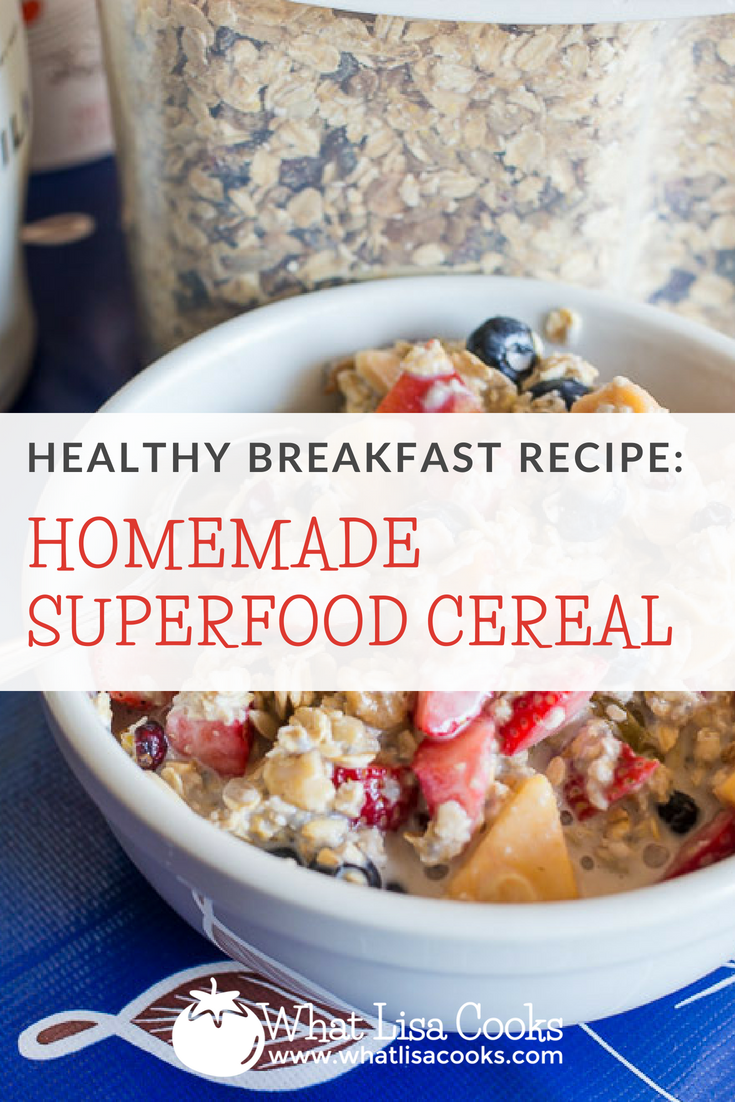
Homemade superfood breakfast cereal
Quick and easy recipe for a homemade superfood breakfast cereal to get your day off to an amazing start.
Do you need a boost of healthy energy in the morning?
A way to get your day going with a super healthy start? This is what I've been having for breakfast every day and I am loving it.
This is my quick and easy recipe for a homemade superfood breakfast cereal.

I was buying some pre-made superfood cereals, until I read the ingredients and realized it was all things I had in my pantry and I could throw it together myself for a LOT less than I was paying to buy it already made for me.
As with most of what I make and share - this "recipe" is more of a guideline. This will give you a basic framework for a healthy cereal to get your morning off to a great start.

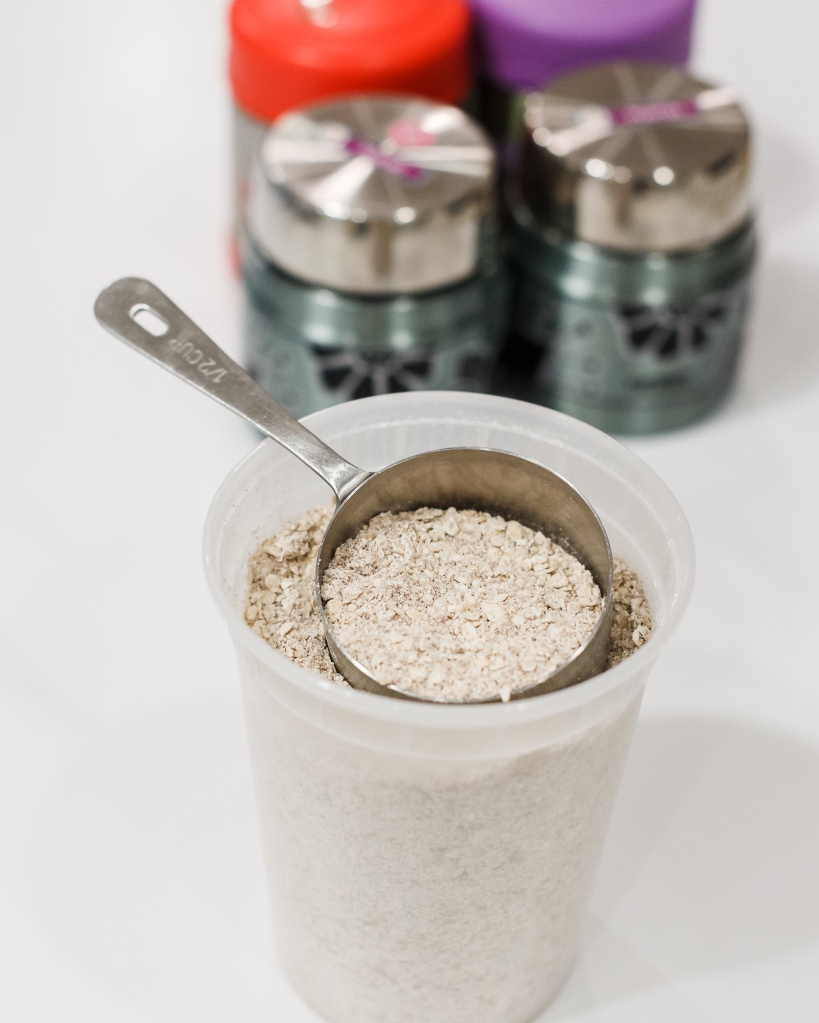
You are basically just combining rolled oats with a variety of nuts, seeds, and dried fruits.
For mine I try to shop at Trader Joe's - they have a great selection of nuts, seeds, and dried fruits, and they have a good rice on organic oats. You could also grab your ingredients from the bulk foods section of your grocery store or natural market.
Ingredients:
Rolled oats: NOT steel cut, and not quick cooking. Just old fashioned rolled oats. 1 regular size container - probably about a pound.
Nuts: I like a combination of sliced almonds and chopped walnuts. Use any kind you like, just make sure they are in bite sized pieces.
Seeds: Sunflower seeds, chia seeds, hemp seeds, flax seeds (or ground flax).
Dried fruits: raisins, blueberries, cherries...

A few notes about the ingredients:
Nuts: Don't buy salted ones. They are going to be way too salty for this kind of recipe. I personally prefer to buy roasted nuts, I find that I digest them better. But if you like raw then go for raw nuts. I like to buy the nuts that are already sliced or chopped. That makes it super easy to throw this together.
Seeds: I buy roasted unsalted sunflower seeds - again, my system handles the roasted ones better. But many folks prefer raw. In addition to the sunflower seeds, add whatever combination of other seeds you can get your hands on - chia, hemp, flax - there's no limit!
Fruits: Trader Joe's has a great bag of mixed dried fruit, so that's what I've been using. It's got raisins, cranberries, blueberries, and cherries - so it's everything I need and it's easy.
Feel free to add other stuff - ground flax is great, wheat germ if you're into that.

Quantities:
My personal preference is to have the mix be about half oats and half other stuff. Of the half "other stuff", I tend to go for about equal parts of fruit, nuts, and seeds - slightly more fruit & nuts vs. seeds.
The container I'm using is about 8 cups. So that breaks down to about:
4 cups rolled oats
1 1/2 cups dried fruits
1 1/2 cups chopped nuts
1 cup mixed seeds
Instructions:
Literally - dump it all in and mix together.
Store in an airtight container.
Serving:
My container comes with a 1 cup measuring scoop, so I use 1 cup as the serving. Add enough of your favorite milk to cover, and let sit for a few minutes to let the oats & fruit soften a bit. I use almond milk, but you can use any kind you like.
I top it with whatever fresh fruit I've got around - blueberries, strawberries, etc.

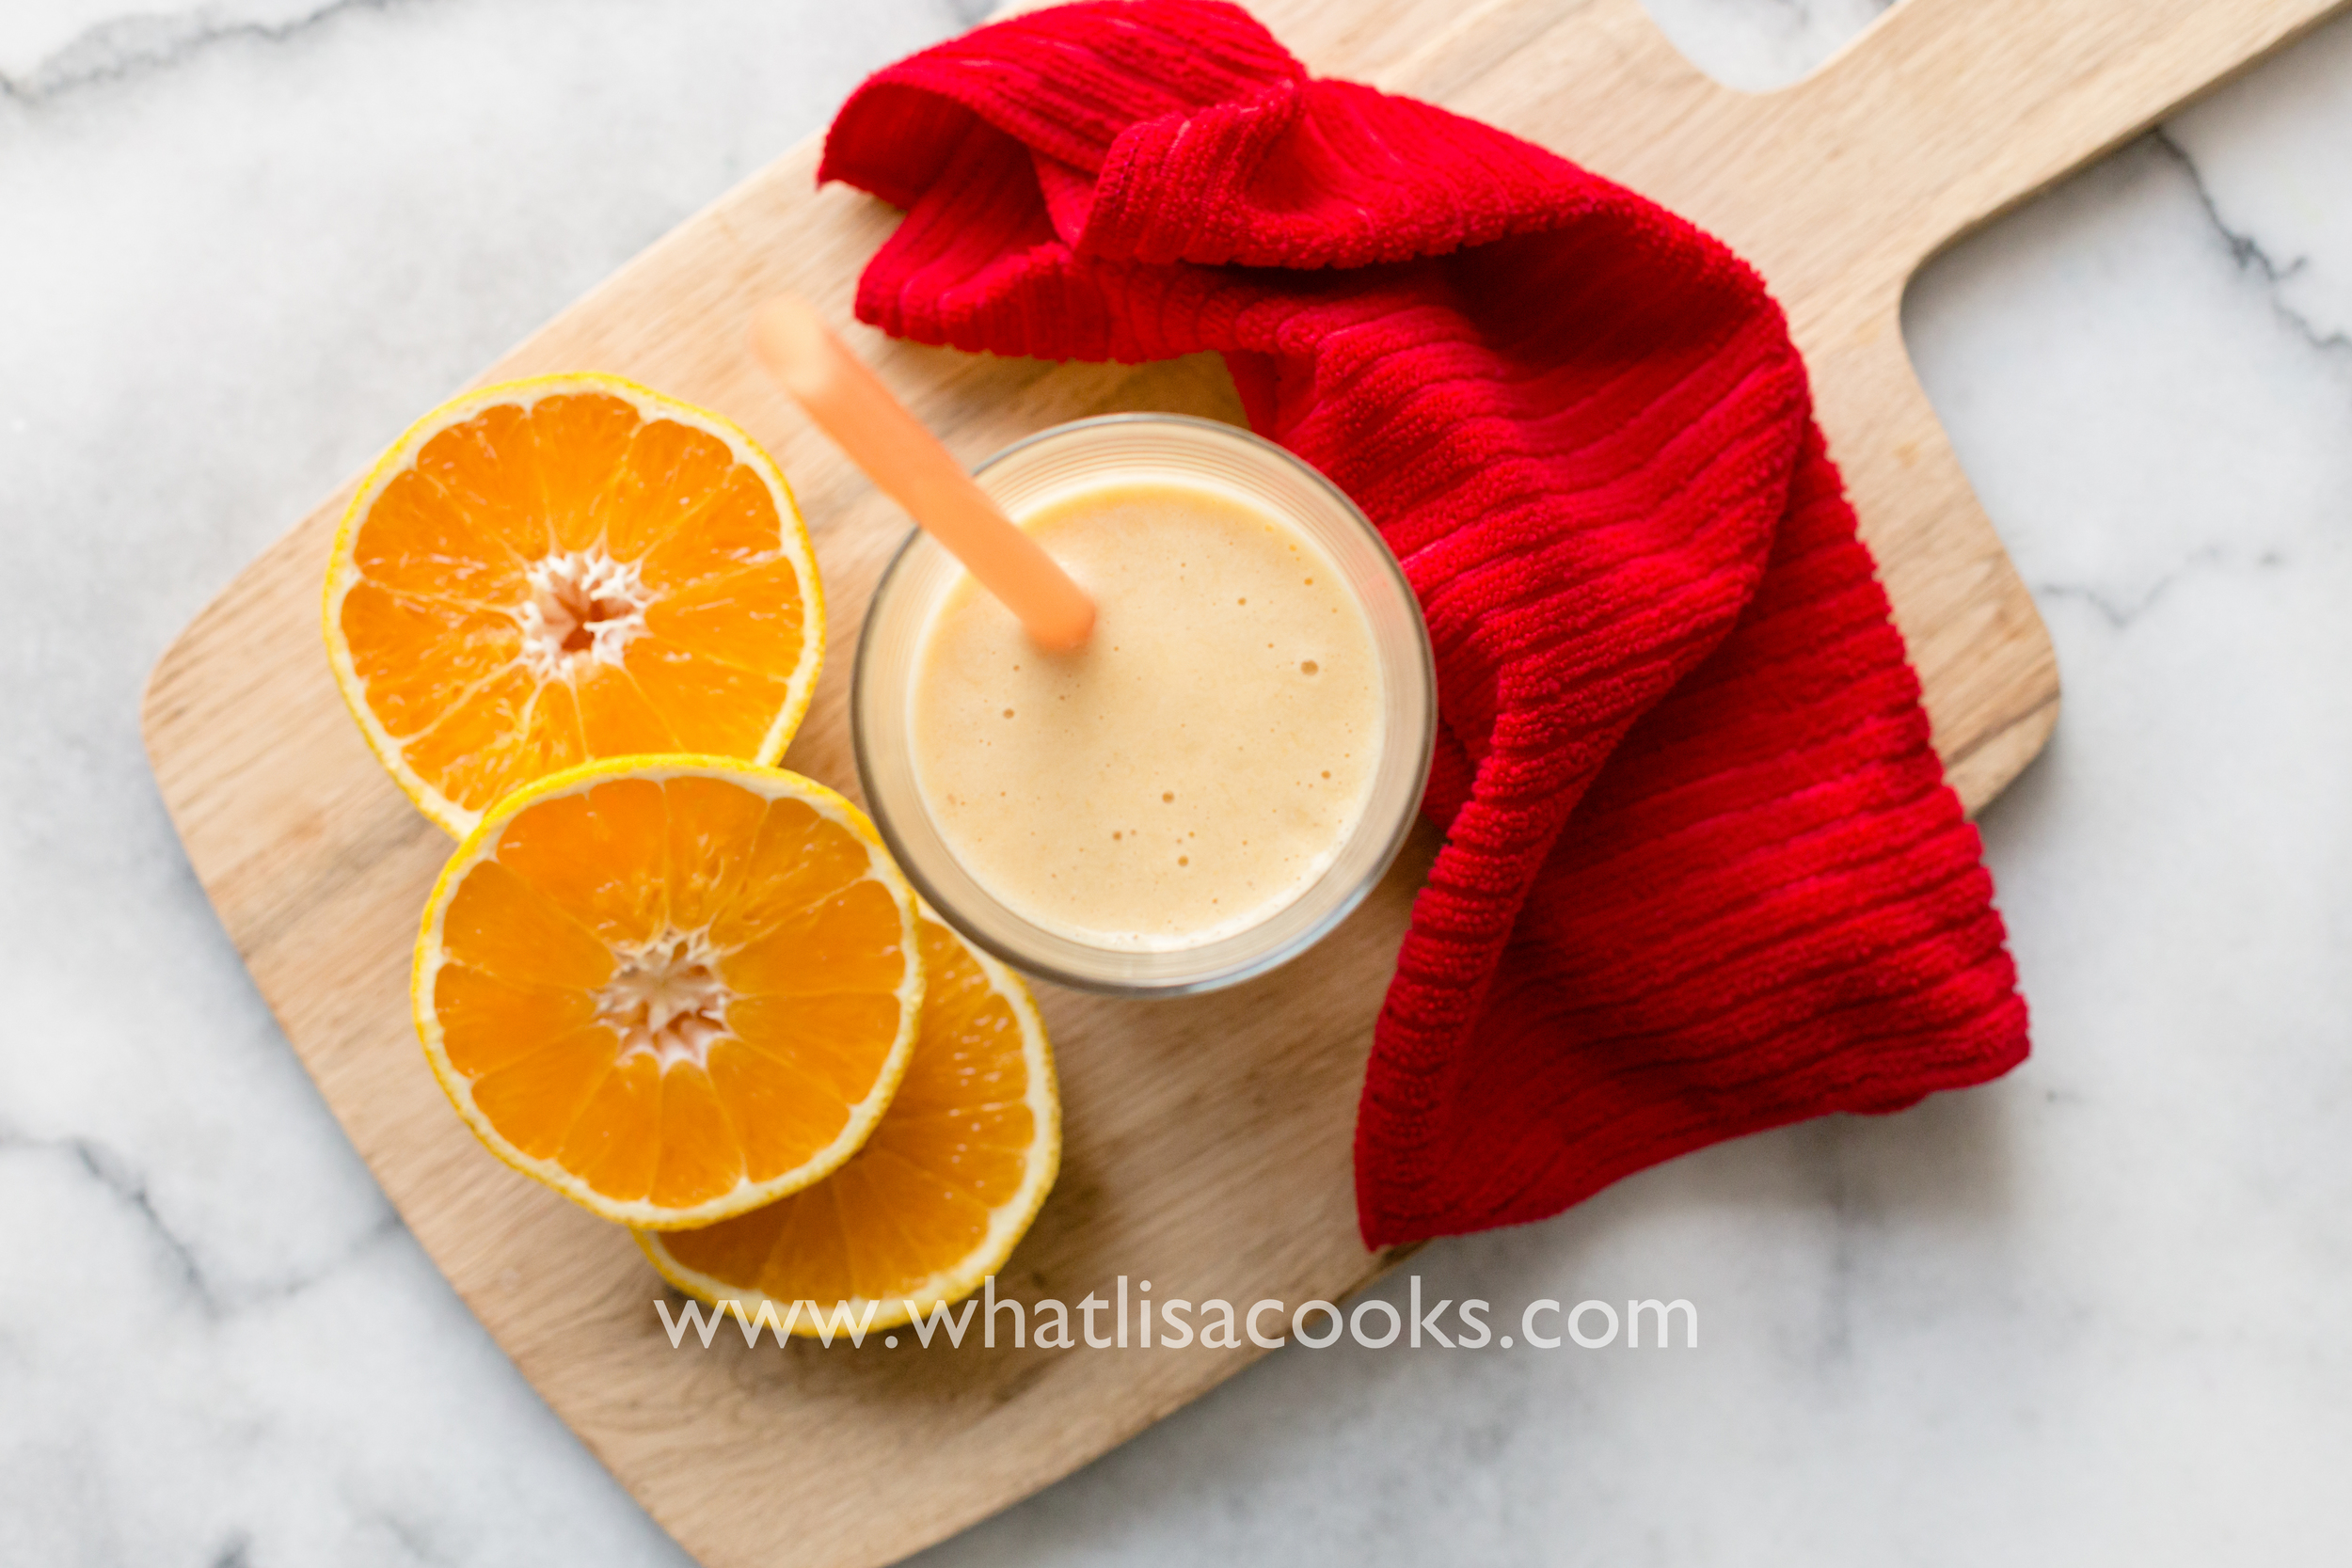
Orange Banana Protein Smoothie
A family favorite smoothie recipe.

This is my favorite smoothie, and my go-to when I want something quick and fresh. It's fast and easy, and I love knowing that it's got whole fruit and no added juice. I make this one for my kids a lot and they love it. And it reminds me of an old fashioned Orange Julius.
Because you are starting with whole oranges, you don't need to add any extra juice or other liquid to this. It's great because you get all the fiber and vitamins from the fruit, not just the juice. You can however add a splash of milk or cream (or almond milk) if you want it a little creamier.
I am making this for four kids, so this recipe makes four small servings, or two large glasses. You could cut this in half or thirds if you want a serving for one.
Ingredients:
3 whole oranges
2 frozen bananas
1/2 cup protein powder
1 Tablespoon honey
1 teaspoon vanilla
Directions:
Peel and quarter oranges. I cut off the ends, and then cut down the sides with a sharp knife. So I end up with a whole orange with no skin. Then I cut into quarters.
Put the oranges in the blender first, and then all the other ingredients, in high powered blender (I use my Vitamix). Start out pulsing slowly so the oranges release their juice. Once you have some liquid in the bottom, then you can turn the blender up to high to puree the whole thing.
You could use fresh bananas, I just like frozen bananas because it makes the smoothie cold. I buy extra bananas, let them get ripe, then peel and break into pieces and freeze. Then I always have bananas in the freezer for smoothies.
For protein powder I prefer a pure whey powder - with no added fillers or sweeteners. This is the brand I buy. It's just whey, nothing else. It has 15 grams of protein per 1/4 cup, so it really gives a nice protein boost in the morning.

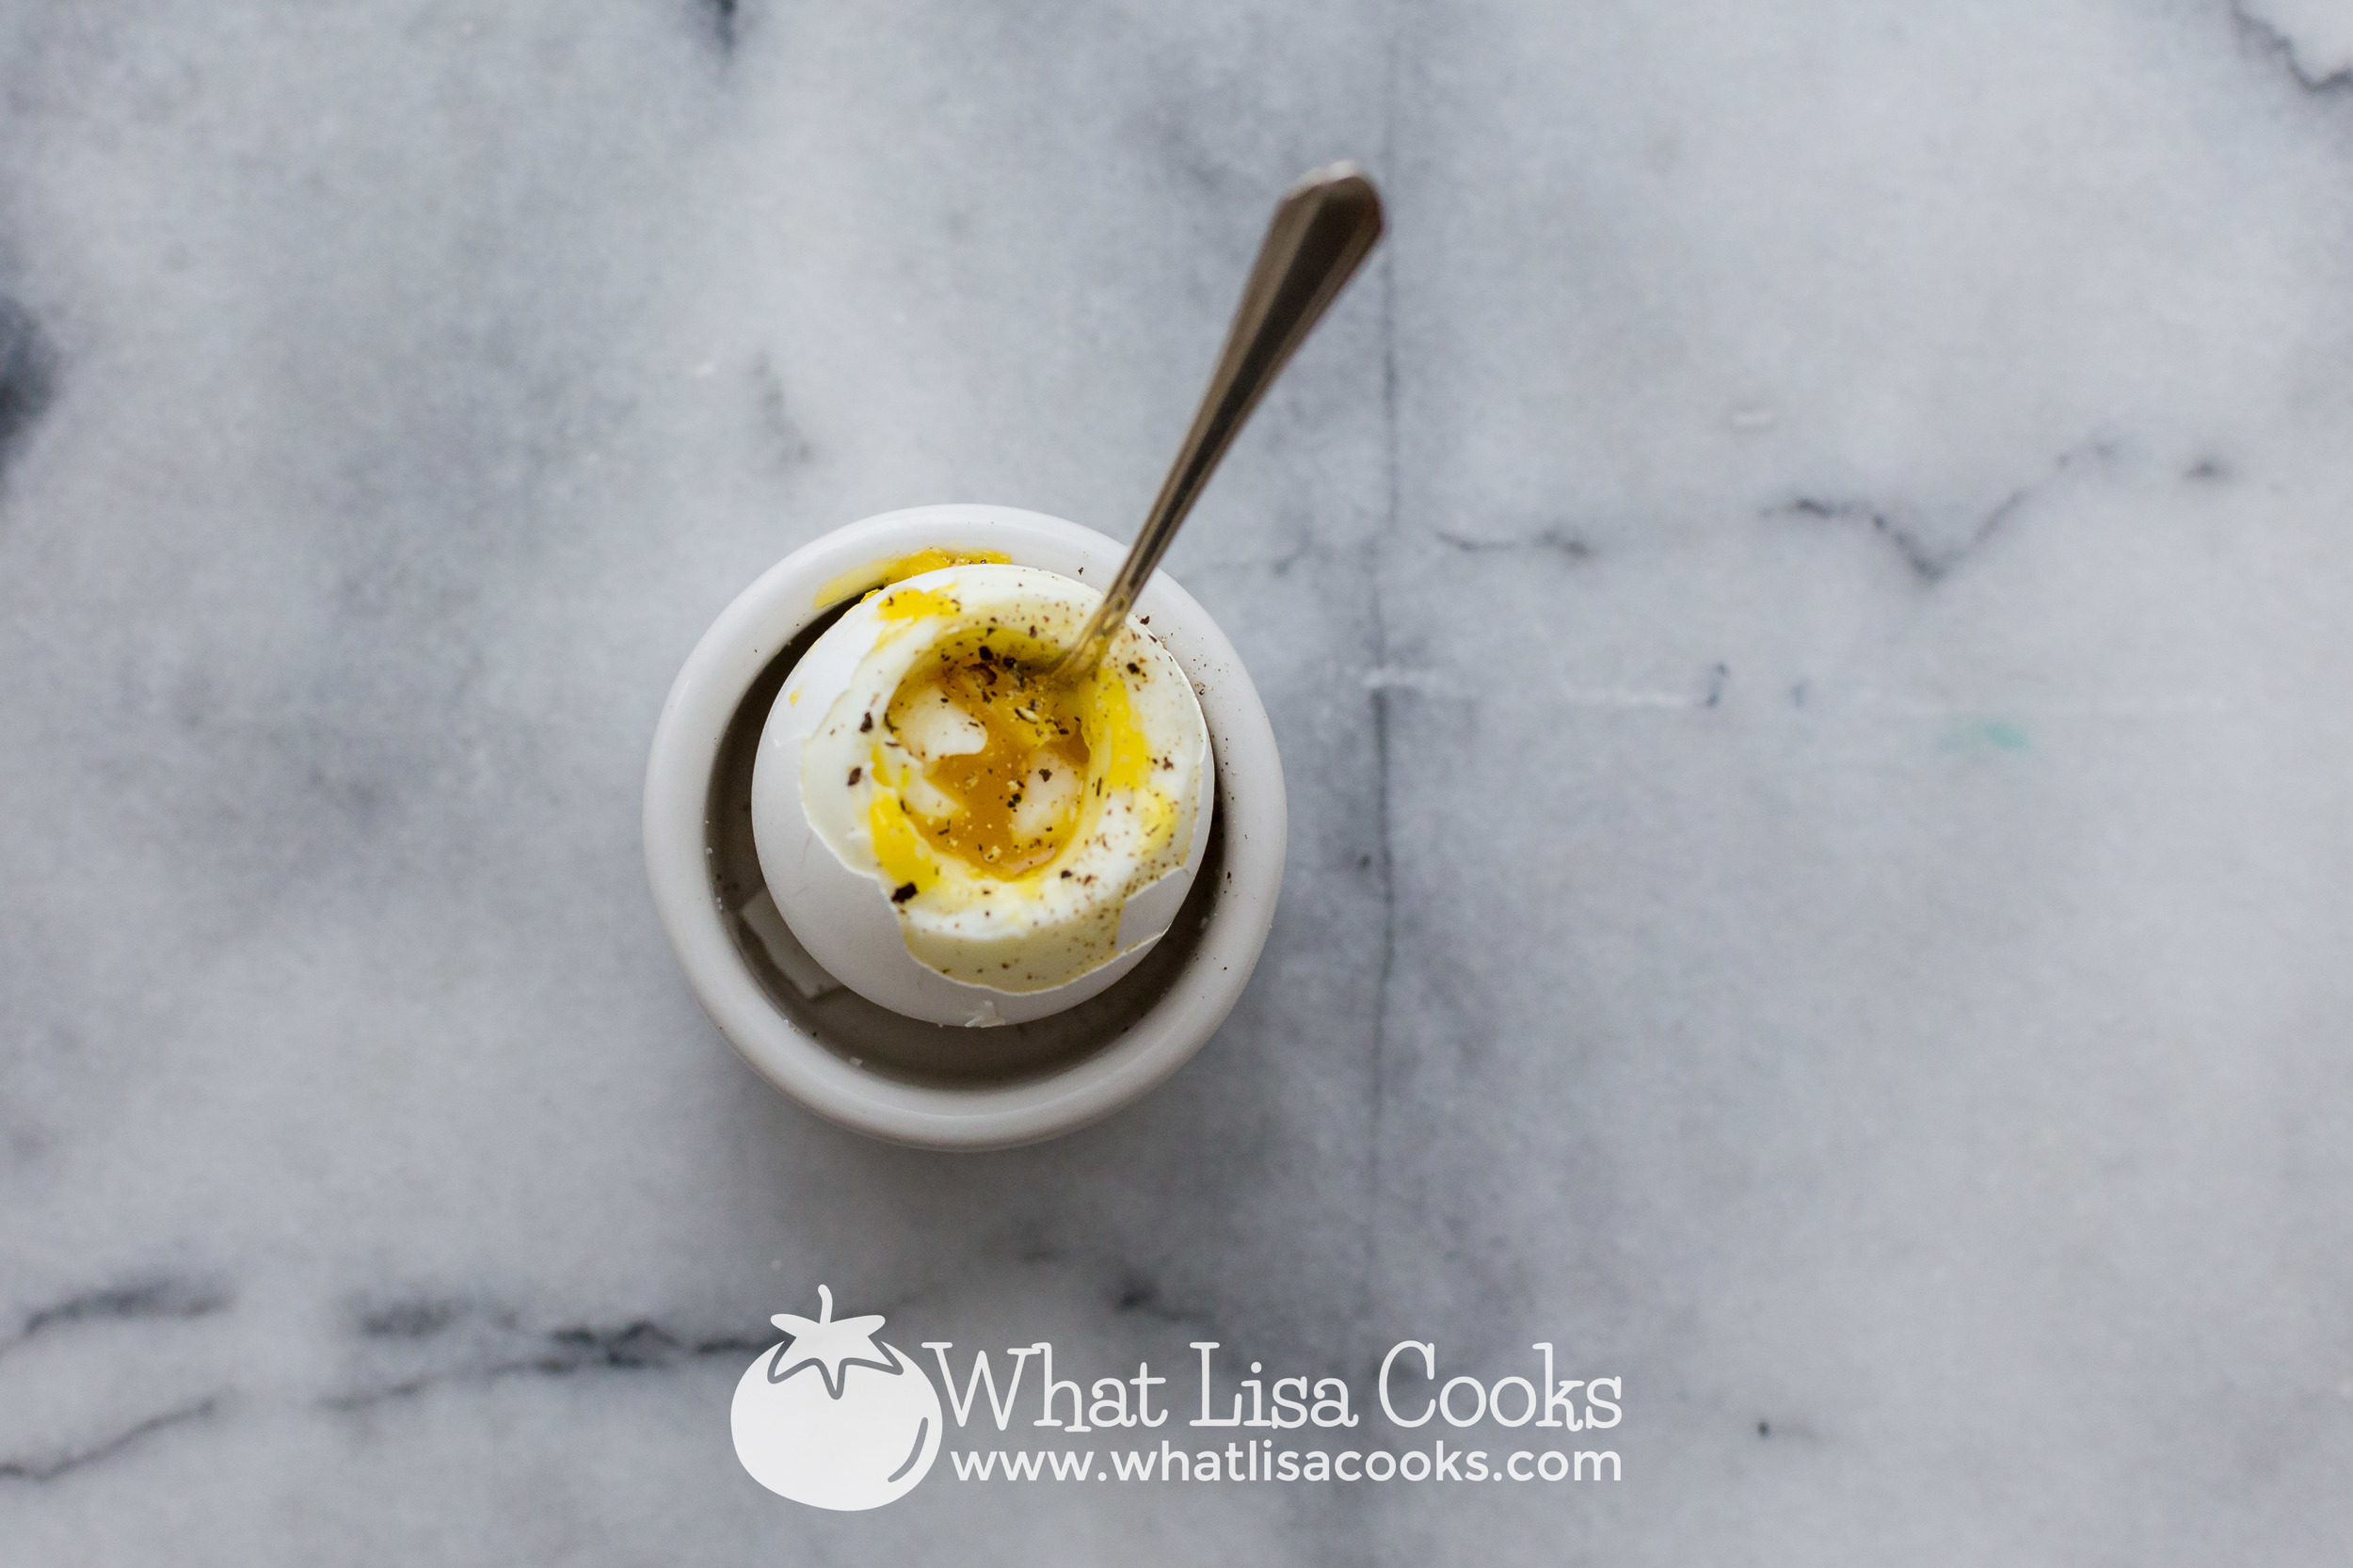
Pressure Cooker "Boiled" Eggs
The easiest way to make boiled eggs is to not boil them at all.
I've tried every trick out there for cooking easy to peel eggs. EVERY. TRICK. And I don't think there was a single one that worked consistently. Some methods would work one time, and then not the next time.


Then I discovered cooking eggs in my pressure cooker.
I'm telling you - perfect eggs every time, and the shells practically fall off.
If you have a pressure cooker and haven't hard cooked eggs in it yet, you must try. And if you like hard or soft boiled eggs but you don't have a pressure cooker - you must get one!
If you don't yet have an electric pressure cooker - let me just take a moment and tell you about mine. Don't be scared - they are not the dangerous things they used to be. They are electric and easy to program and super safe.
I have two! The first one I've had for several years and it is my favorite - is the Cuisinart Pressure cooker. It's a workhorse. The second one I had to try because everyone was raving about it is the Instant Pot. They are both great, and they both have their advantages. The Instant Pot is a multi cooker - it can be a slow cooker and a pressure cooker and a rice cooker and a yogurt maker, and I guess it does even more than that because they call it a 7-in-1 cooker. If you really think that you will use all those other features, then it is a great choice. But as for just pressuring cooking, I like the Cuisinart best. It has more options for adjusting your pressure cooking settings, and more options for timing, simmering, and sauteeing your ingredients before you start the cooking cycle. Those things are also possible with the Instant Pot, but I just find the Cuisinart to be more intuitive and easier to program and use. Also, it's less expensive. Either way though, you can't go wrong.
Anyway, back to the eggs. Here are the instructions.
Pressure Cooker Eggs:
Place a rack or trivet in the bottom of your cooker pot
Add about a cup of water - I like to use hot water just to get it going faster. You want the water to be under the rack, not touching the eggs. (be sure to read the directions on your cooker for the minimum amount of liquid you can use - I think it's about a cup for most.)
Carefully place eggs on the rack. A lot of recipes you read for this have you putting them in separate little cups or making little foil nests for them. I have never found this to be necessary and it just takes more time. Yes, occasionally one or two will crack, but I've found that this happens regardless of whether you "nest" them, so I really don't see the point. You can cook just one or two at a time if you prefer to eat them warm (best for soft cooked eggs), or I can fit about 10 at a time in my cooker without crowding them too much.
Close your cooker and set it to low pressure.
Cook according to the times below.
When your time is up - use the quick release method and get the eggs in an ice bath to quickly stop the cooking. I sometimes just dump a bunch of ice and cold water right in the pressure cooker pot on top of the eggs. This is quicker than lifting them out one at a time.
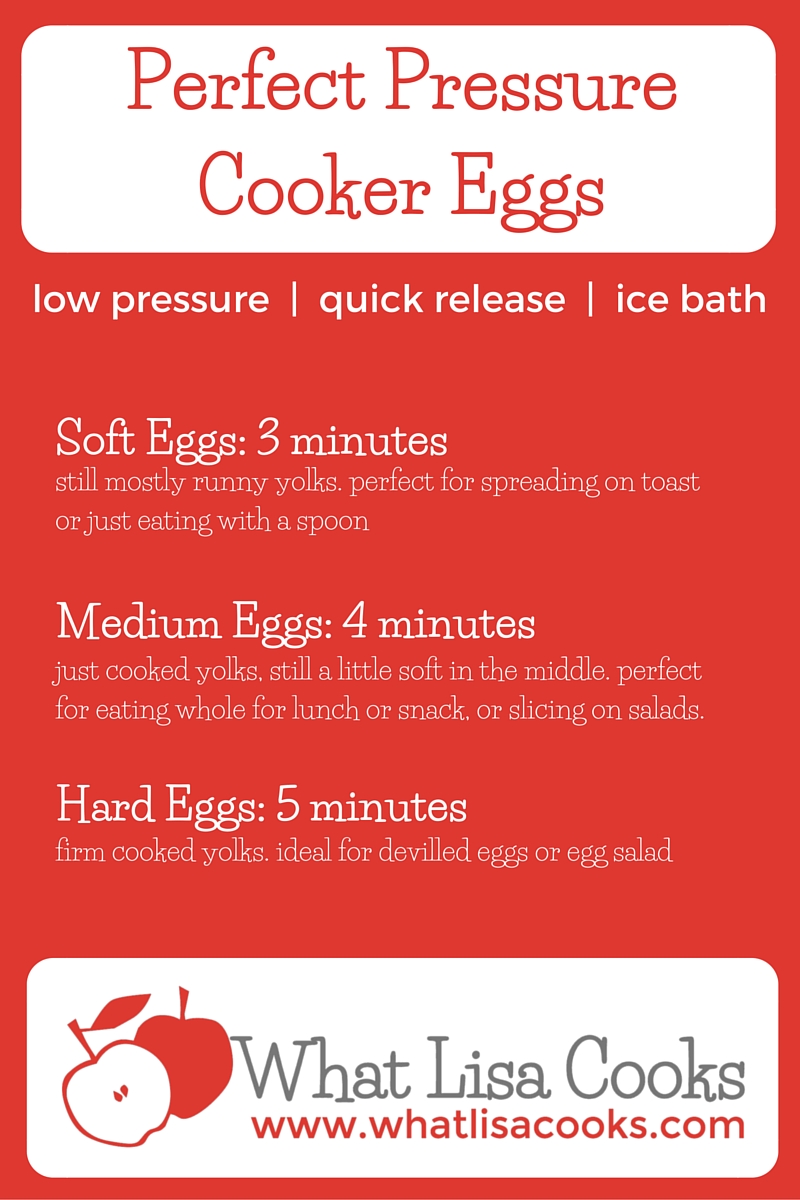
Cook times for pressure cooker eggs:
Soft Cooked: 3 minutes on low pressure, quick release, ice bath. These will have still slightly runny yolks. I LOVE these for breakfast - either mashed up on toast or just lop of the top of the shell and eat them with a spoon.
Medium Cooked: 4 minutes for on low pressure ,quick release, ice bath. These will have just solidified yolks, maybe sometimes with a small dot of wet still in the very center. This is my favorite if I'm making eggs to peel and eat whole for lunch or snack. I personally love to dip them in salt. I think this is also perfect for slicing on a salad.
Hard Cooked: 5 minutes on low pressure, quick release, ice bath. These will have fully solid yolks. This is best for making deviled eggs or egg salad.
But seeing is believing! You have to see how easy this is, so I made video. If you don't want to watch the whole cooking process, just skip forward to about the 4 minute mark, to see how they peel so easily that I can do it with one hand!
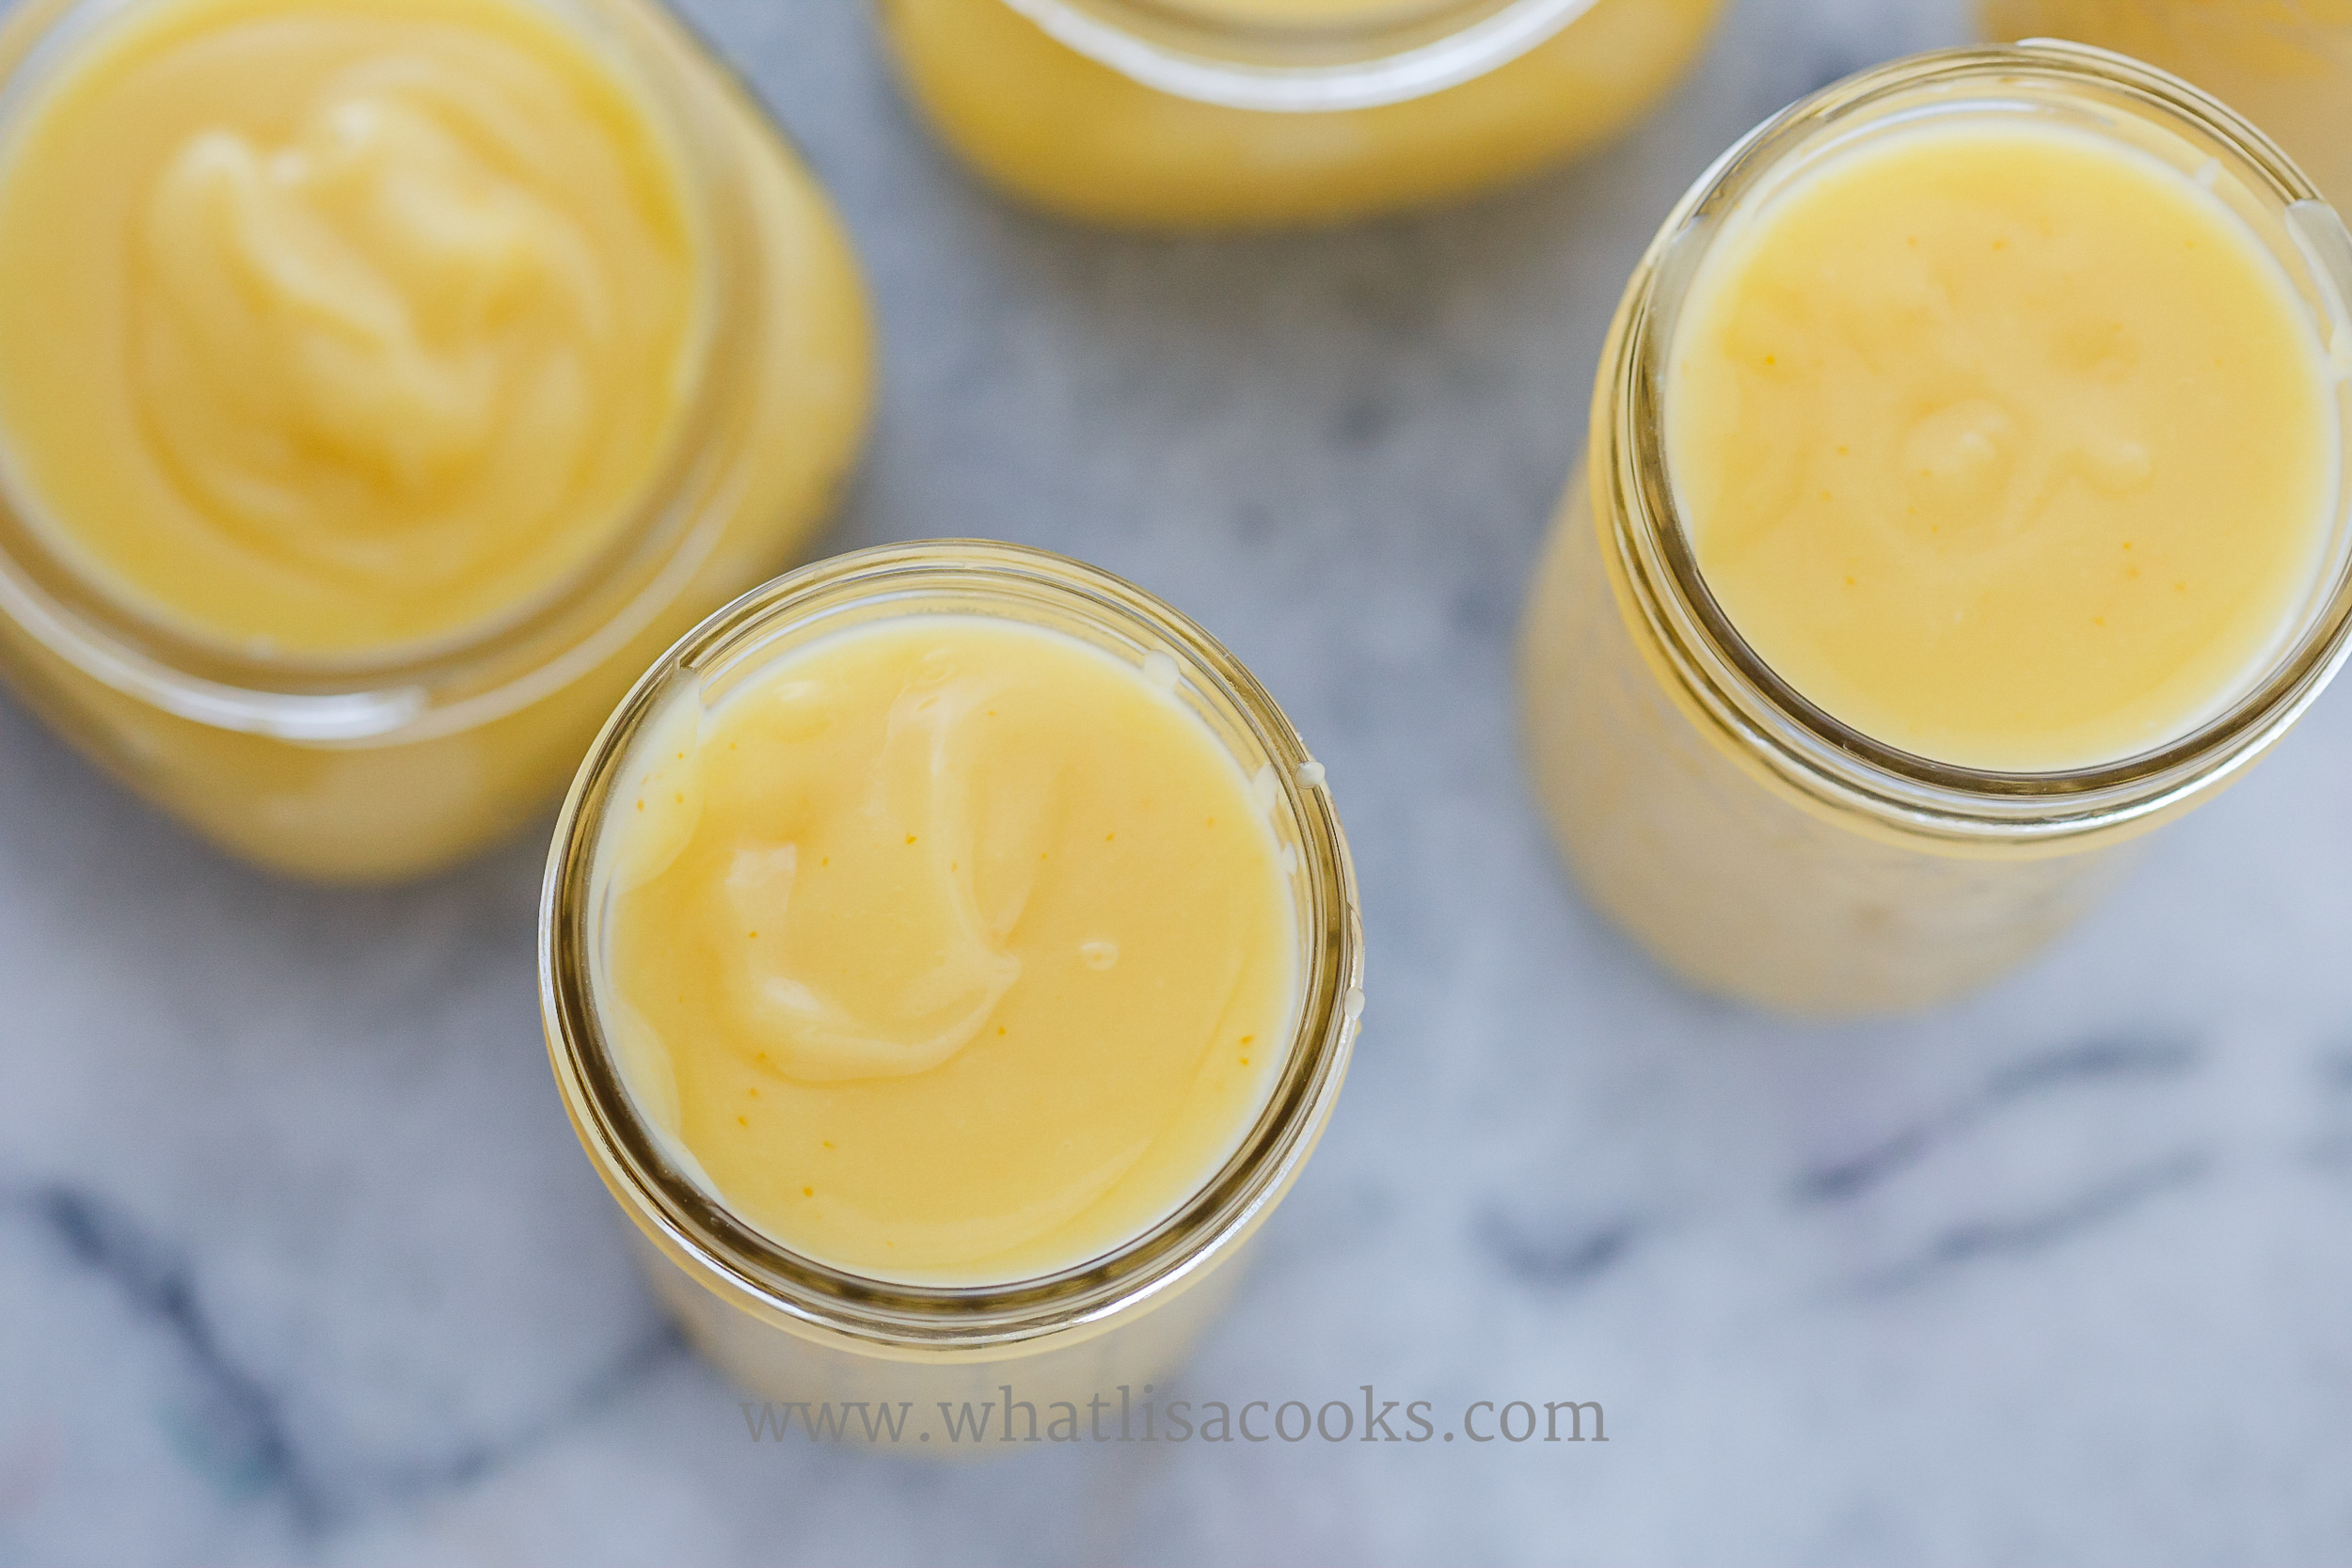
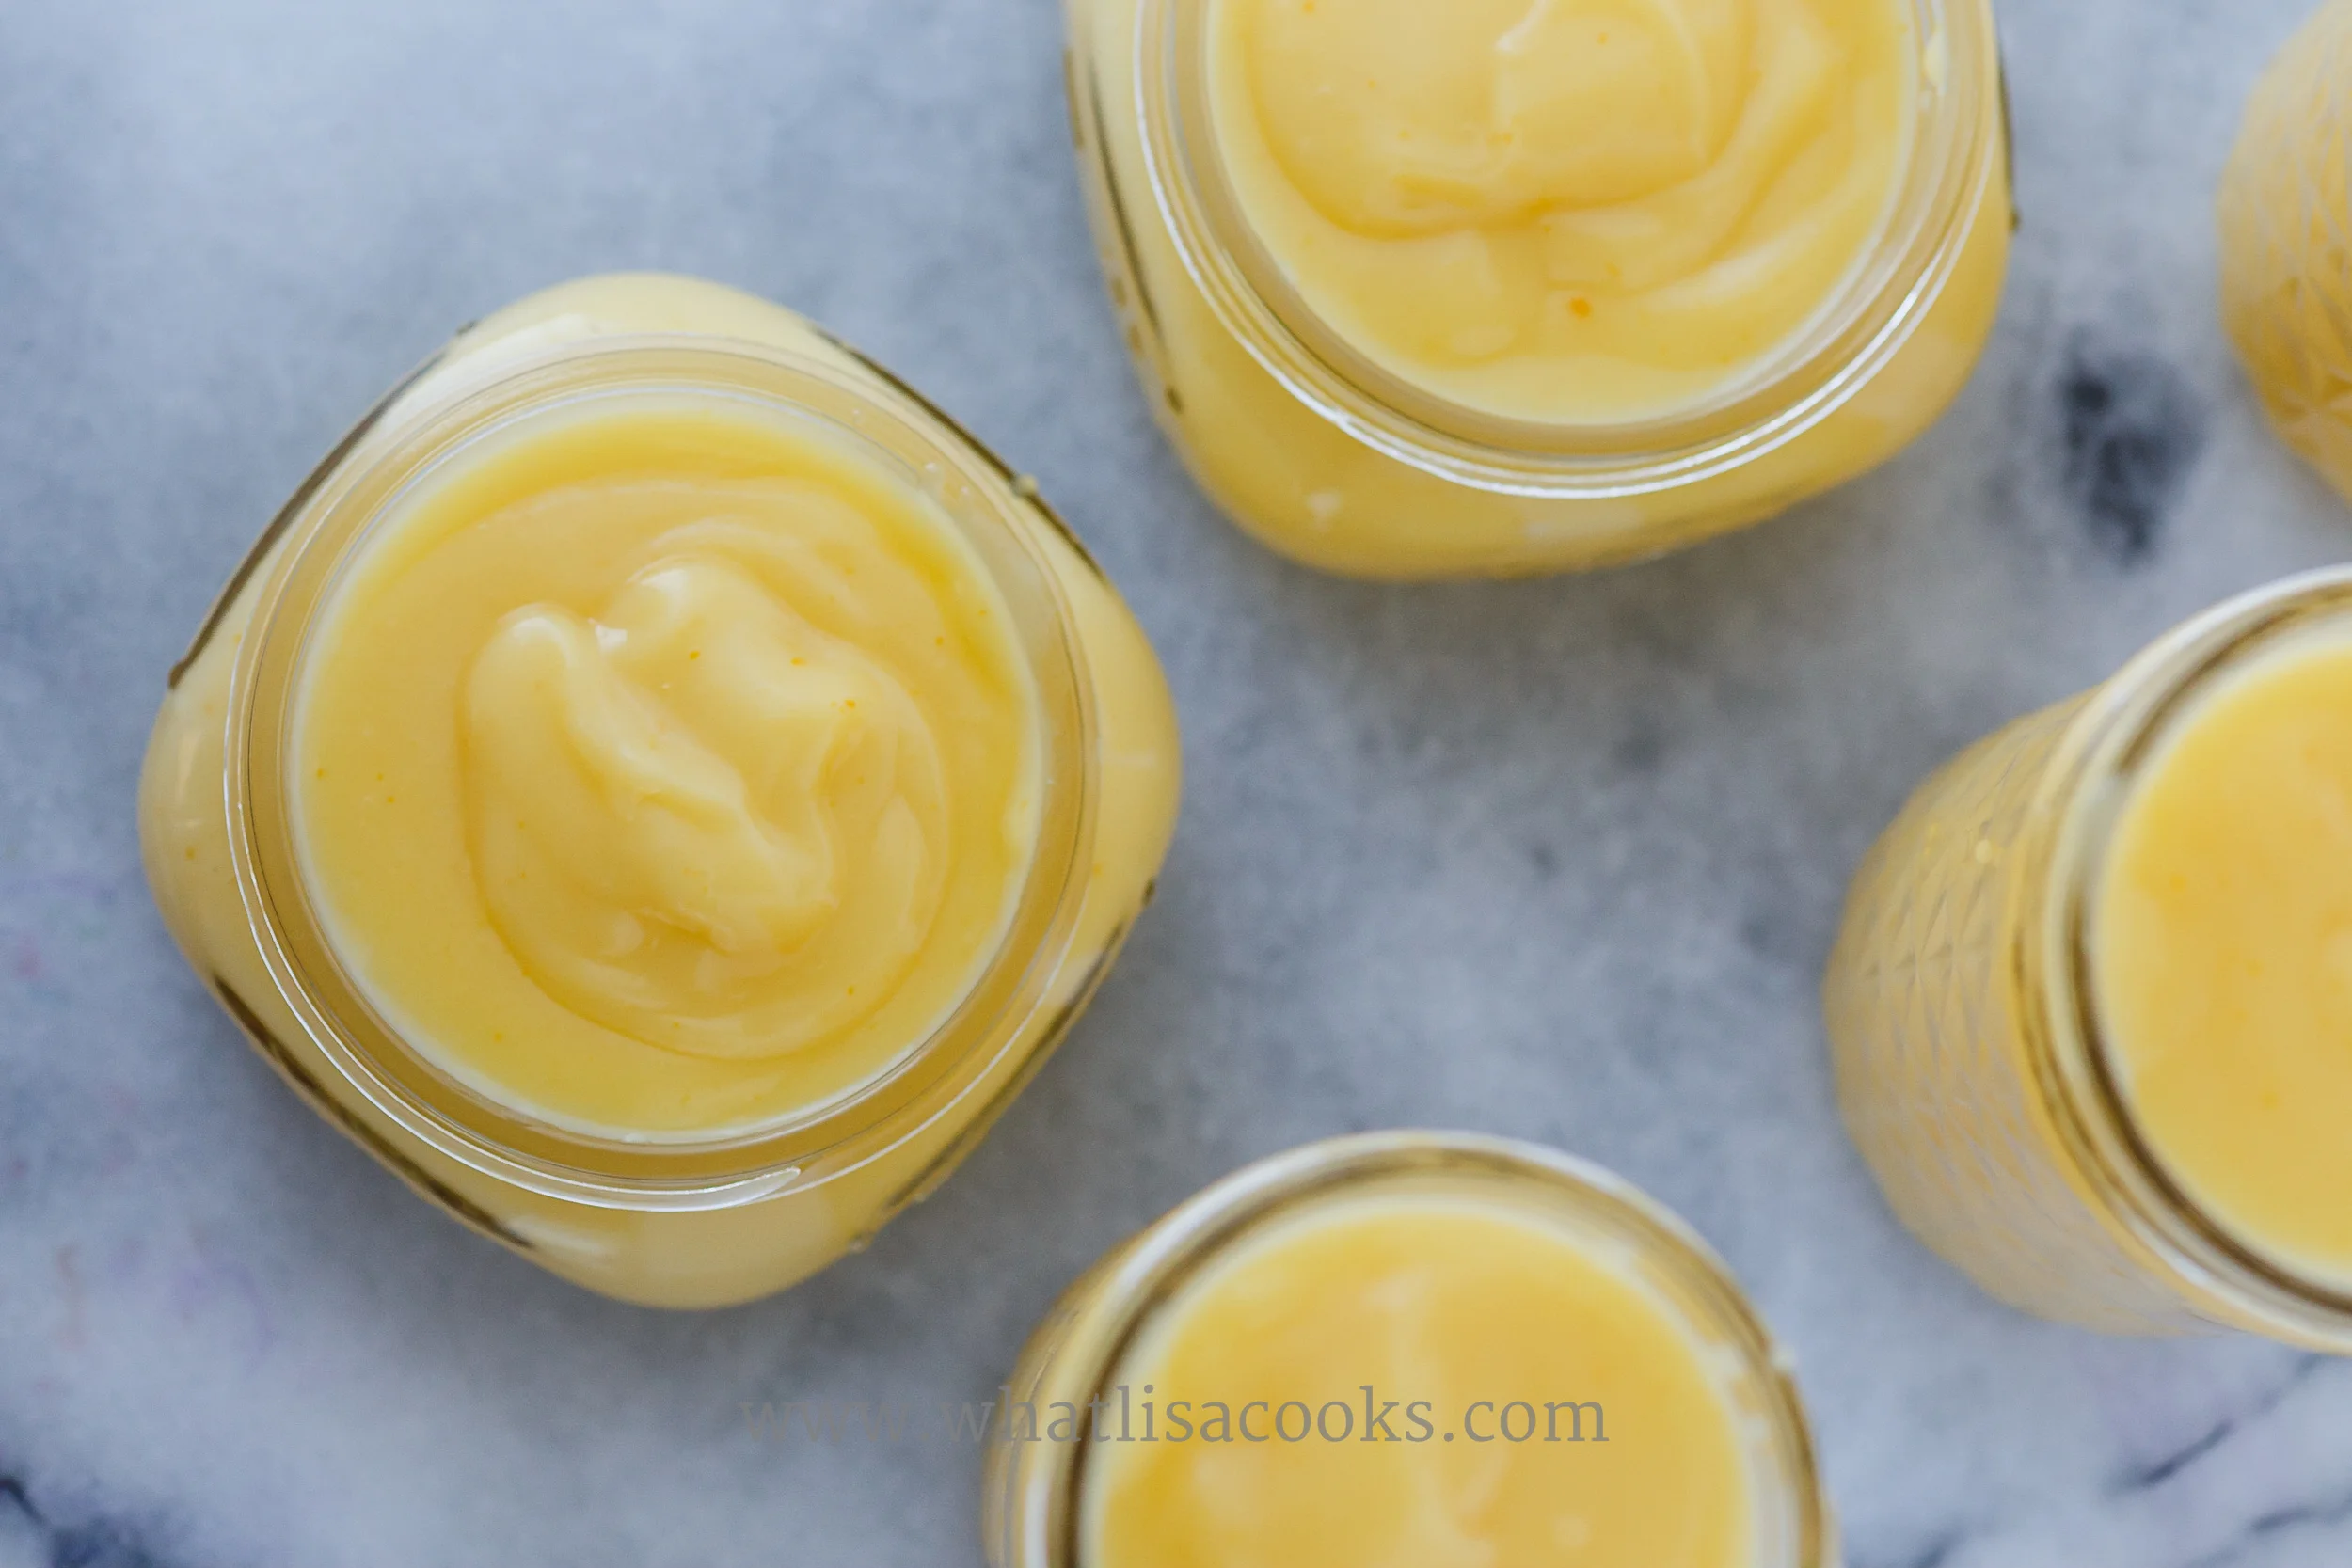
Lemon Curd
An easy recipe for a homemade lemon curd for a decadent treat your family will love.
I absolutely love lemon curd, it tastes like such a decadent treat. And this homemade lemon curd recipe is so easy you can enjoy this delicious treat any time you want. It’s lovely any time, but it’s especially nice for any kind of special occasion breakfast, and it makes a really lovely little gift for neighbors and friends.
We've been buying this amazing locally made Greek yogurt. It's a total treat for us because it is EXPENSIVE. We're talking $12 for a quart of yogurt. And you know my kids can polish that off in one sitting! I guess if I put it in perspective, $12 for yogurt is certainly cheaper and healthier than taking them out for breakfast. Or maybe I should compare it to going out for ice cream - because this stuff is so decadent that it's more like a desert. Only, yogurt! Protein! So it's better than taking them out for ice cream. Still, expensive for yogurt. We've tried every flavor and our very favorite is the lemon curd flavor.
Since my kids keep asking for it, rather than break the bank buying more and more and more, I figured I'd better try to make my own. It's honey sweetened, creamy Greek yogurt, with lemon curd folded in. I can do that. I make yogurt all the time, so that part is no big deal. Then it just comes down to making lemon curd.
I asked for suggestions, and I searched around a bit, and the recipe I came up with is a combination of a few things. Ingredients and quantities mostly influenced by a recipe that a reader shared with me, some of the technique borrowed from an Ina Garten recipe, and some just made up because it seemed right to me. That's how I cook.
This is a big recipe. It makes about 4 pints - the jars you see here plus a little more (I spilled a little). You could certainly cut it in half if you don't think you'll use this up. But my philosophy when you're making yummy things that take a bit of work, is that you might as well make more and share. It's delicious and decadent and such a special thing to share. So make a few jars and give one or two away, people will love you.
Easy Homemade Lemon Curd
Ingredients:

12 eggs
2 cups lemon juice
Peels from about 6 lemons (about 1/4 cup)
3 cups sugar
1 cup (2 sticks) unsalted butter
1 teaspoon vanilla
pinch of salt
Directions:
Using a carrot peeler, remove the zest of the lemons, being careful to avoid the white pith.
Put the zest in a high powered blender (or food processor fitted with the steel blade). Add the sugar and pulse until the zest is very finely minced into the sugar.
Add eggs, lemon juice, salt and vanilla and process until well blended.
Pour through a strainer into a pot. (You could skip this step, but I thought my kids might not eat it if the texture of the lemon zest remained.)
Add the butter, cut into chunks.
Cook slowly over low heat, stirring constantly. The butter will melt and the mixture will slowly start to thicken. This should take about 10 minutes.
When it is thickened, coating a spoon, remove from heat.
Pour into containers and refrigerate to cool.
It's all really quite easy, and I think if you wanted to speed things up you could probably skip the separate step of pulsing the lemon zest and sugar first, and instead just put everything in the blend and whiz it up and then pour into the pan.
I really want to try a version of this with just honey. I did actually use a bit of honey in this one - I only had about 2 1/2 cups of sugar, so I used that plus 1/2 cup of honey.
We will be enjoying this mixed with yogurt for breakfast. I think it would be wonderful over vanilla ice cream, or spread between layers of a white cake, or even in the place of jam on a muffin or toast.
Enjoy!
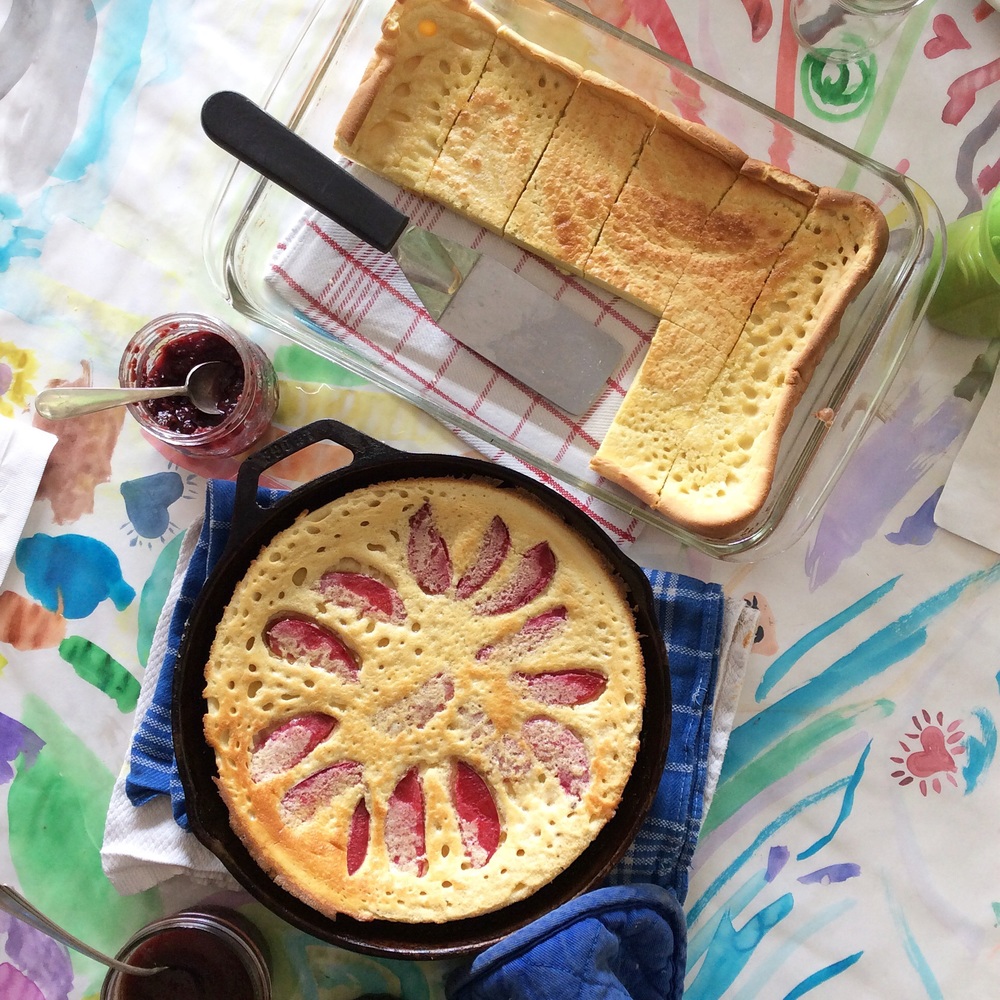
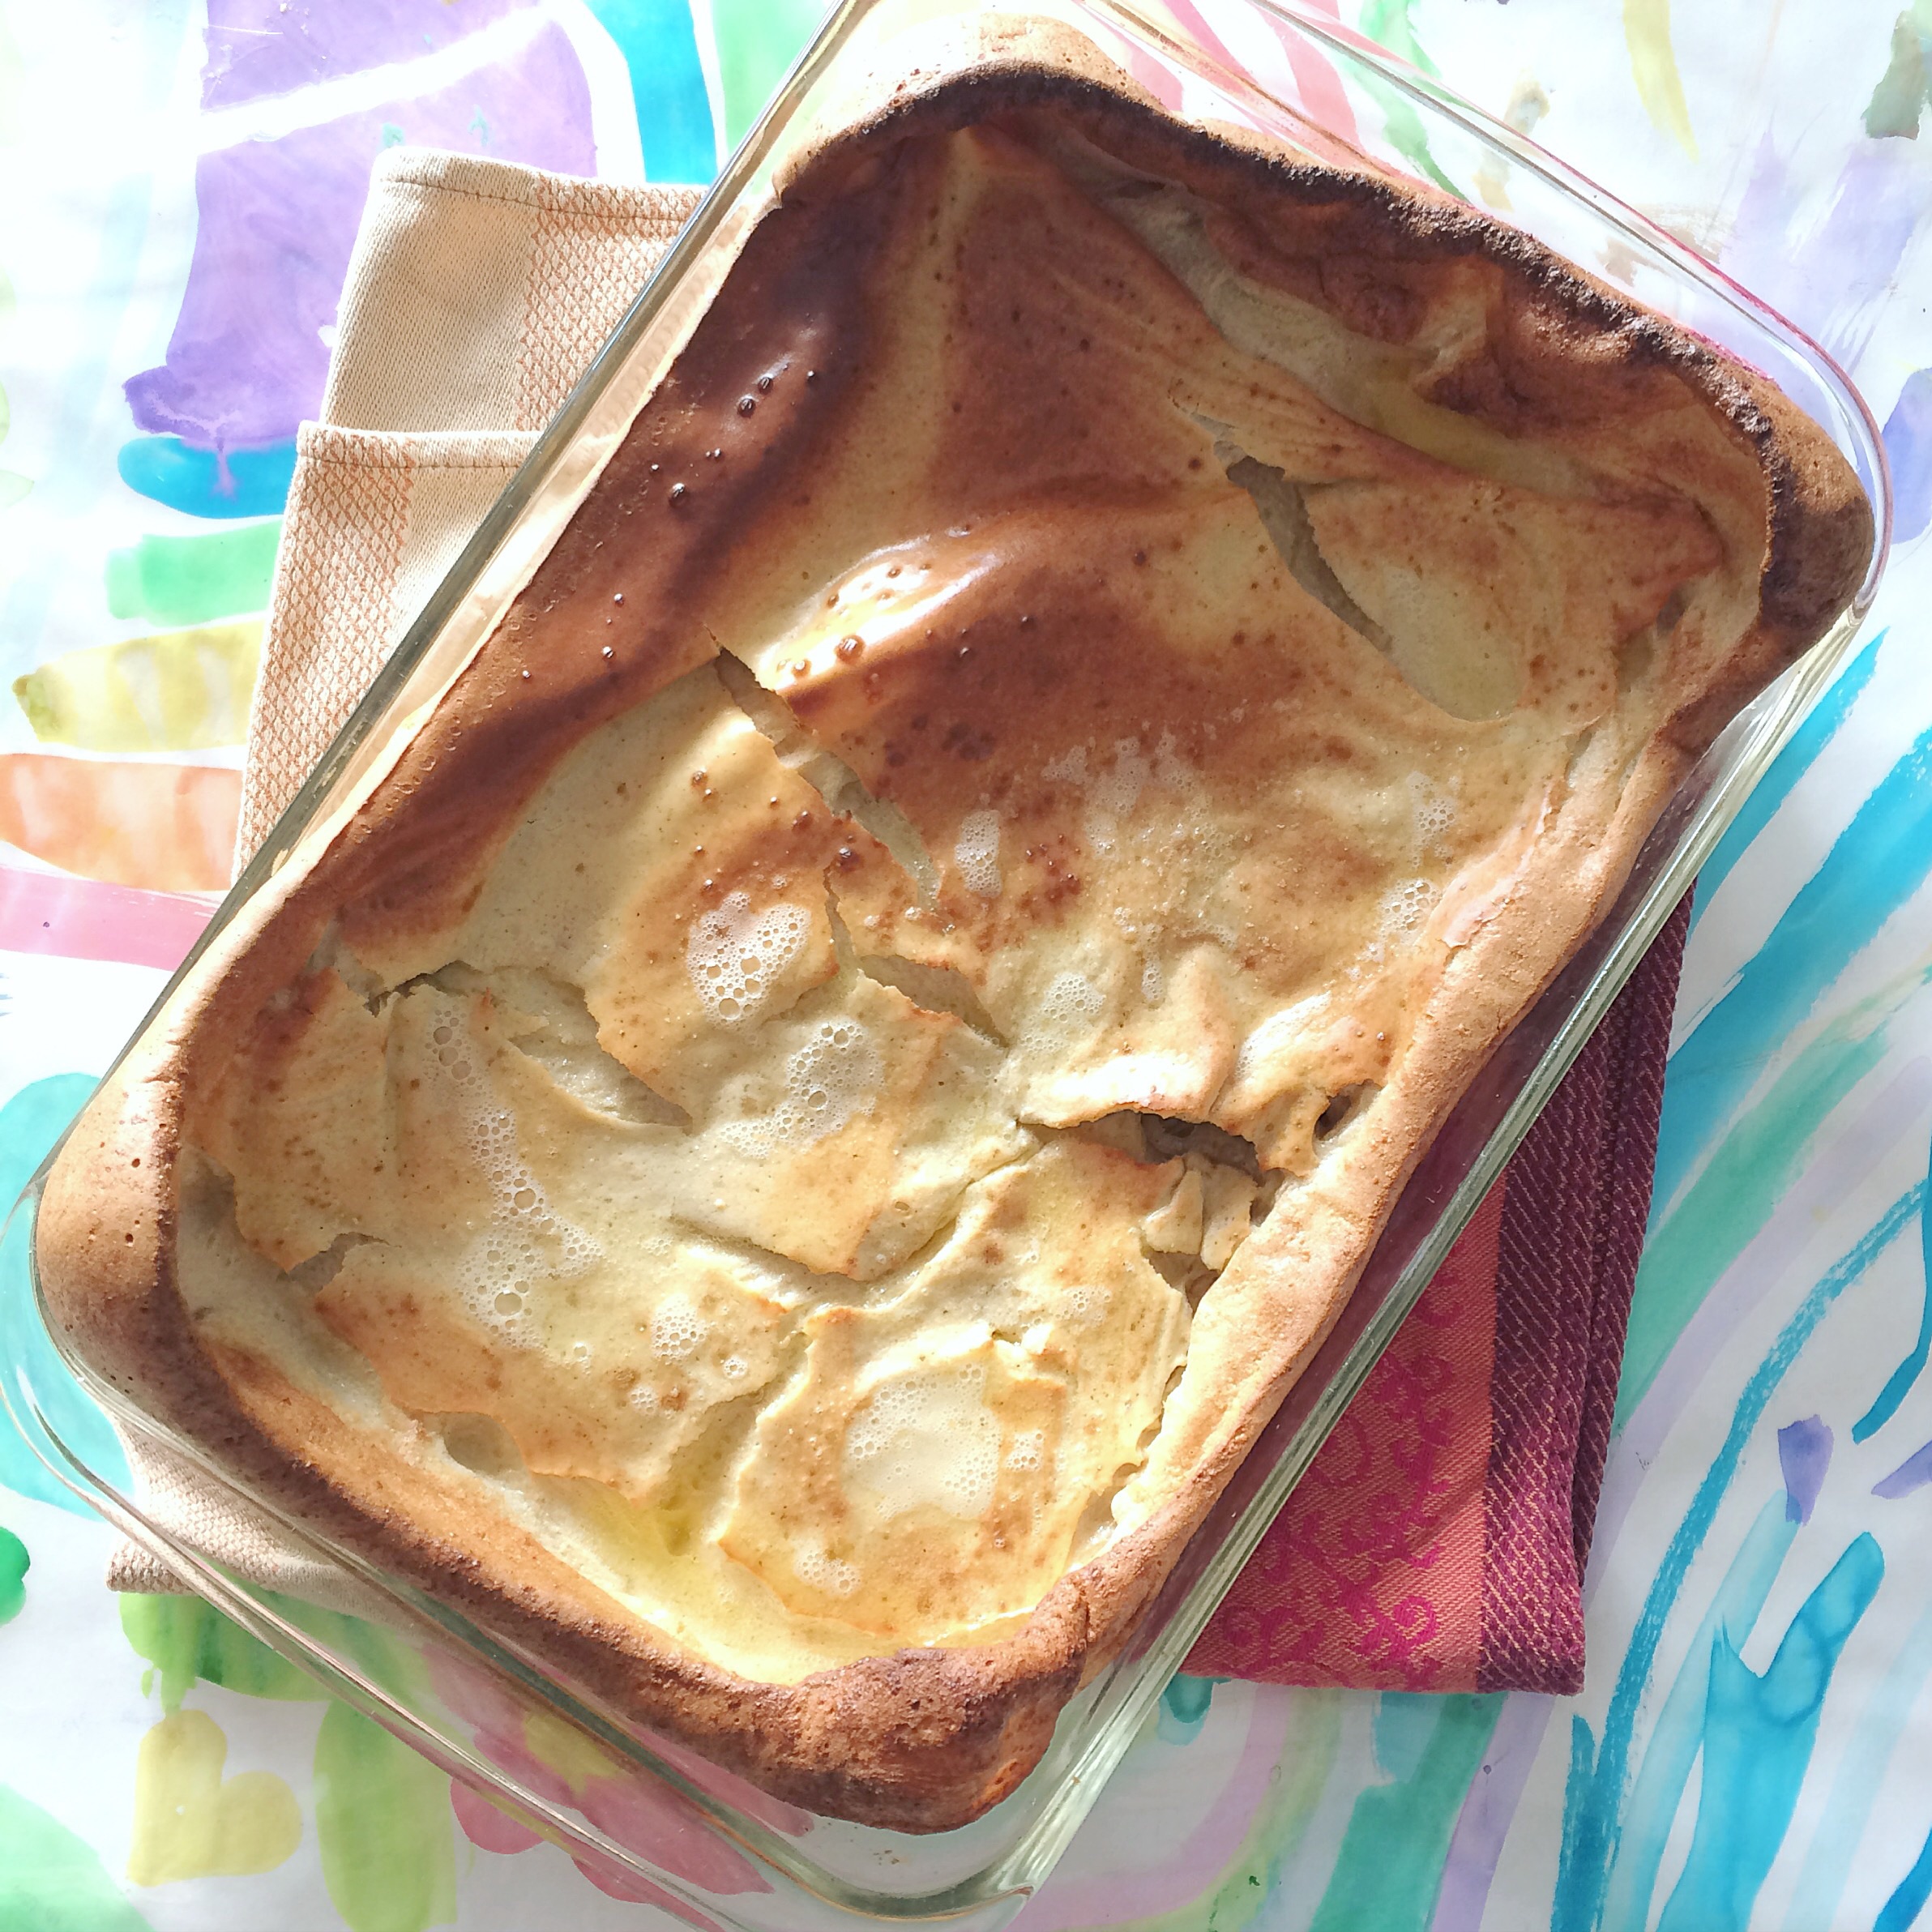
Dutch Baby (German Pancake)
Dutch Baby / German Pancake Recipe

The pretty one in the cast iron pan has plums in it. I just sliced them and layered in a nice pattern right before putting it in the oven.
This is my new favorite breakfast to make for the family! It has all the qualities that I love in a recipe - it's easy, it's fast, it's versatile, and most of all, everybody loves it.
It is a variation of a traditional German dish, called a German Pancake. Some recipes call this kind of thing a Dutch baby, and my kids think that name is a crack up. Apparently the name came from a poor misspelling of the word Deutsch (which means German, in German). I read one source that said that smaller ones are called a Dutch Baby, and bigger ones are called a German Pancake. I don't know. My version is a combination of many different recipes I've tried over the years, I experimented with different variations and came up with a version that works well for us.
The Recipe
6 eggs
1 cup flour
1 cup milk
1/4 cup maple syrup
1 teaspoon vanilla
1/2 teaspoon salt
2 tablespoons butter
up to a cup of fruit if desired (blueberries, sliced peaches, sliced apples, etc.)
Directions:
Preheat oven to 400 degrees, or 375 convection. Put your pan or dish in the oven while it preheats. I usually use a full size casserole dish, or a big cast iron pan. Any good size oven proof dish should work. Alternately, you can use a muffin pan or even a popover pan. A good size pie or quiche dish would work too.
Dump all of the ingredients, except the butter and fruit (if using), in your blender. I use my Vitamix and it is amazing for this kind of thing because it whips it all up super fast with no lumps.

Nothing fancy here - just half a peach sliced and a handful of blueberries, and I left 1/3 plain for the kid that doesn't like fruit cooked in things.
When your pan or dish is hot, put the butter in the pan to melt. My butter is always cold, so I usually toss it in the pan and let it melt in the oven for a minute. Once melted, just swirl the dish around a bit to get it all coated with melted butter.
Once the batter is blended and the butter is melted, just pour your batter into your hot pan. If you are adding fruit, now is the time. If you want to make it pretty, you can carefully line up slices of fruit in a nice pattern. Or you can just sprinkle a handful of blueberries and call it good. Sometimes I just put fruit on half of it, because I have one child who prefers it plain.
And now stick it in the oven! I do mine in my convection, so 375 convection for about 17 minutes is about right. But it's going to depend on the size of your pan and how accurate your oven is. Go for 15 minutes and then take a peek. It should be puffed up and nicely brown around the edges, and no longer wet in the middle. If it's not quite there, give it a few more minutes.
When you take it out of the oven it will sink pretty quickly. So if you want to impress your guests, just make sure they are at the table when you bring it out.
Variations:
This one was made with a gluten free flour blend.
I've done this with AP flour, bread flour, whole wheat flour, and even a gluten free flour blend. Because the flour just gives it some density and holds it together, but doesn't actually rise, the type of flour doesn't really seem to matter. A friend of mine made it with a grain free cassava flour and she said it was also great. If you try it with a different kind of flour, definitely let me know how it turns out!
I use maple syrup to sweeten because I like the taste, but I've also made it with honey or just regular white sugar. Also great.
If you like cinnamon, add a teaspoon. This would be especially great if you are adding sliced apples on top.
A lot of recipes you see for these call for powdered sugar on top. I don't bother because I don't think we need it, but if you like that and you want to make it look a bit more fancy, go for it. Just sprinkle on top right before serving.
When I make it plain with no fruit, we love to have a little homemade jam on top. It's delicious that way.
This is so easy, but looks impressive and makes breakfast feel special without doing a lot of work. It's great for feeding a crowd, because you can whip up a couple of them in just a few minutes. I like this recipe better than some others because it has more eggs, so it seems a little richer, and gives the kids a decent amount of protein in a breakfast that tastes like a treat.
I think you could even mix up your batter the night before if you want, and just give it a quick stir an pour in your pan in the morning. It would be great for a Christmas or Easter or other holiday morning, because it seems so fancy and special, but really is minimal time in the kitchen for the cook.

Same batter, just poured in muffin pans. It worked just the same and the kids loved the little personal size!

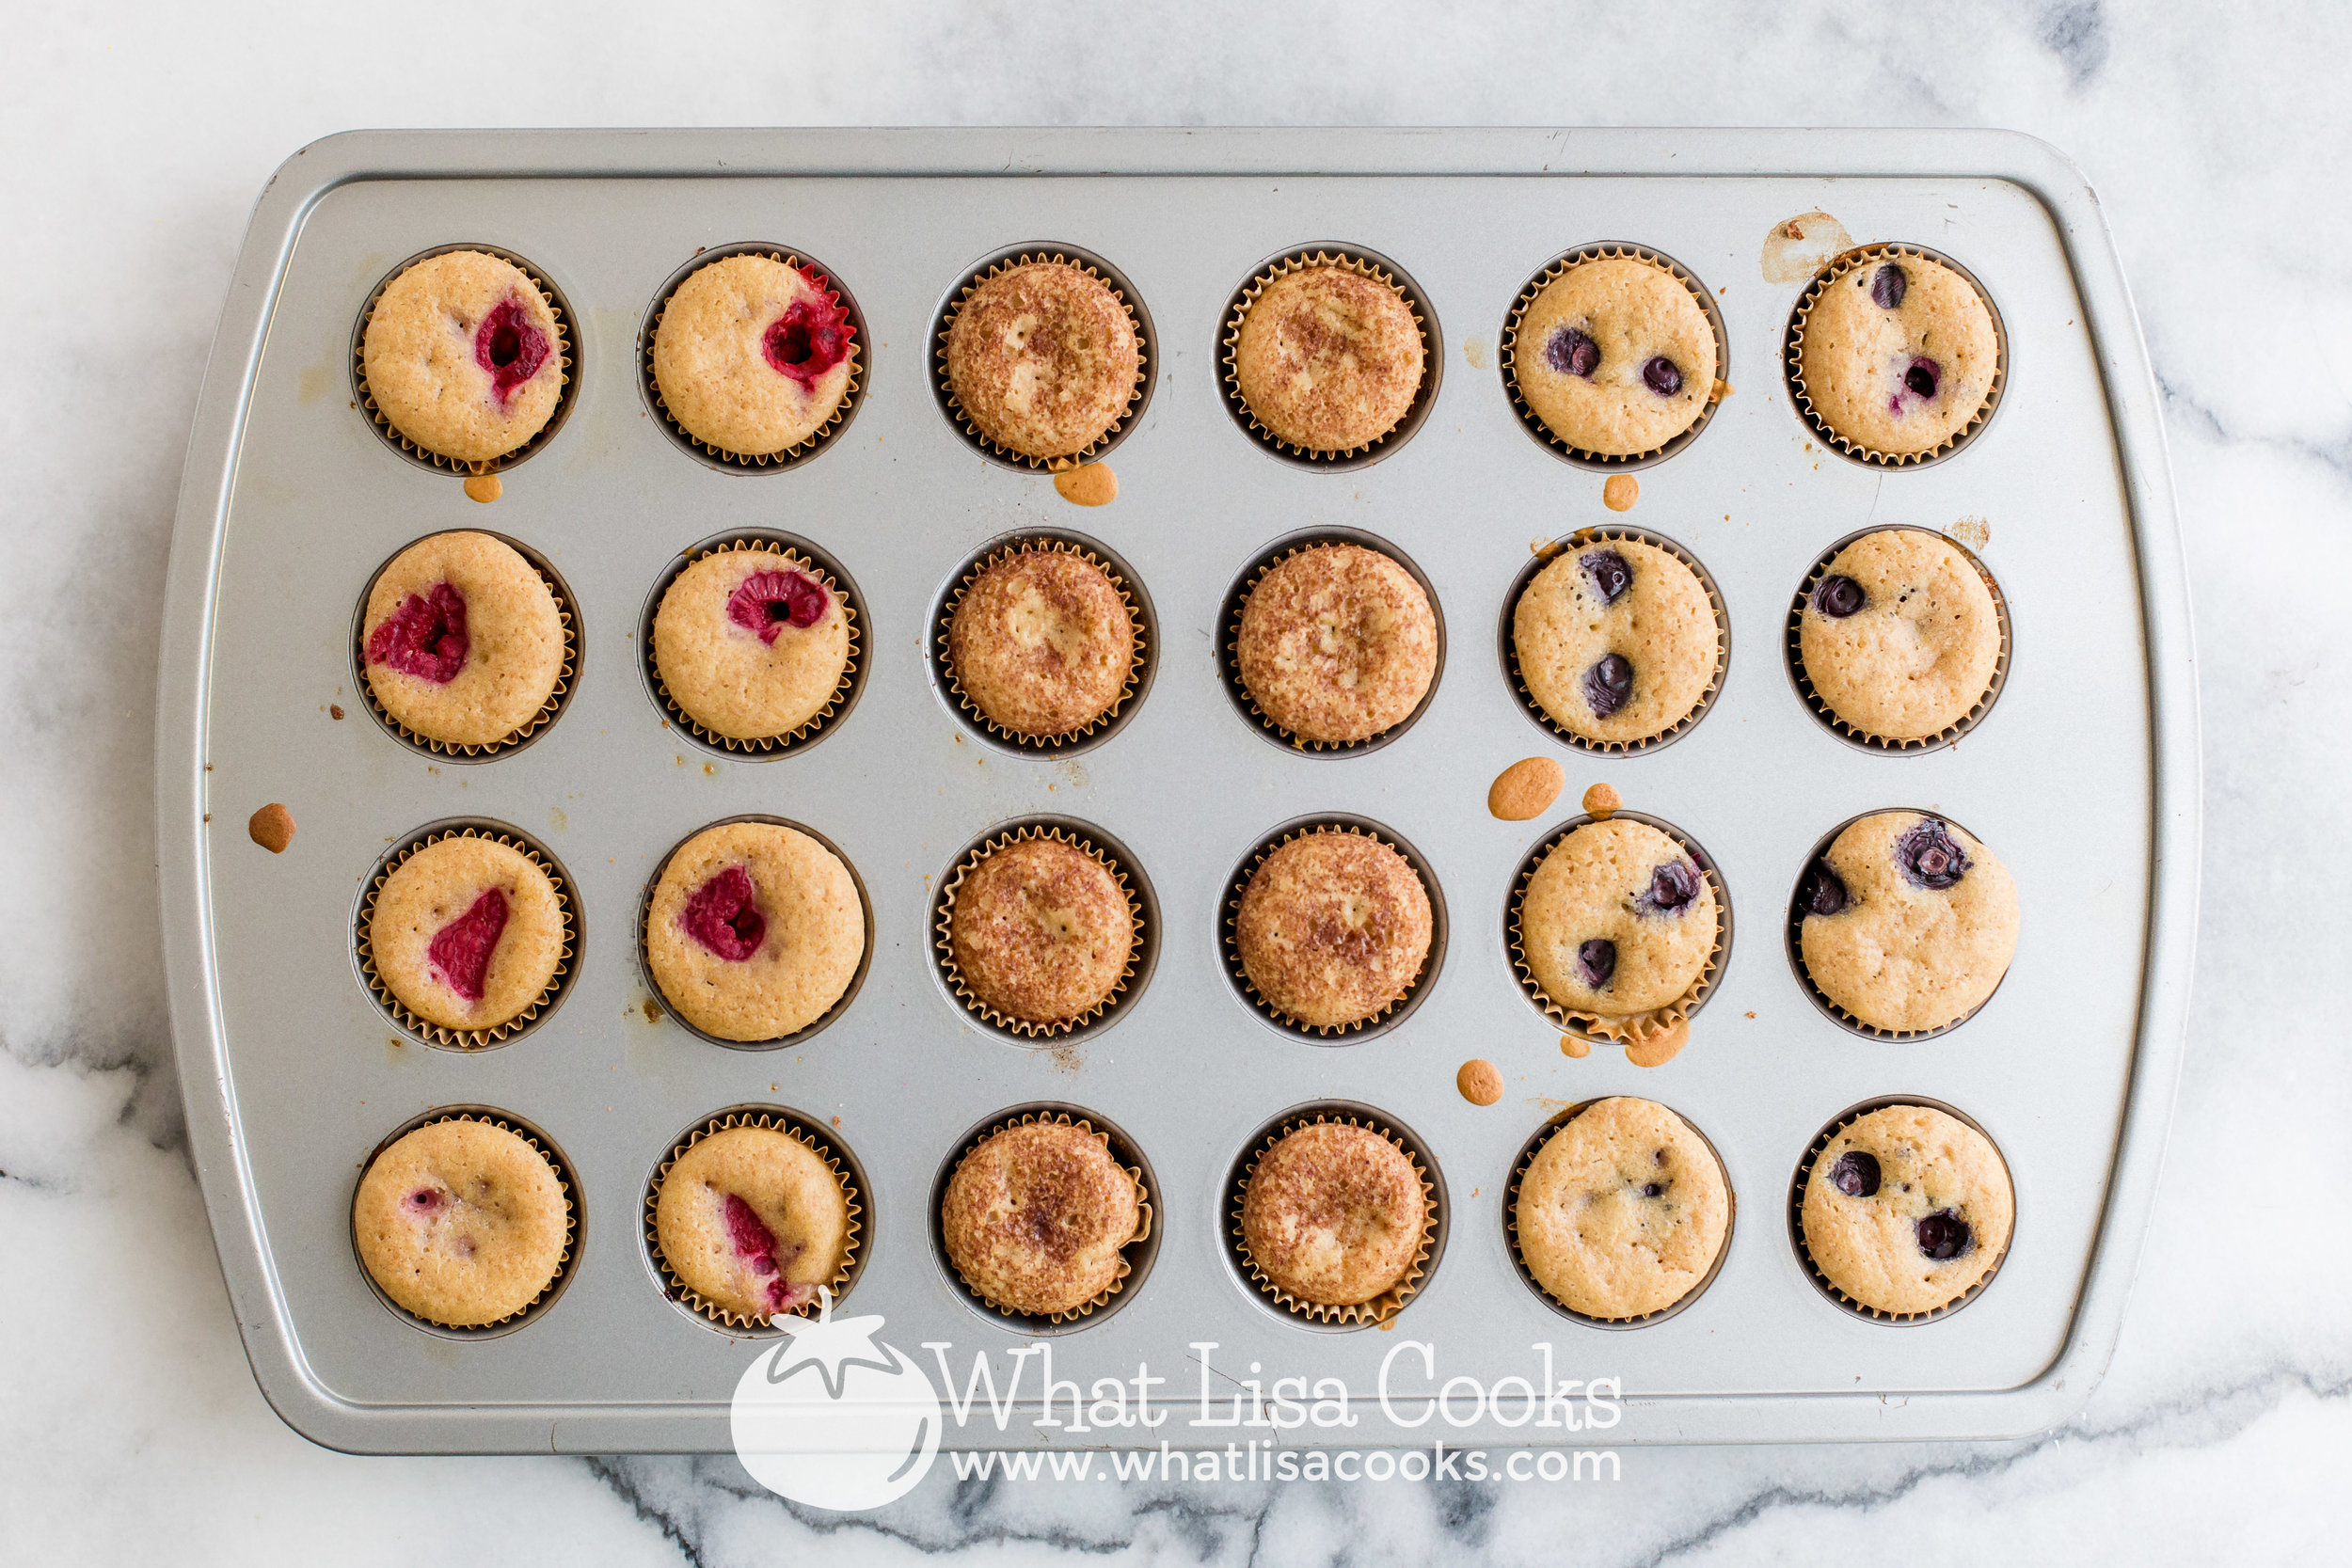
Pancake muffins
I love a good cooking shortcut - or I guess we call them "hacks" these days. So here is one of my favorite breakfast hacks: muffins made from pancake batter.

Muffins made from pancake batter? Yes! It totally works.

When I make pancakes I always make extra batter.
If you look at my breakfast for lunch posts, you'll see that we make a lot of lunches with leftover pancakes. Pancakes refrigerate well and freeze great and they are a perfect item to have on hand for quick and easy breakfasts and lunches.
But sometimes I get about halfway through the batter and I'm just feeling done with standing over the stove and cooking pancakes.
So I take the rest and just make muffins!
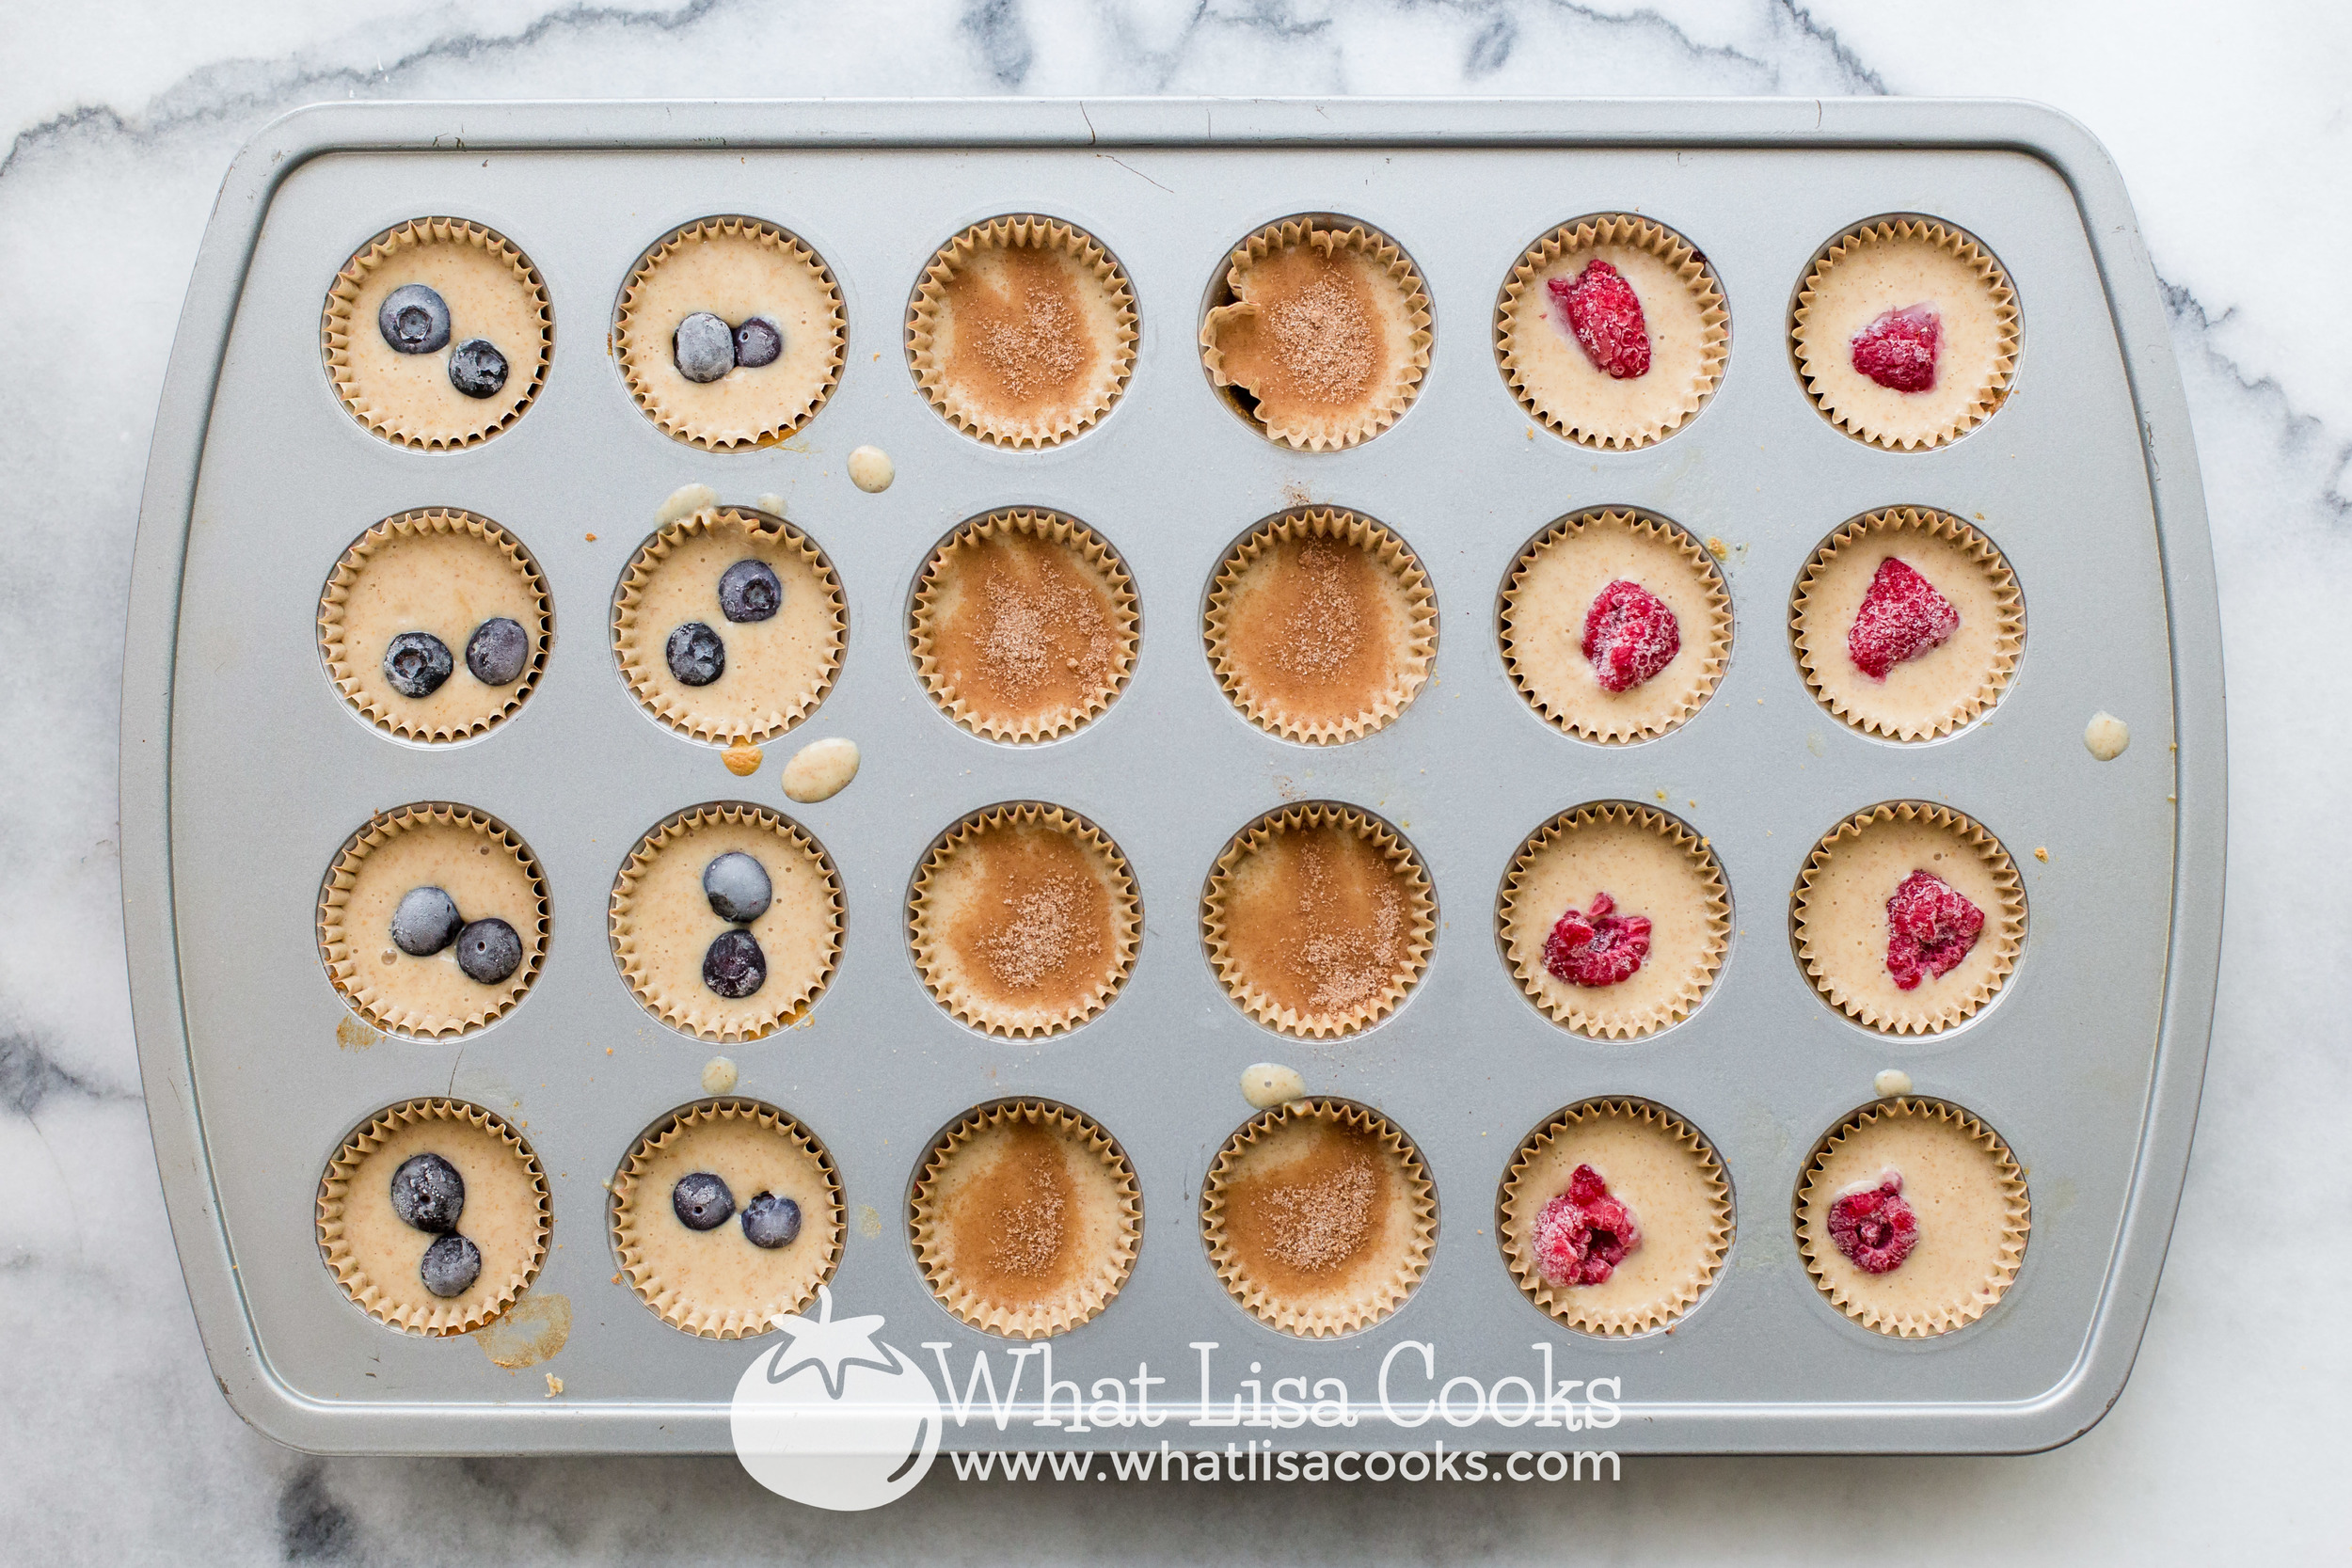
All you do is fill greased (or paper lined) mini muffin pans with the batter and then top as you like.
These work best with mini muffin pans because pancake batter is lighter than regular muffin batter, so bigger muffins fall a little and don't look quite as pretty. But bite sized pancake muffins are perfect. You can make them plain, or you can dress them up. I like to fill all the spots with batter, and then add stuff to the top.
In this batch you can see that I did three different flavors. I put a couple of blueberries in some, a big frozen raspberry in the middle of some, and the rest I just sprinkled with a little cinnamon sugar.
They are so good - light and moist and just perfectly sweet enough. They are the perfect size for little hands and small enough to just pop in your mouth, and they make a great portable breakfast.

As for the pancake recipe - I make my own. Pancakes are so easy to make from scratch, it's almost silly. You can read my pancake recipe here. You'll note in my recipe that I say that the butter is optional, but I think it's necessary for muffins - it really helps to keep them from sticking. If you don't want to take the time to melt and cool butter, I've substituted vegetable oil for the butter and they still come out great.
You can totally do this with a store bought pancake mix if you prefer, I would just gently suggest that you try to find one with no artificial ingredients. For extra tasty pancakes, I always add a little maple syrup to the batter. This makes them taste great on their own, which means that for a quick weekday breakfast or lunch you don't need to get out all that sticky syrup.
Pancake Muffins
Mixed pancake batter (be sure to include the butter or oil, and add a little extra sweetener)
oil of choice for muffin pans, or muffin cups
mini muffin pan
toppings / fillings of choice: berries, chocolate chips, cinnamon & sugar, etc.
Preheat oven to 350, or 325 convection. Grease mini muffin pans, or line with muffin papers.
Prepare your pancake batter as usual. Be sure to include the butter or oil called for in the recipe, and add a little extra sweetener. I usually sweeten my pancake batter with maple syrup. My recipe calls for enough syrup to make the batter nicely sweet without needing to add extra syrup when you eat them. But if you're using a different recipe, or a box mix, I would recommend that you add a few tablespoons of extra syrup or sugar.
Fill your muffin cups about half way with pancake batter. Add toppings as desired - a piece of fruit, a frozen berry, a little sprinkle of cinnamon sugar. Bake for about 15 minutes for mini muffins (time will vary depending on your oven temperature).
Enjoy!
~ Lisa

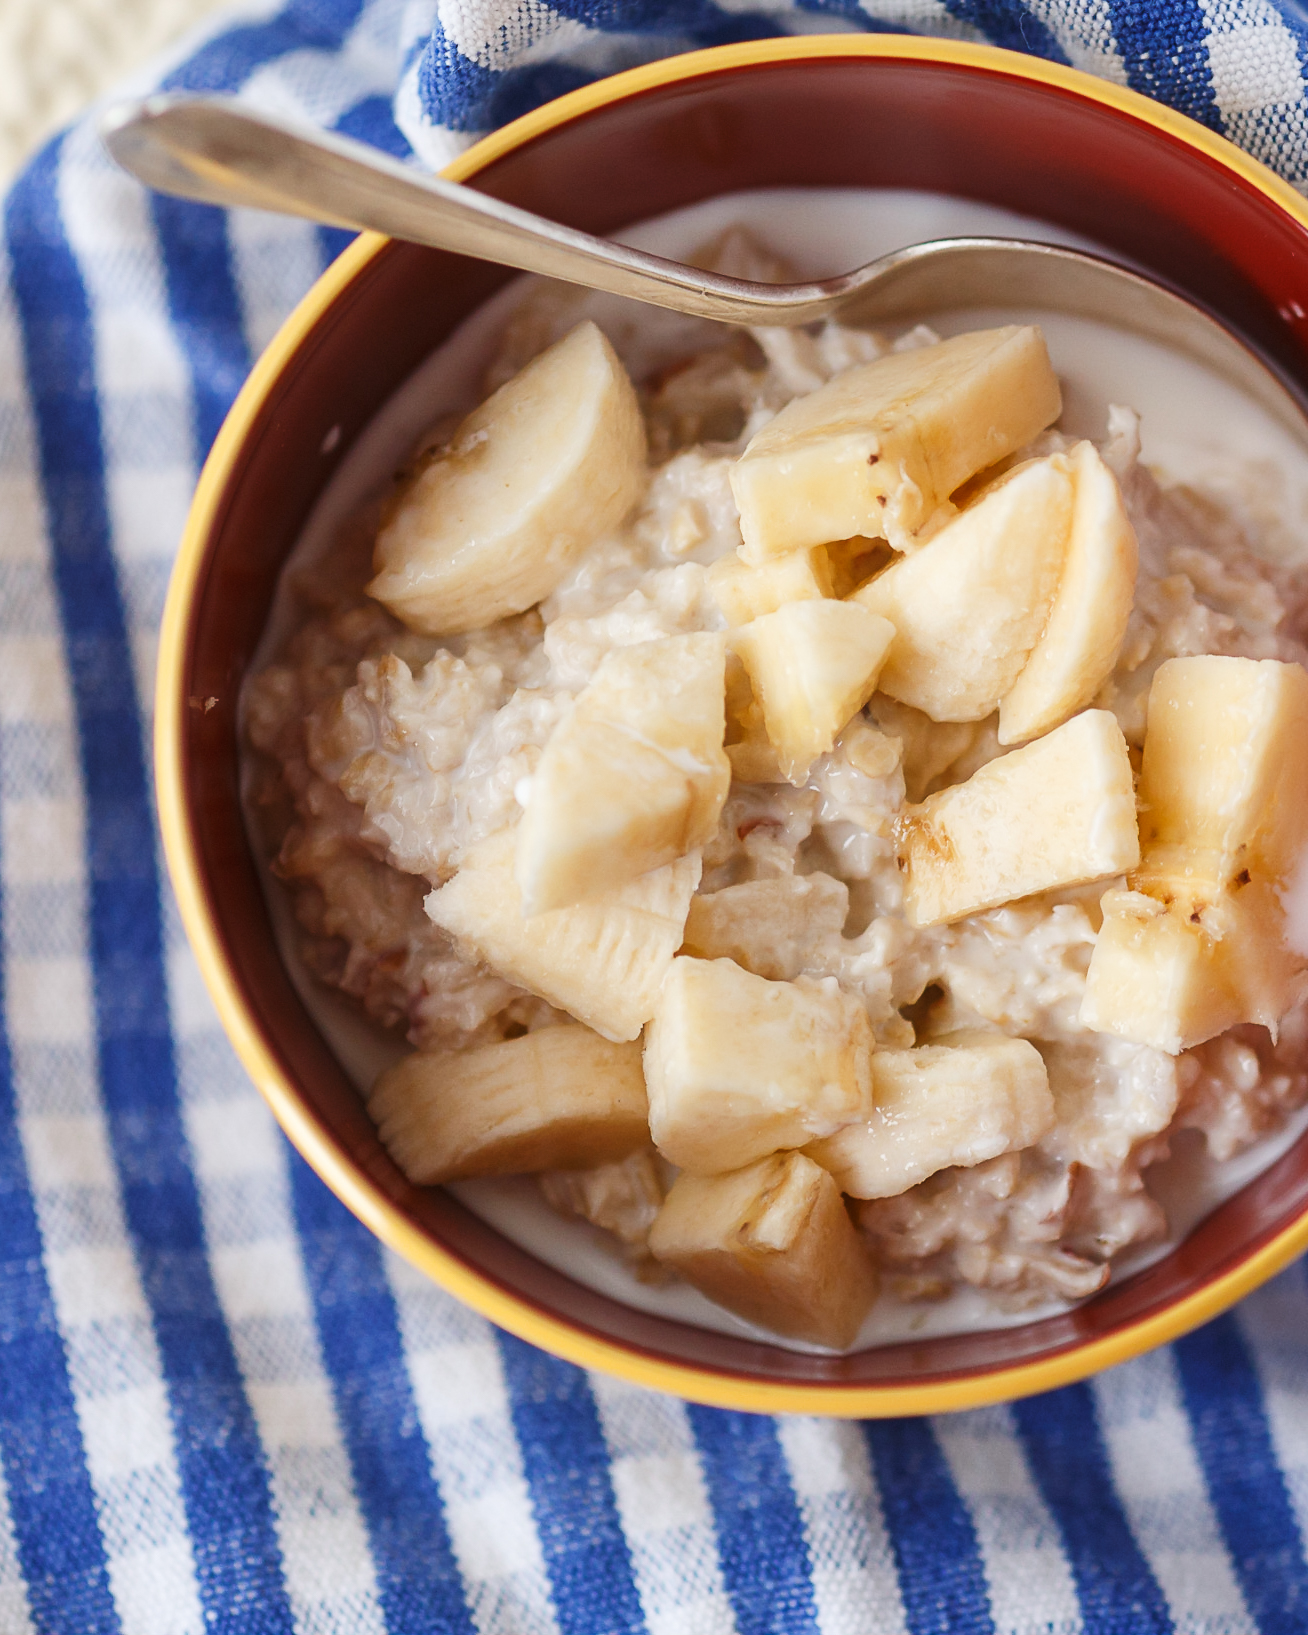
Swiss Muesli: an easy overnight oats recipe that the whole family will love
Do you want a breakfast that's easy, hearty, and healthy, and the whole family will love? Well this might just be it.
Have you seen all the buzz lately about these overnight refrigerator oats recipes? Seems like some new way to make oats? Nope, not new. The Swiss have been doing it this way for over 100 years. They call it Muesli, or Swiss Muesli, or Bircher Muesli (named from the doctor that created the recipe for the health benefits of his patients). This is not the "muesli" that you've seen in a cereal box. That is a granola like cereal that has some oats and dried fruit and somebody decided to give it the name because some of the ingredients are similar. No, this is a totally different thing - it's a way of preparing oats that's like nothing you've probably ever tasted. I love it, it's one of my favorite breakfasts. I first learned about Swiss Muesli almost 30 years ago, when my older sister came home from being an exchange student in Switzerland. She introduced us to the way the Swiss do oats, and I've loved it ever since. In the summer I like to make up a huge bowl and eat it for breakfast all week long. It's cool and refreshing, but hearty and filling. And you can dress it up however you like.
Swiss Muesli: The original easy overnight oats recipe
Muesli is one of my favorite summer breakfasts.
It's cool and refreshing when it's hot out, and it's made ahead, so you don't have to spend time in the kitchen on a beautiful summer morning. Everybody who has tried my version of this recipe loves it!

Do you want a breakfast that's easy, and hearty, and healthy, and the whole family will love?
Well this might just be it.
Swiss Meusli is the original easy overnight oats recipe.
Have you seen all the buzz lately about these overnight refrigerator oats recipes?
Seems like some new way to make oats? Nope, not new. The Swiss have been doing it this way for over 100 years. They call it Muesli, or Swiss Muesli, or Bircher Muesli (named from the doctor that created the recipe for the health benefits of his patients).
This is not the "muesli" that you've seen in a cereal box. That is a granola like cereal that has some oats and dried fruit and somebody decided to give it the name because some of the ingredients are similar.
No, this is a totally different thing - it's a way of preparing oats that's like nothing you've probably ever tasted. I love it, it's one of my favorite breakfasts. I first learned about Swiss Muesli almost 30 years ago, when my older sister came home from being an exchange student in Switzerland.
She introduced us to the way the Swiss do oats, and I've loved it ever since. In the summer I like to make up a huge bowl and eat it for breakfast all week long. It's cool and refreshing, but hearty and filling. And you can dress it up however you like.
There are so many ways to make muesli, with various combinations of milk, yogurt, juice - but the basic idea is combining oats with some combination of those, plus apples, and soaking overnight.
The apple appears to be required, in order for it to be the original Bircher Muesli. I think it's part of what makes it so unique, although you could leave it out if you prefer.
What you get in the morning is so great - the oats have soaked up the liquid and have softened, but not turned to mush. They still have some texture, just enough, and they have flavor.
The bits of grated apple are still a little crisp. There's just enough sweetness from the honey. The milk and yogurt are creamy. It's just so good.
If you look around you'll find that no two recipes are exactly alike. The original Bircher Muesli is still around, but now it has evolved and everyone makes it just a little different. My personal preference is what I think is a pretty simple version.

Here's how I make Swiss Muesli.
Ingredients:
2 cups old fashioned rolled oats (not quick oats!)
1 cup of milk (whatever kind you like)
1 cup of plain yogurt
1/4 cup (or less if you like less sweet) of honey
Juice from 1 medium size lemon
1 large apple, grated.
Optional toppings:
milk, cream or half & half
diced fresh fruit
dried fruits
chopped nuts
seeds
dried coconut
anything else that sounds good!
Preparation:
Mix together all of the ingredients (not the toppings), cover, and refrigerate overnight. If it's your first time making it, you might want to hold back on some of the honey, mix everything else, and taste. See if it's sweet enough before you add all the honey. It might vary depending on how big or sweet your apple is. Also if you've used almond milk or some other kind of non-dairy milk that's sweetened, I would leave out the honey altogether until you've tasted it.
In the morning, scoop out a serving, and top it however you like. I like mine with just a little bit of extra half & half and some diced bananas or some blueberries. Simple, creamy, just a little tart from the lemon and apple, just sweet enough from the honey and banana. Breakfast perfection.
You can go as crazy as you want though - nuts, all different kinds of dried and fresh fruit, sunflower seeds or chia seeds, or ground flax seeds, nut butter - whatever sounds good. If you want, you can really load it up with all kinds of yummy and nutritious stuff. This is way more than just overnight oatmeal!
Give it a try, and let me know what you think.
Enjoy!
~ Lisa

Easy Quick Bread and Muffin Recipe
A master recipe for making all kids of quick and easy muffins or breads! This recipe is made with whole wheat flour, whole fruits and veggies, and no refined sugar (or very little, if you decide to add some). It is sweetened with just a little honey and the natural flavors of fruit. Best of all - it's made all in the blender, and takes less than 5 minutes from start until it's in the oven. It is so fast and easy, you are just not even going to believe it. This is not your grandma's banana bread - there is no need to let your butter or eggs come to room temperature, there is no creaming of butter and sugar. You aren't washing multiple bowls.
An easy recipe for quick bread and muffins that comes together super fast in the blender.
My kids love it when I make homemade breads and muffins - the climb all over each other to be the first one to get to the banana bread or carrot bread or pumpkin muffins. They get so excited when they see me mixing, or smell it baking, or see it come out of the oven. I can hardly make them wait until it's cool enough to eat. But I haven't been making it all that often, because it just seems like too much work and advance planning. I am no good at setting butter or eggs in advance out to get to room temp, and the creaming of butter and sugar seems like a lot of effort, and I can't stand the mess of all the bowls I need to wash. Sometimes it just seems like more trouble than it's worth. I've got a lot going on.
But I couldn't help but think that there had to be an easier way. There had to be a way to shortcut some of those steps. So I set out to figure it out.

Banana chocolate chip mini muffins.
My goals: it had to be easy, it had to be fast, but it still had to be relatively healthy. I wasn't going to trade off making it easier by using processed junk. So many quick bread recipes you see call for so much sugar, it's crazy. We need to just be honest with ourselves and call those things for what they are: they are cake. If a recipe has a couple of cups of sugar in it, it's not bread. It's cake. And don't get me wrong, I love cake. But not for an everyday staple, for a school day breakfast or an after school snack. So I had to come up with a recipe that was going to taste great but not be loaded with sugar. And I think I've done it!
This is it folks, the last quick bread recipe you will ever need.
This recipe is made with whole wheat flour, whole fruits and veggies, and no refined sugar (or very little, if you decide to add some). It is sweetened with just a little honey and the natural flavors of fruit. Best of all - it's made all in the blender, and takes less than 5 minutes from start until it's in the oven. It is so fast and easy, you are just not even going to believe it. This is not your grandma's banana bread - there is no need to let your butter or eggs come to room temperature, there is no creaming of butter and sugar. You aren't washing multiple bowls.

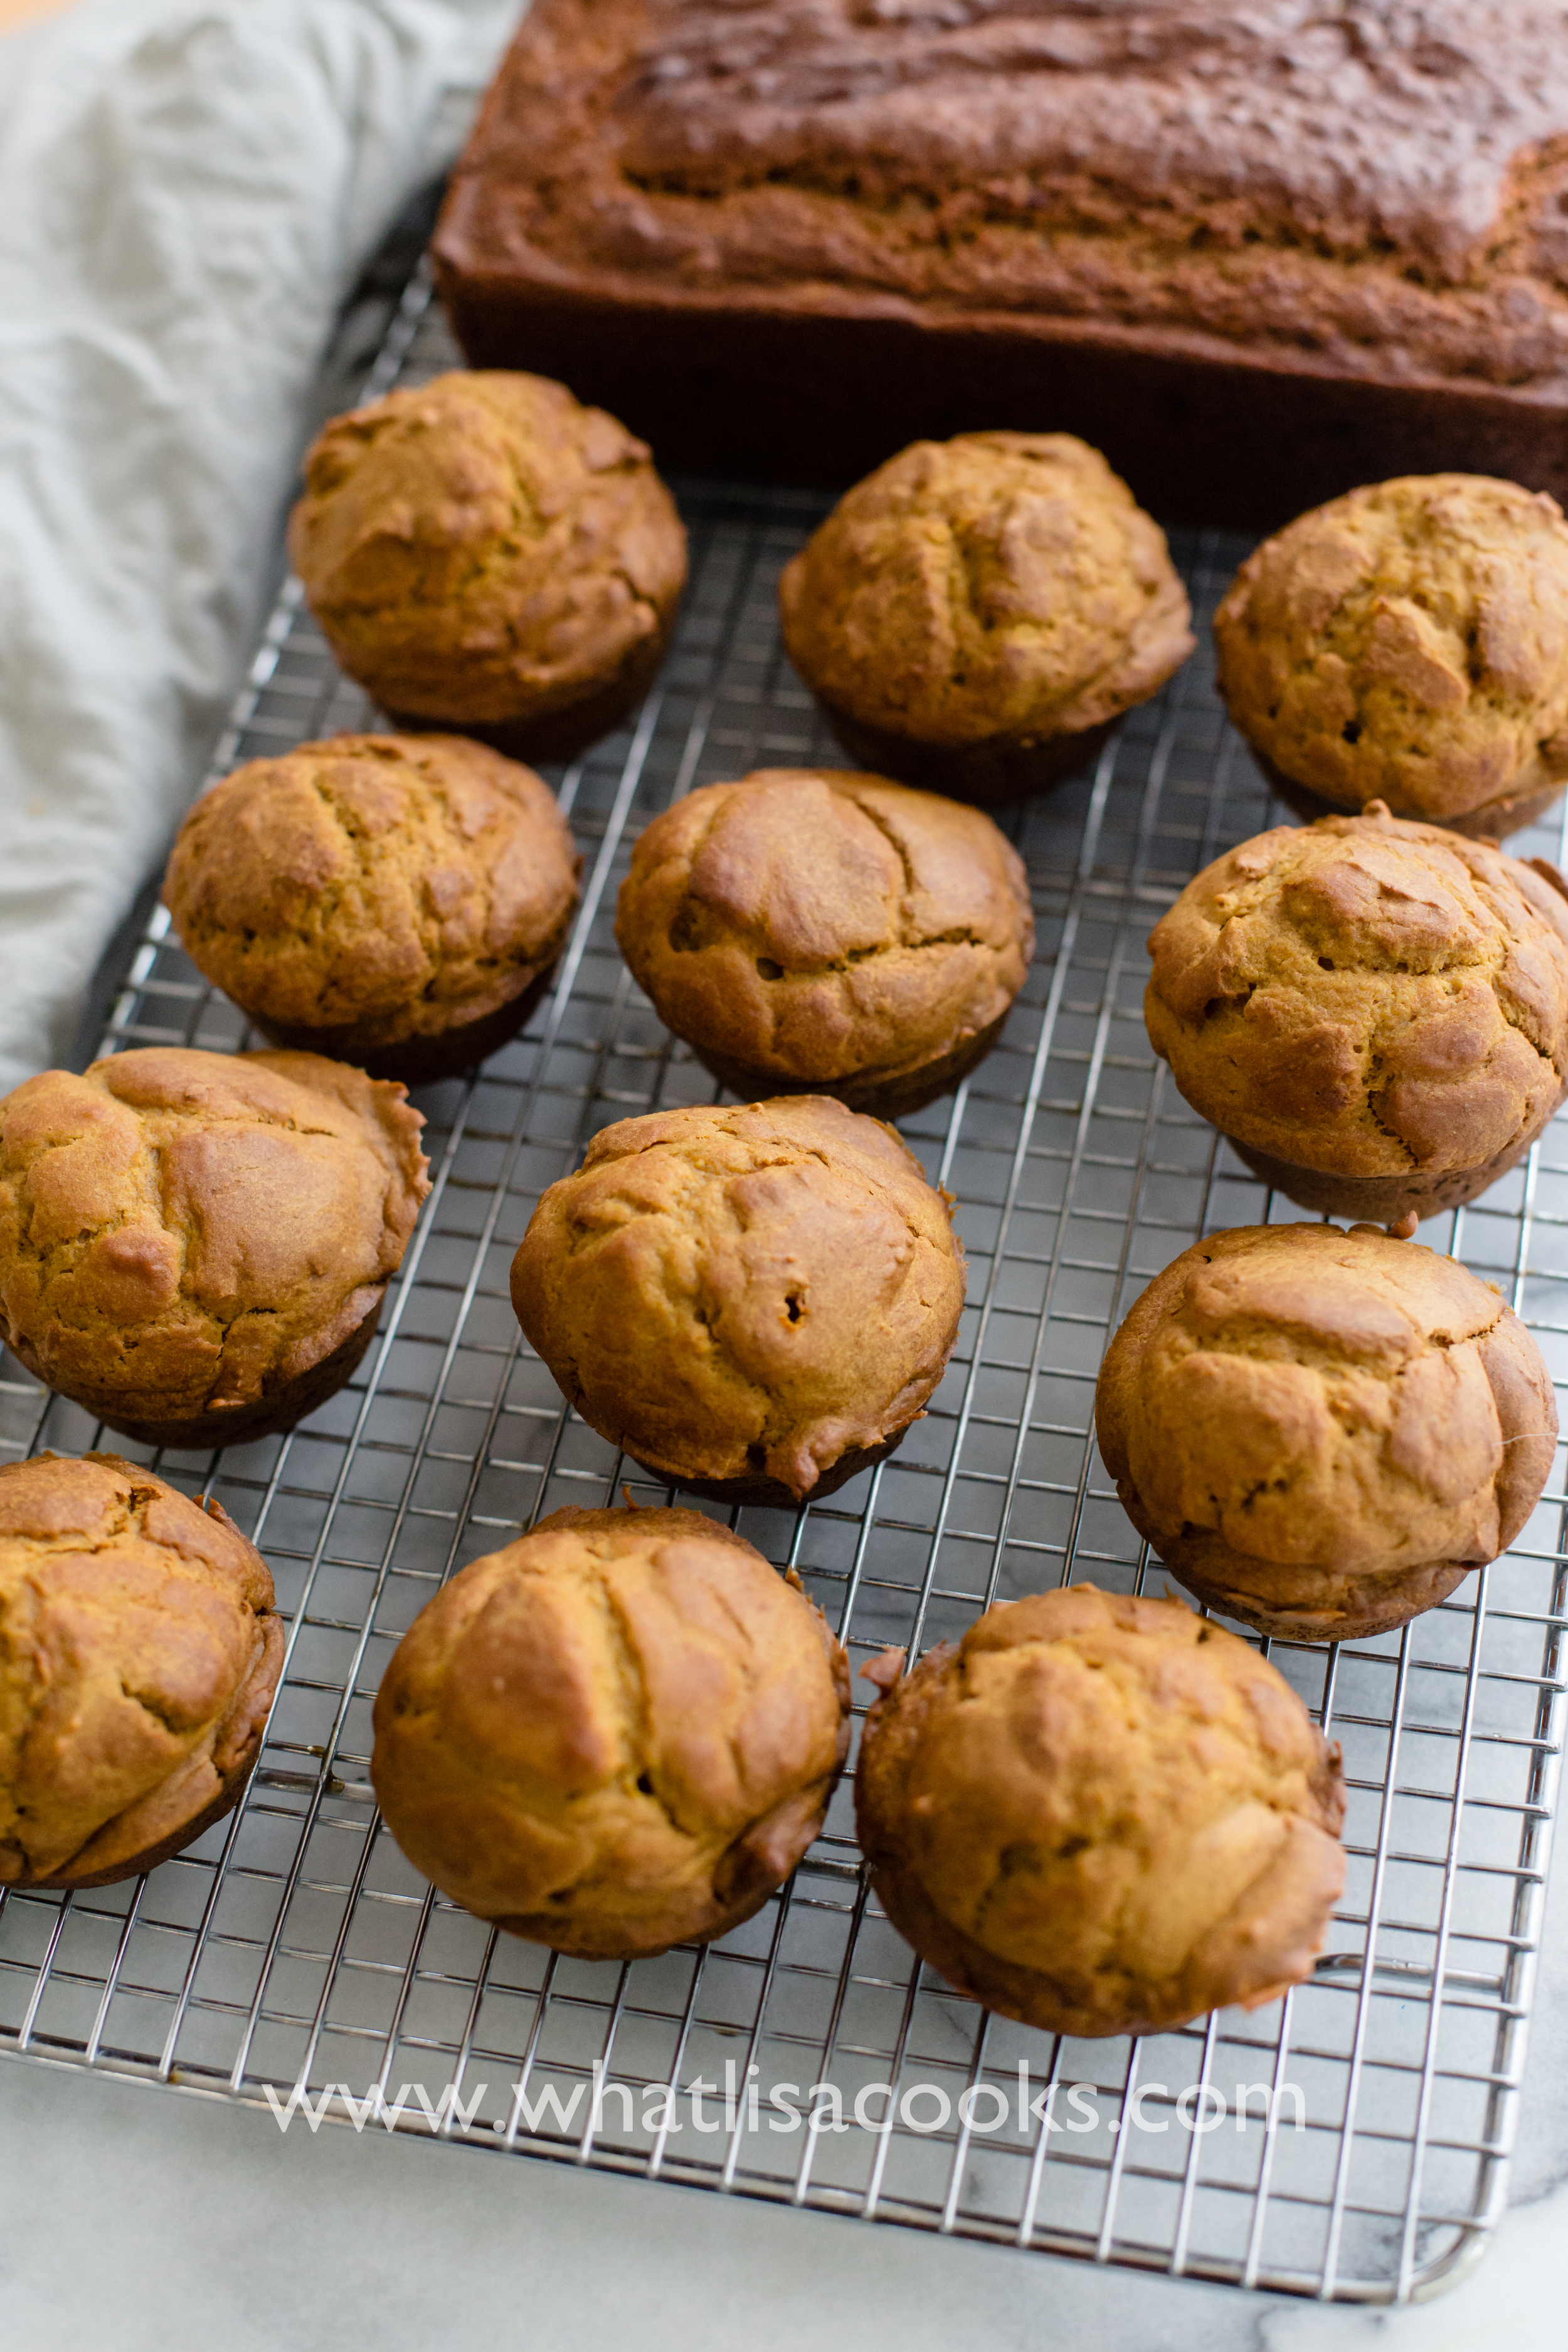
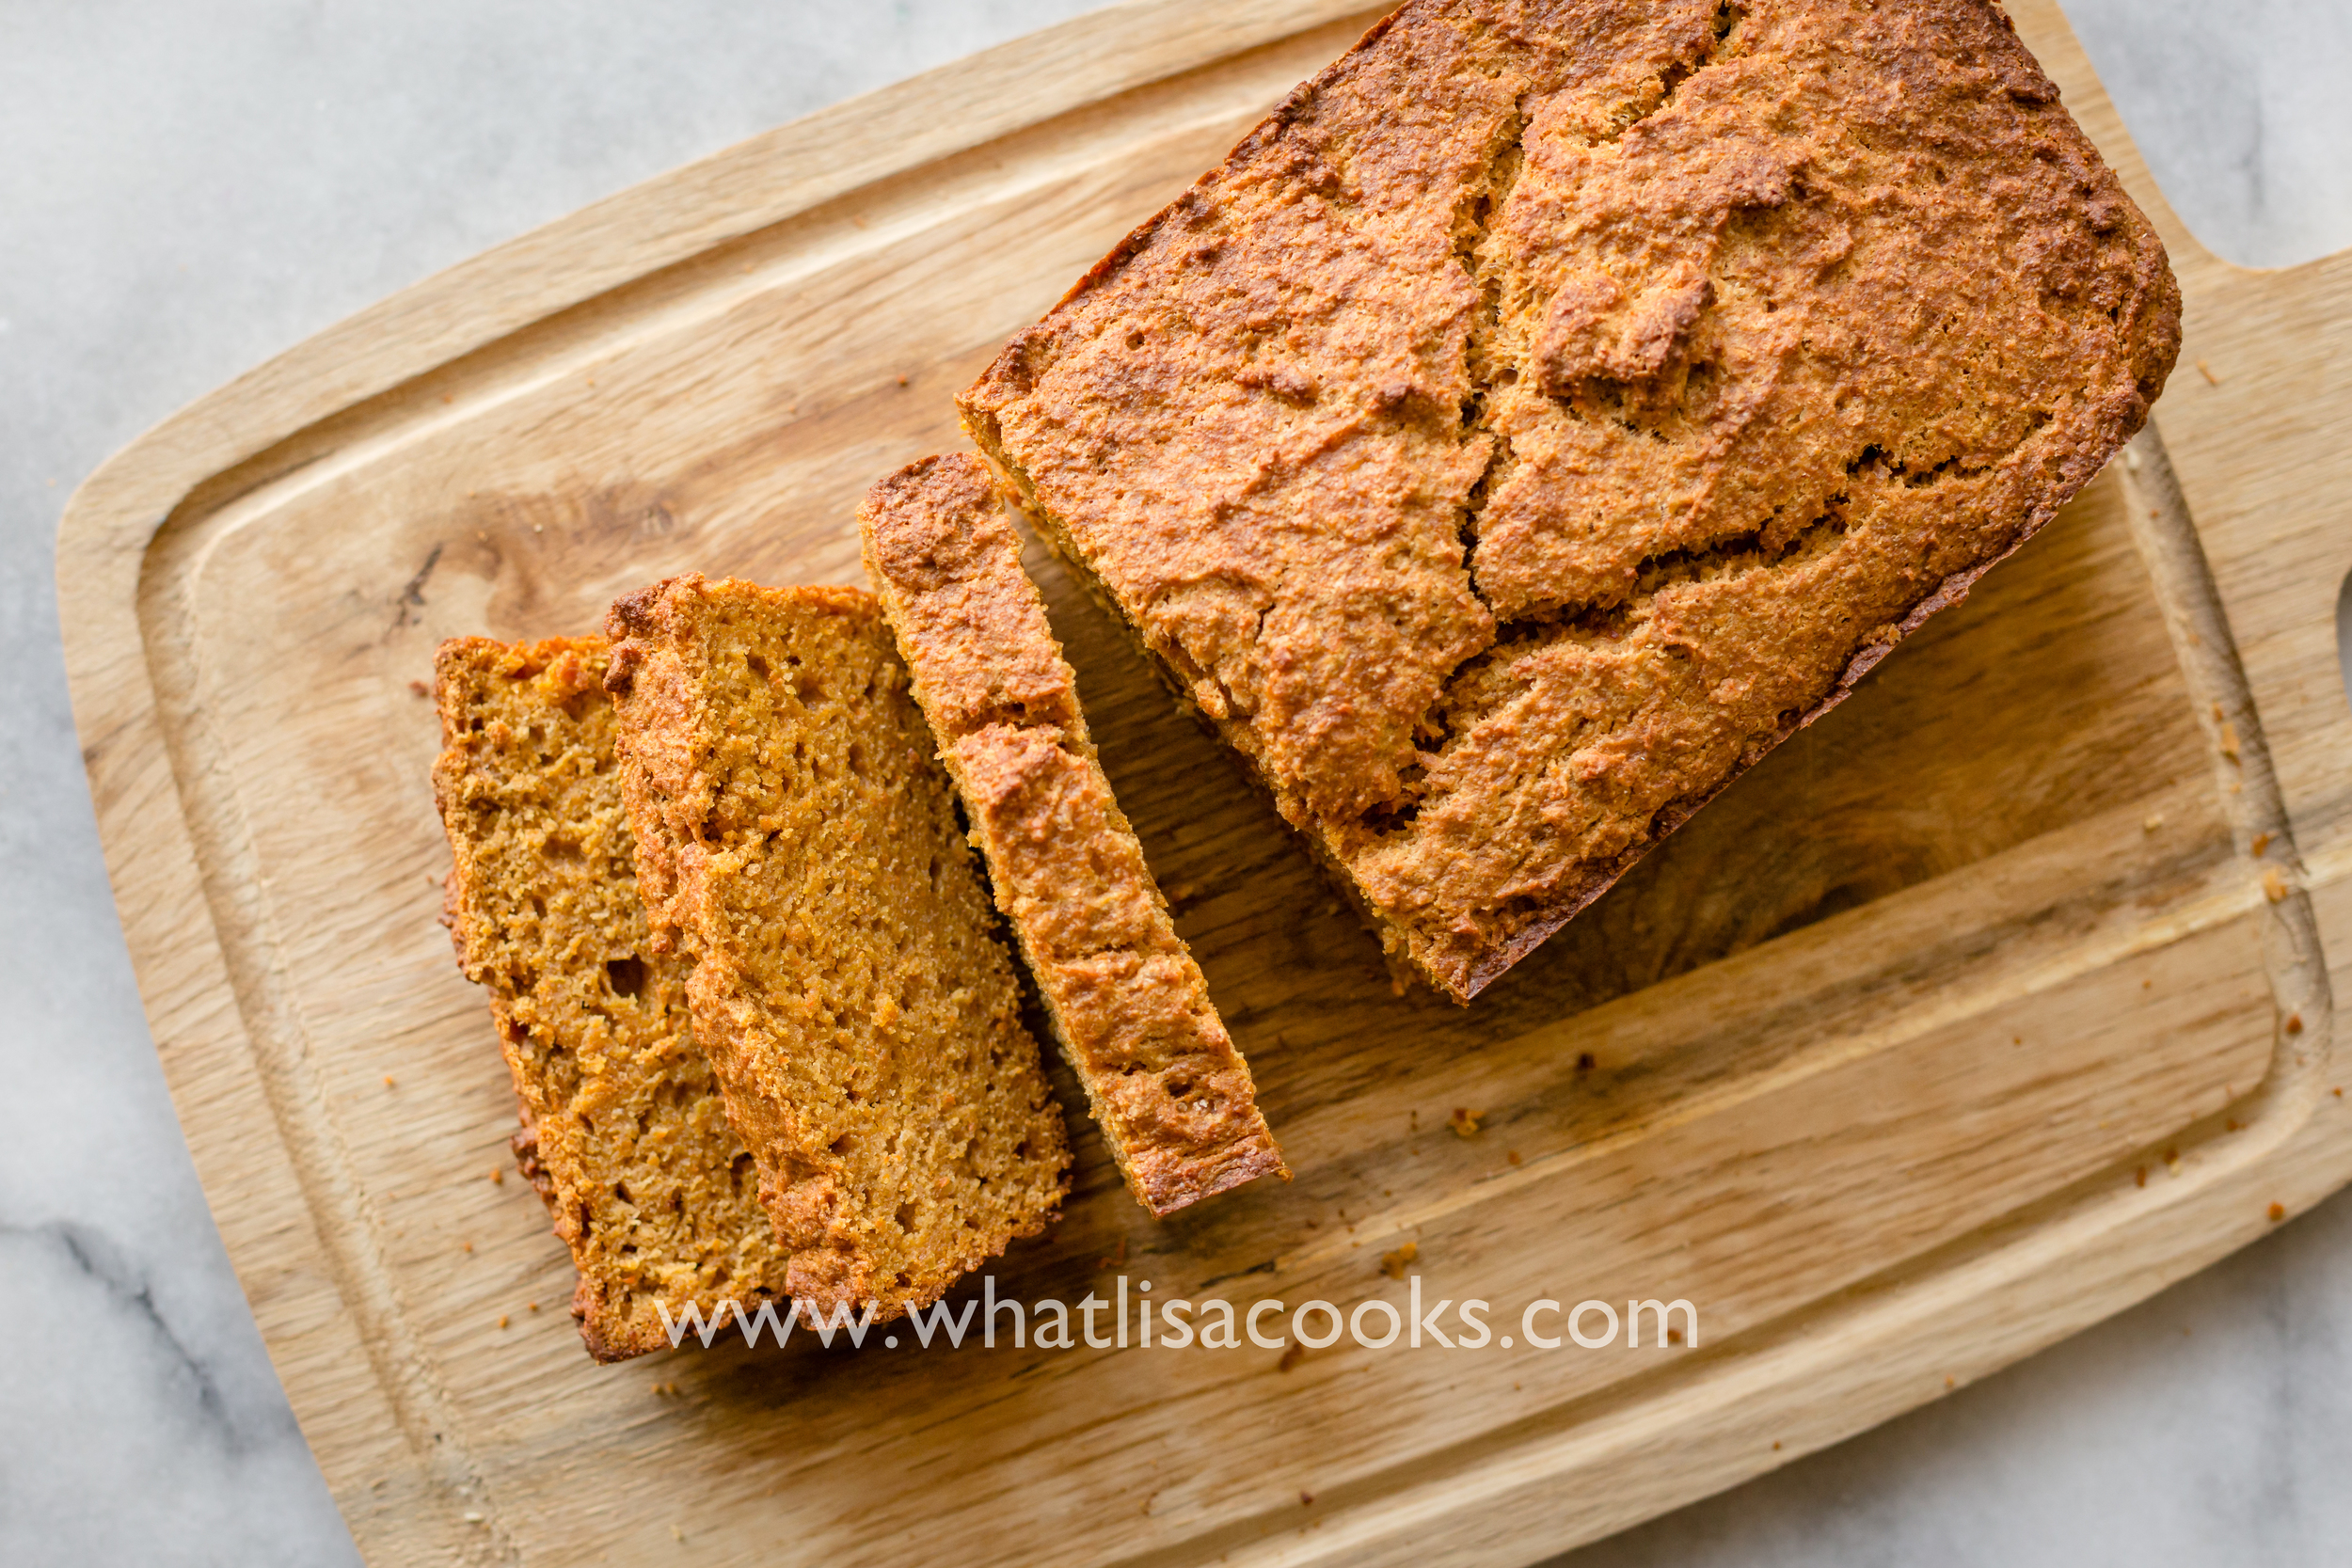
Carrot Apple Bread and Pumpkin Muffins
This. Is. Easy.
It's the perfect balance of hearty and sweet, with a little tang from plain yogurt. It's moist in the middle, just a little chewy and just a little crumbly, with a nice crunch of crust on the top. Spread a hot slice with some butter, or a little cream cheese, and I think you've got breakfast or snack time perfection.
What I have for you is a basic master recipe that can be used to make any number of flavors of quick bread. You can turn this into a super quick zucchini bread, banana bread, pumpkin bread, apple bread, carrot bread, or whatever else you like. I've tried it with all of those, and a number of combinations. I LOVE the combinations. I've made apple + carrot, carrot + pear, zucchini + banana, apple + carrot + chocolate chip. The combination of a little fruit and a little veggie gives a great flavor and just the right amount of sweetness. See the variations below for some suggestions of flavor combinations.
This is not a super sweet loaf, because that's how I like it. If you like your breads to be more sweet, then you'll want to increase the honey or add a little sugar (I included a bit of brown sugar in the ingredients as optional - read my note about it).
I recommend you read all the way through before starting. This is very easy, but the technique is a little different than what you are used to, so you want to read the directions before you just start tossing stuff in a bowl. This is still a basic "mix your wet, then mix your dry, the combine the two" type of situation, but the way you mix the wet and the way you combine are a little different.
Ingredients: (in the order in which I add them)

Carrots & Pears
1/2 cup honey
1/4 cup plain Greek yogurt (I use whole milk yogurt. Sour cream will work too)
Approximately 1 cup pureed fruit and/or veggies (apple, banana, carrot, zucchini, pumpkin, etc.). Or enough whole fruit & veg, roughly chopped, to make about a cup pureed. (see notes & variations below)
1/2 cup (1 stick) salted butter
1 egg
1 teaspoon vanilla
optional: 1/4 cup brown sugar (see notes)
1-2 teaspoons cinnamon (see notes & variations)
2 cups whole wheat flour
1 1/2 teaspoons baking powder
1 teaspoon salt
Oil spray or butter for the baking pan.
optional: up to a cup of chopped nuts, raisins, chopped fruit, or even chocolate chips!
Recipe makes 1 regular loaf, or 3 mini loaves, or 12 standard size muffins, or about 3 dozen mini muffins. I don't recommend doubling this with the blender method, the blender would be too full and it won't mix properly. But it's so fast and easy to mix up that making several at a time is no problem. I made 3 different batches in less than 15 minutes.
Directions:
Preheat oven to 350, or 300 convection. Grease a loaf pan or a muffin pan. (Rub it with a bit of butter, or if you're in a hurry like me just hit it with a little spray oil. I use a coconut oil spray that I get at Trader Joe's.)
Mix together the "wet" ingredients:
In your blender, put honey, yogurt, and fruit and veggies. Pulse the blender until the fruit and veggies are mostly pureed and well blended. Check your quantity - if you are not at 2 cups, you can add a little more fruit and puree some more.
Add butter, egg, vanilla, cinnamon, and sugar if you are using it. Turn on blender to mix at a medium speed until the butter is blended in. This should only take a few seconds, unless your butter is super hard. Pulse it a few times, check to make sure the butter isn't still in a chunk. If you still have some big chunks of butter, then puree a bit more.
Mix together the "dry" ingredients:
In a separate bowl, combine flour, salt, and baking powder.

Combine wet and dry.
Method 1: all in the blender. You can do this all in the blender if you have a high powered blender. Just dump the flour mixture in, put the lid on tight, and turn it on at a high setting. On a Vitamix - this would be variable 9 or 10 - turn the dial to 9 or 10 and then pulse it on and off (don't start on low and turn it up, just start it on high). That will suck some of the flour down to the bottom. Then get in there with a spatula or spoon and stir a little, pulse again, stir a little. You are just trying to get the dry just mixed with the wet so there are no obvious areas of dry flour left. Don't overmix, you just want the flour moistened.
Method 2: in a bowl. You can also do this step in a bowl - just pour your wet mixture in the bowl with the dry, and gently stir until all the flour is moistened.
It should be a fairly thick batter. Pureed raw fruit will still release more moisture when it bakes, so you want to start out with a fairly thick batter in order to have a finished baked good that's not too moist. But if you think it really is too dry to mix together without having to work it too hard, then add a little more moisture. You can add up to a quarter cup of milk, or applesauce, or yogurt.
If you are adding any chopped nuts or fruit or chocolate chips, you will want to do this last step in a bowl. Pour the wet mixture over the dry, add your nuts or chocolate chips, and fold it all together until combined.
Then dump it in your greased loaf pan, or divide into muffin pans, and bake. I've been using this for mini muffins, and using a small cookie scoop to make it quick and even.
Baking times:
(approximate, will vary depending on your oven):
Full size loaf: 1 hour
Mini loaves: 30 minutes
Full size muffins: 25 minutes
Mini muffins: 15 minutes
Notes:
This is not a very sweet recipe. I put a 1/4 cup of brown sugar in there as optional - if you like your breads on the sweeter side, you'll want to add this. Or if you are starting with just veggies that aren't very sweet (like zucchini, or pumpkin), then you'll probably want it. But if you are using super ripe bananas that are already very sweet, or sweet applesauce, then I don't think you need it. If you are adding chocolate chips, then you probably don't need it.
If you are starting with already pureed fruit, then just measure 1 cup and add it to the rest of the wet ingredients and puree.
If you are starting with whole fruit and veggies, you need to estimate what will be enough to total no more than 2 cups when blended with the yogurt and honey. Start with a little, puree, and read the measurement on the side of the blender, then add more if you need to.
If you're worried about pureeing all your fruit and having no actual texture or chunks of fruit, just dice or grate a little and fold that in at the end, the same time as when you would add any nuts or chocolate chips. Remember it will release moisture though, so cut back on your puree just a tiny bit.
I have made this with all purpose white flour. It works. Personally I think the whole wheat version tastes better, it gives it a heartiness that you don't get from white flour, and I think the texture is nicer. But if you want to do it with white flour, go for it. You might want to decrease your wet ingredients just a bit, because the white flour doesn't seem to absorb as much liquid. I have also done half white and half wheat, and that works well.
I have not yet tried it with a gluten free flour, but I will soon. If you try it, let me know.
You could totally skip the yogurt and add an extra 1/4 cup of fruit puree instead (or an extra banana). I just like the little bit of tang that it gives, I think it rounds out the sweet fruit flavors really nicely. It seems to also somehow help contribute to a little crunch in the crust. You can also replace the yogurt with sour cream.
You can do this with less butter, or skip the butter and add more yogurt or some applesauce.

Top: banana; Middle: zucchini; Bottom: apple + carrot
Variations:
Quantities of fruit and veggies here are approximate and will vary depending on size. You still want to follow the rule of no more than 2 cups total when pureed with the honey and yogurt. I want you to experiment! Tell me what combinations you try!
Banana Bread: 3 very ripe bananas, 1 teaspoon cinnamon.
Pumpkin Bread: 1 1/4 cups organic canned pureed pumpkin, replace the cinnamon with 2 teaspoons pumpkin pie spice, replace the honey with real maple syrup, and add 1/4 cup brown sugar.
Apple Bread: 2 medium tart & juicy apples (I've been using Jonagold), 2 teaspoons cinnamon. I think this one is my favorite. It tastes like pie.
Zucchini Bread: 1 medium zucchini, just 1 teaspoon cinnamon, and add 1/4 cup brown sugar.
Apple + Carrot Bread: 1 medium apple, 2 medium carrots, 2 teaspoons cinnamon.
Carrot + Pear Bread: 1 medium pear, 2 medium carrots, 1 teaspoon cinnamon.
Banana chocolate chip: 3 very ripe bananas, 2/3 cup mini chocolate chips, no cinnamon (I don't like cinnamon and chocolate together in this kind of thing).
The possible combinations are endless! We made one this week with carrot, pear, apple, and chocolate chips.

Pumpkin Muffin with butter.
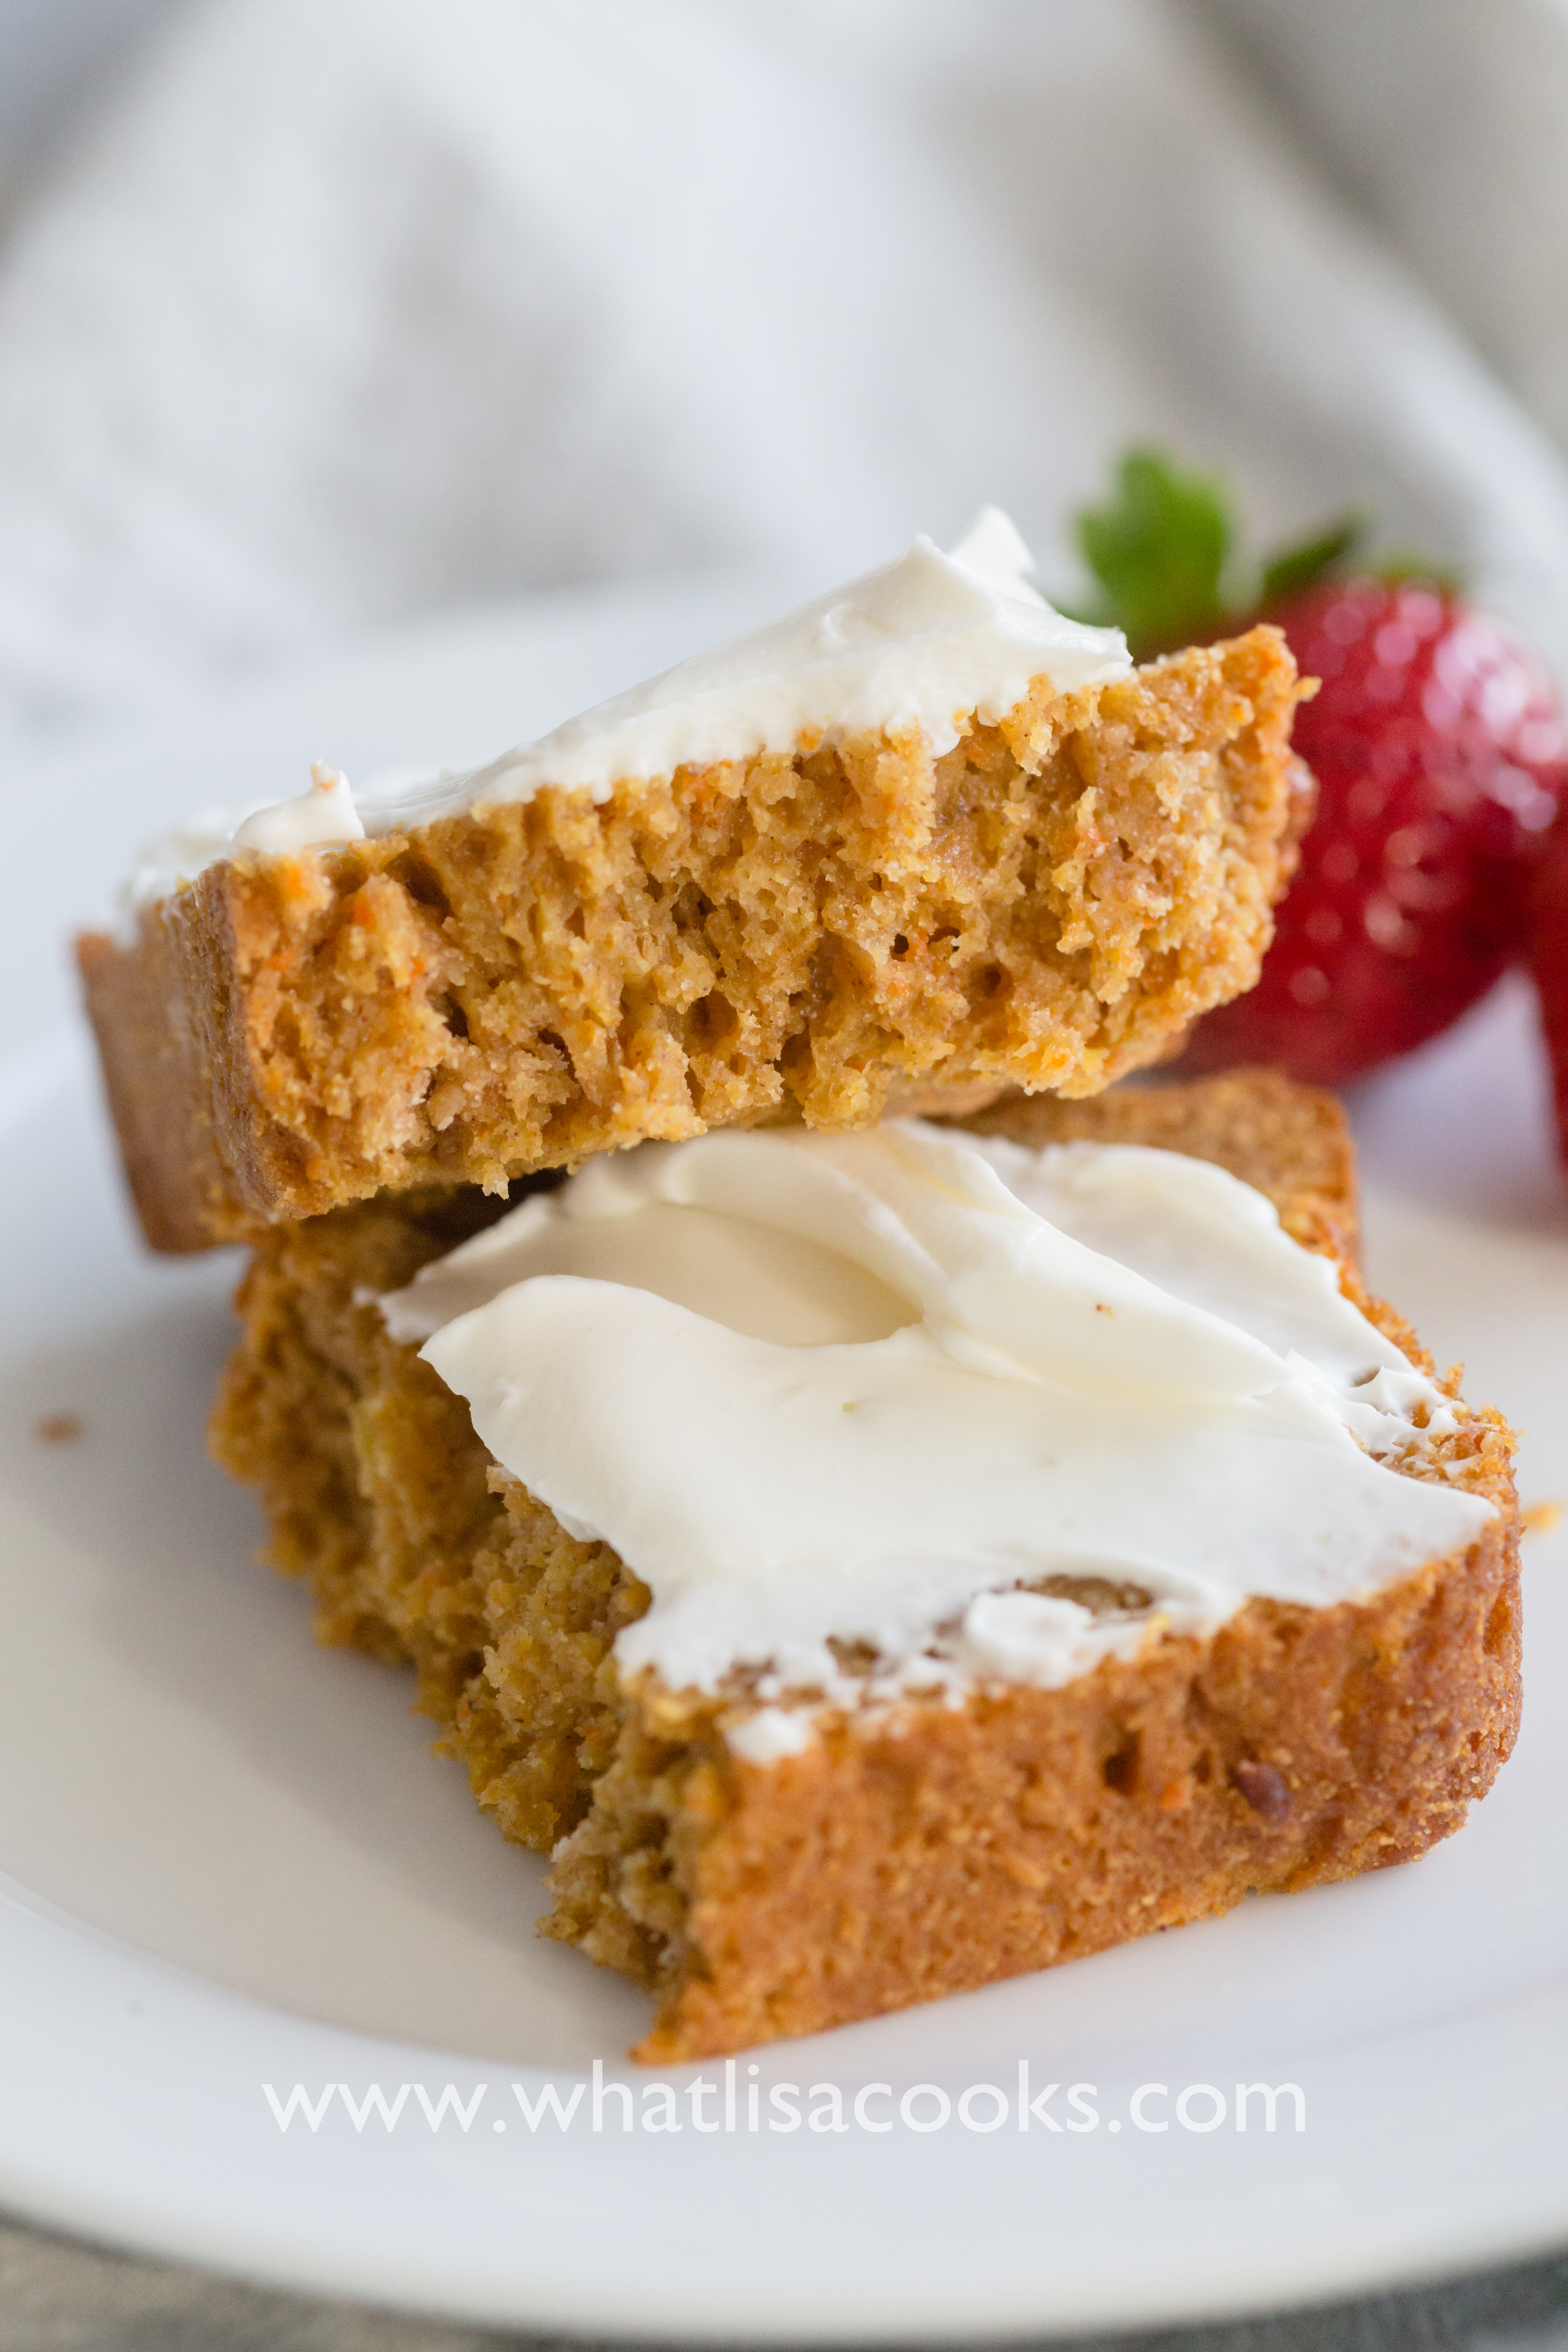
Carrot + Apple bread, with cream cheese.

Banana Chocolate Chip Blender Muffins
I think I need to just bow out while I'm ahead with this one - I will never try another muffin recipe again. My children have declared these to be the best muffins they've ever had. And if you knew my kids, you'd know that they are pretty tough little food critics (my fault, I'm sure).
I've made a couple batches of these over the last week, and they are inhaling them as fast as I can bake them. But it's totally ok, because these are super easy to make, and relatively healthy, as far as things containing chocolate chips go. We're talking from starting to in the oven in like 5 minutes.

You read that title right - blender muffins. Absorb that for a sec....
I think I need to just bow out while I'm ahead with this one - I will never try another muffin recipe again. My children have declared these to be the best muffins they've ever had. And if you knew my kids, you'd know that they are pretty tough little food critics (my fault, I'm sure).

I've made a couple batches of these over the last week, and they are inhaling them as fast as I can bake them. But it's totally ok, because these are super easy to make, and relatively healthy (as far as things containing chocolate chips go), and fast! We're talking from starting mixing, to in the oven, in like 5 minutes.
They are fast to make because they are mostly made in the blender!
I know it's an unconventional way to make this type of recipe, but it totally works. I love baking stuff like this for my kids, but all the steps and multiple bowls, and waiting for butter to come to room temperature so you can slowly cream it with sugar.... it was kiiillllling me. I had to find an easier way. I am an instant gratification kind of cook. I like to whip it out and move on to the next thing. So this is just my type of recipe.
Also the amount of sugar in so many recipes is just crazy! We're not making cake folks, we're making muffins. If I'm going to put 2 cups of white sugar in something, then let's just be honest and call it cake. I love cake, but I'm not feeding it to my kids every day. With super sweet ripe bananas and some honey, all that sugar is just not necessary.
I think these work best as mini muffins, they are just a perfect two bite size, for a little sweet treat or snack. But full size muffins work great too. The whole wheat flour makes them feel really filling, and the little bit of yogurt adds moisture and just a hint of tang that balances out the sweetness really nicely. You can swap out sour cream if you don't have yogurt. Or add more banana.

Ingredients:
2 cups whole wheat flour
3 very ripe bananas
1/2 cup honey
1/2 cup (1 stick) butter
1/4 cup plain yogurt (I use whole milk Greek yogurt)
1 egg
1 1/2 teaspoons baking powder
1 teaspoon vanilla
1 teaspoon salt
2/3 cup mini chocolate chips
Directions:
Preheat oven to 350, or 300 convection. Grease muffin pans (we prefer mini muffin pans), or if you are using paper or silicone liners then just set them out.
In the container of your high powered blender, put bananas (broken into a couple of pieces), cold butter (cut up a little), honey, yogurt, vanilla, and egg.
Start out pulsing the blender to get it started. Stop and push the contents down if you need to. Pulse some more. Once the butter is starting to break up and the ingredients blend together, turn it up gradually. Blend just until everything is well mixed.
In a bowl, combine flour, baking powder, salt, and chocolate chips.
Pour the wet mixture over the dry and fold together gently just until all the flour is moistened.
Note: if you don't have a high powered blender, you can still make these! You'll just do it the old school way - let the butter soften, cream together with the honey, mix in the other wet ingredients (including mashed bananas), and then mix with the dry ingredients. They will still taste awesome, it will just take a little longer. So get yourself a blender, ok?
For mini muffins, I like to use a small cookie scoop to fill the muffin cups. I get the perfect amount every time and all the muffins end up evenly sized with no overflow.
Bake: 20 minutes for mini muffins. 30-40 minutes for regular muffins (depends on how big your cups are and how full you fill them). 1 hour for a loaf of bread.
If you're of the banana nut persuasion, you could totally add some chopped nuts to these. We just don't believe in mixing our nuts with our baked goods in this house. ;-)
Also, a hint: this recipe totally works with other mashed/pureed fruits too. I'm working an upcoming post about that, with a master quick bread recipe. But if you can't wait - just use this recipe, and swap out the bananas for any other pureed fruit, just make sure that it adds up to no more than 1 1/4 cups of puree, less if you're using something super wet (like apples). Leave out the chocolate chips and add nuts or raisins, and add a little spice.
Just a few ideas:
pumpkin muffins: pureed pumpkin, swap maple syrup for the honey, and add 2 teaspoons pumpkin pie spice
apple pie muffins: puree a couple of tart apples, and add 2 teaspoons cinnamon
carrot muffin: puree a couple of carrots & a zucchini, and add 1 teaspoon cinnamon
try other combinations - banana + zucchini, pear + carrot, apple + carrot
(Links contained here are affiliate links. If you purchase something from a product link I've provided, I get a small commission. It doesn't cost you any more, but it helps me keep the lights on here.)

How to Make Almond Milk
Do you want to know how to make your own almond milk? Please say yes - you won't regret it - because this is too easy, and it tastes so good!
I've been making my own almond milk for a while now. I love having it in my morning coffee - it gives the milkiness I like from putting milk in my coffee, and just the right amount of sweetness, but somehow seems lighter on the stomach. I also love using it in my kid's smoothies.
When I made it the first time I was completely blown away at how easy it was. I couldn't believe I'd been holding off on making nut milk, for some reason thinking it would be too much work. So wrong!
As with anything I do, of course I have to tinker with it. I might start by following somebody else's recipe, but I tweak and change until I've figured out the way that works for me. You can google around and you'll find plenty of recipes for homemade almond milk, the variety is quite surprising actually, given how simple it is. So what we have here is the method I've been using that's working well for me. One of my goals when messing with a recipe is to figure out how much I can simplify the process, while still getting the best possible flavor. I try to cut out any unnecessary steps and just get it down to the most efficient process possible. I've also experimented with different amounts of water, and different combinations of sweetness and flavor. One of the things I have learned for sure is that having a great blender makes a HUGE difference in how creamy your milk will be. I use my Vitamix to make my almond milk. Once you try homemade almond milk made in a high powered blender like this, you will never want to go back to store bought.
So now I'm sharing with you my recipe - I think it's about as easy as you can get, and the flavor is great.

What you'll need to make about a quart of almond milk:
1 cup of raw almonds
Dates, or other sweetener (I'm using 2 medjool dates. If you use smaller dates you might want more. Or you can use honey, or any other natural sweetener you like)
About 4 cups of water, maybe slightly more
Other flavorings as desired (vanilla, cinnamon)
A high powered blender
A nut milk bag or some cheesecloth and a strainer
A glass bottle or other storage container.
Note that I have tried doubling this to make more than a quart at a time, but my blender doesn't quite hold enough to allow for the doubled recipe and still have room to really blend it up. So one quart at a time it is. But it's so easy, that it's really not a problem to do this a couple times a week.
How to make almond milk:

Measure out 1 cup of almonds. Put them directly in your blender container and fill with water up to the 5 cup line. This will end up being just a little over 4 cups of water.

Let soak overnight. The next day the almonds will have swelled a little and the water will look a little murky. Some people strain them at this point and start over with fresh water. I've tried it both ways and I think switching the water is not necessary. It maybe gets you a slightly whiter milk, but the flavor is the same so why not skip that step. This is why I just start out soaking right in my blender - no need to dirty another vessel, no need to drain or do anything else at this point.
Drop in your dates and/or any other sweetener or flavoring you like. Some people like vanilla, some also add a little cinnamon. Some do honey instead. It's really all about personal taste and I've found that the dates alone give me just enough of a clean sweetness, so I like keeping it simple. Don't forget to take the pits out of the dates!
Blend it all up on high power. I like to let it go for a minute or two, to really get the almonds as pulverized as possible and get every bit of flavor out of them.

When it's as blended as you think you can get it, get your straining setup ready. I bought a nut milk bag which makes it so easy. I just set my bag down in a bowl.
But before I got the bag I would set a strainer over the bowl and line it with a couple layers of cheesecloth. Both methods work just as good, the nut milk bag just makes the process a little easier and faster.

Pour everything from your blender into your strainer.
Gather it up and let it start to drain.

I hang my bag from a cabinet knob, so it easily drains right into my bowl. With the nut milk bag you can let it drain for just a few minutes and then squeeze the rest out. The mesh is fine enough that you can squeeze pretty hard and none of the pulp gets through. This satisfies my need for instant gratification - I can't stand waiting for it to strain.
If you're using a strainer and cheesecloth you'll want to just walk away and let it drip for a while, maybe a couple hours - if you do too much squeezing with the cheesecloth you will start to get some pulp coming through.
And that's it! Pour milk into a jar, chill, and enjoy! The first time I made it I couldn't believe how easy it was, and also how creamy and milky it was. If you like store bought almond milk, you're going to absolutely love this! It will separate as it sits in the fridge, so you'll just need to give it a good shake before you pour some.

Homemade "instant" oatmeal
It totally kills me that my kids prefer those instant oatmeal packets over real cooked oats. But lately I'm really trying to focus on choosing my battles, and trying to force people to learn to like oatmeal with some texture over the creamy, mushy stuff, just seems like a fight that's not worth fighting at this stage, especially on an already manic school day morning. But instant oatmeal packets have all kinds of strikes against them, and I just can't bring myself to buy them any more. The artificial flavorings in so many of the mainstream brands, the amount of sugar, and the cost - with 4 kids eating two packets each, we would use whole box at one meal. I have bought some organic ones before, which are a little better, but they still have so much sugar and are even more expensive. I had seen several mentions on various food blogs and pinterest boards about making your own, so I thought I'd give it a try.
It totally kills me that my kids prefer those instant oatmeal packets over real cooked oats. But lately I'm really trying to focus on choosing my battles, and trying to force people to learn to like oatmeal with some texture over the creamy, mushy stuff, just seems like a fight that's not worth fighting at this stage, especially on an already manic school day morning. But instant oatmeal packets have all kinds of strikes against them, and I just can't bring myself to buy them any more. The artificial flavorings in so many of the mainstream brands, the amount of sugar, and the cost - with 4 kids eating two packets each, we would use whole box at one meal. I have bought some organic ones before, which are a little better, but they still have so much sugar and are even more expensive. I had seen several mentions on various food blogs and pinterest boards about making your own, so I thought I'd give it a try.
There are lots of different versions of recipes out there, some of which are no healthier than the store-bought ones, calling for things like non-dairy creamer and way too much sugar. But I did find a few that I liked. I can't seem to find the exact page that I got the final recipe from that I ended up using, I'll certainly link back to it when I come across it again. But I don't think it was a totally original recipe anyway, as so many of them have the same basic proportions in common.
Homemade Instant Oatmeal
- 10 cups of quick cooking oats (I use this brand - 10 cups was almost the whole bag, so I think you could use the whole bag and be just fine)
- 1 teaspoon salt
- 1 cup brown sugar (I actually substituted coconut sugar because that was what I had, and I really like the flavor). Use more sugar if you know you want it sweeter, but I like the idea of keeping it less sweet to start, and then I can add a little maple syrup if someone really wants sweeter.
- 2 teaspoons cinnamon
- 1 cup powdered milk (I use this organic one).
Here's the key that all the good recipes seem to have in common: some of the oats need to be blended and broken down - that is what gives the softer consistency. So, put 4 cups of the oats in your blender or food processor and blend until almost like flour. Then just mix all the ingredients together. That's all.
I think you could easily go ahead and add in some chopped up dried apples or apricots, or nuts, at this stage as well. Given how fast I think we'll go through it, I think it would keep just fine. Maple sugar would probably be really good in this, or vanilla sugar too.
Most of the other recipes out there have you portion it out in 1/2 cup servings in individual snack bags. But I thought that seemed like way too much waste, so I just put it all in a couple of big containers and I measure it out when I am ready to serve it. I also thought for home use you could just as easily measure out your portions into pint sized jam jars, and then just add your water and serve right out the jars. For eating right away, using equal parts water to the dry mix seems about right, which I think would be the same as the packets. But I've noticed that instant oatmeal tends to get thicker as it sits, so if making ahead for lunch I would add a little extra water, so it's not too thick by lunch time. Maybe 3/4 water to 1/2 cup dry mix. I also like to add just a little cream or half & half to the finished oatmeal.
I made this last week and my kids ate it up for breakfast. And today I used it for breakfast for lunch (which my kids love). I measured the mixture out the night before, and just added hot water this morning when I was ready to pack up the lunches.

Enjoy!
Basic recipe: pancakes and waffles
Add to the list of things that I can't for the life of me figure out why I ever bought in a box: pancakes.
Pancakes and waffles are so easy to make from scratch. Call me lazy, but I love a recipe that's versatile and adaptable to a number of uses. I like to think about it once and use it a lot - and this one definitely fits that bill.
Add to the list of things that I can't for the life of me figure out why I ever bought in a box: pancakes.
Pancakes and waffles are so easy to make from scratch.

Call me lazy, but I love a recipe that's versatile and adaptable to a number of uses. I like to think about it once and use it a lot - and this one definitely fits that bill.
I started with the basic pancake recipe from my favorite cookbook Mark Bittman's "How To Cook Everything", and I have adapted slightly from there to suit our needs. I like to use whole wheat flour to make them healthier, and real maple syrup for a more natural sweetener. My pancake recipe is a little sweeter than most, because I personally like for the pancake or waffle to taste really good without the need for syrup. I make a lot extra and keep them in the freezer to pop out for my kids for a weekday breakfast or lunch, and it's just quicker and easier if they already taste great without having to get out the syrup. But if you're going to only eat these with a generous pouring of syrup, then you'll probably want to cut back on the sweetener in the recipe.
Basic Pancake Recipe:
- 4 cups flour (whole wheat, or half whole wheat and half white)
- 2 tablespoons baking powder
- 2 teaspoons cinnamon
- 1 teaspoon salt
- 3 cups milk (I use whole milk)
- 3 or 4 eggs - Enough to make about 4 cups of liquid when added to the milk & syrup, depending on the size of your eggs.
- 1/2 cup pure maple syrup (less if you plan on soaking your pancakes with syrup)
- 1/4 cup butter, melted and cooled. (optional, I often leave it out)
- 2 teaspoons vanilla
- butter for your pan
Directions:
Measure all the dry ingredients into a big mixing bowl and stir to combine.
For the liquid ingredients: I fill my big measuring bowl up to 3 cups with milk, then add the syrup and vanilla, then add eggs until it gets to around 4 cups of total liquid ingredients. Then mix all that together with an egg beater until well combined (or you can use a whisk). Then pour into the dry ingredients and stir gently until combined. Try not to mix more than necessary, this will help keep your pancakes nice and light.
For pancakes you want the batter to be pretty thin, they puff up a lot and stay nice and light.
Waffle batter needs to be just slightly thicker, so I use 1/4 cup less liquid if I'm making waffles - either use one less egg, or cut your milk back a little.
Then cook: Pancakes on a hot buttered griddle, or waffles on a buttered nonstick waffle iron.

I like to cook my pancakes in lots of butter, I think it adds that amazing final layer of flavor. Pour our a ladle full of batter onto a well buttered griddle. I have a big double sized cast iron griddle that heats really evenly and works great. And the extra big size is perfect for making a bunch of pancakes at once. If you are going to add extras I like to add it at this stage, when the top of the pancake is still wet. We love to add blueberries, or slices of banana, and mini chocolate chips are a fun little treat too. Then watch for a little browning around the edges and bubbles in the middle, and then flip. Serve hot with hot maple syrup, and we like to have whipped cream on ours too.

For waffles, a good waffle iron makes all the difference. I worked with a cheap one for years and I was amazed at how much better the waffles were with just a new waffle maker. They are light and fluffy on the inside, and lightly crisp on the outside. For a big family like ours, the kind that makes two at a time is a must-have. If you want flavored waffles then mix your extras into the batter. Finely chopped nuts are really great, or a little grated apple.
Notes:
- This is a double recipe because we like a lot extra, but feel free to cut it in half.
- You can use all white flour, all wheat flour, or a mix of both. Or take out a little of the flour and add in some oats, or ground flax, or wheat germ, or oat bran - whatever you like to make them even more healthy
- I've also made these with gluten free flour and they work great. They key to that is to separate the eggs, mix in the yolks with your batter as usual, and then beat the whites until soft peaks and then fold in. The beaten egg white provides the light and airy texture that you miss without the gluten.
- Use less sweetener if you really are going to soak these with syrup.
- I've done this vegan many times and it works great. Just substitute flax + water for the eggs. 1 T ground flax + 3T water, per egg to be replaced. Mix that together and let sit for a minute, then add it just as you would add the eggs.
- You can use brown sugar instead of syrup in the batter.
- When I want to make this more of a 'complete' meal for my kids, with more protein, I'll add a little less liquid and more eggs, or add some protein powder in with the dry mix.
- Options for extra flavorings are pretty limitless. We love blueberry pancakes. Bananas or apples are great too. Finely chopped nuts and a little orange zest are really good in waffles.
- If you want to take the extra time, separating the eggs and whipping up the egg whites is also a great trick to get really light and airy waffles.
- For pancakes, I pour the batter on the greased griddle and then add stuff - a few blueberries, slices of banana or apple, chocolate chips, then flip them.
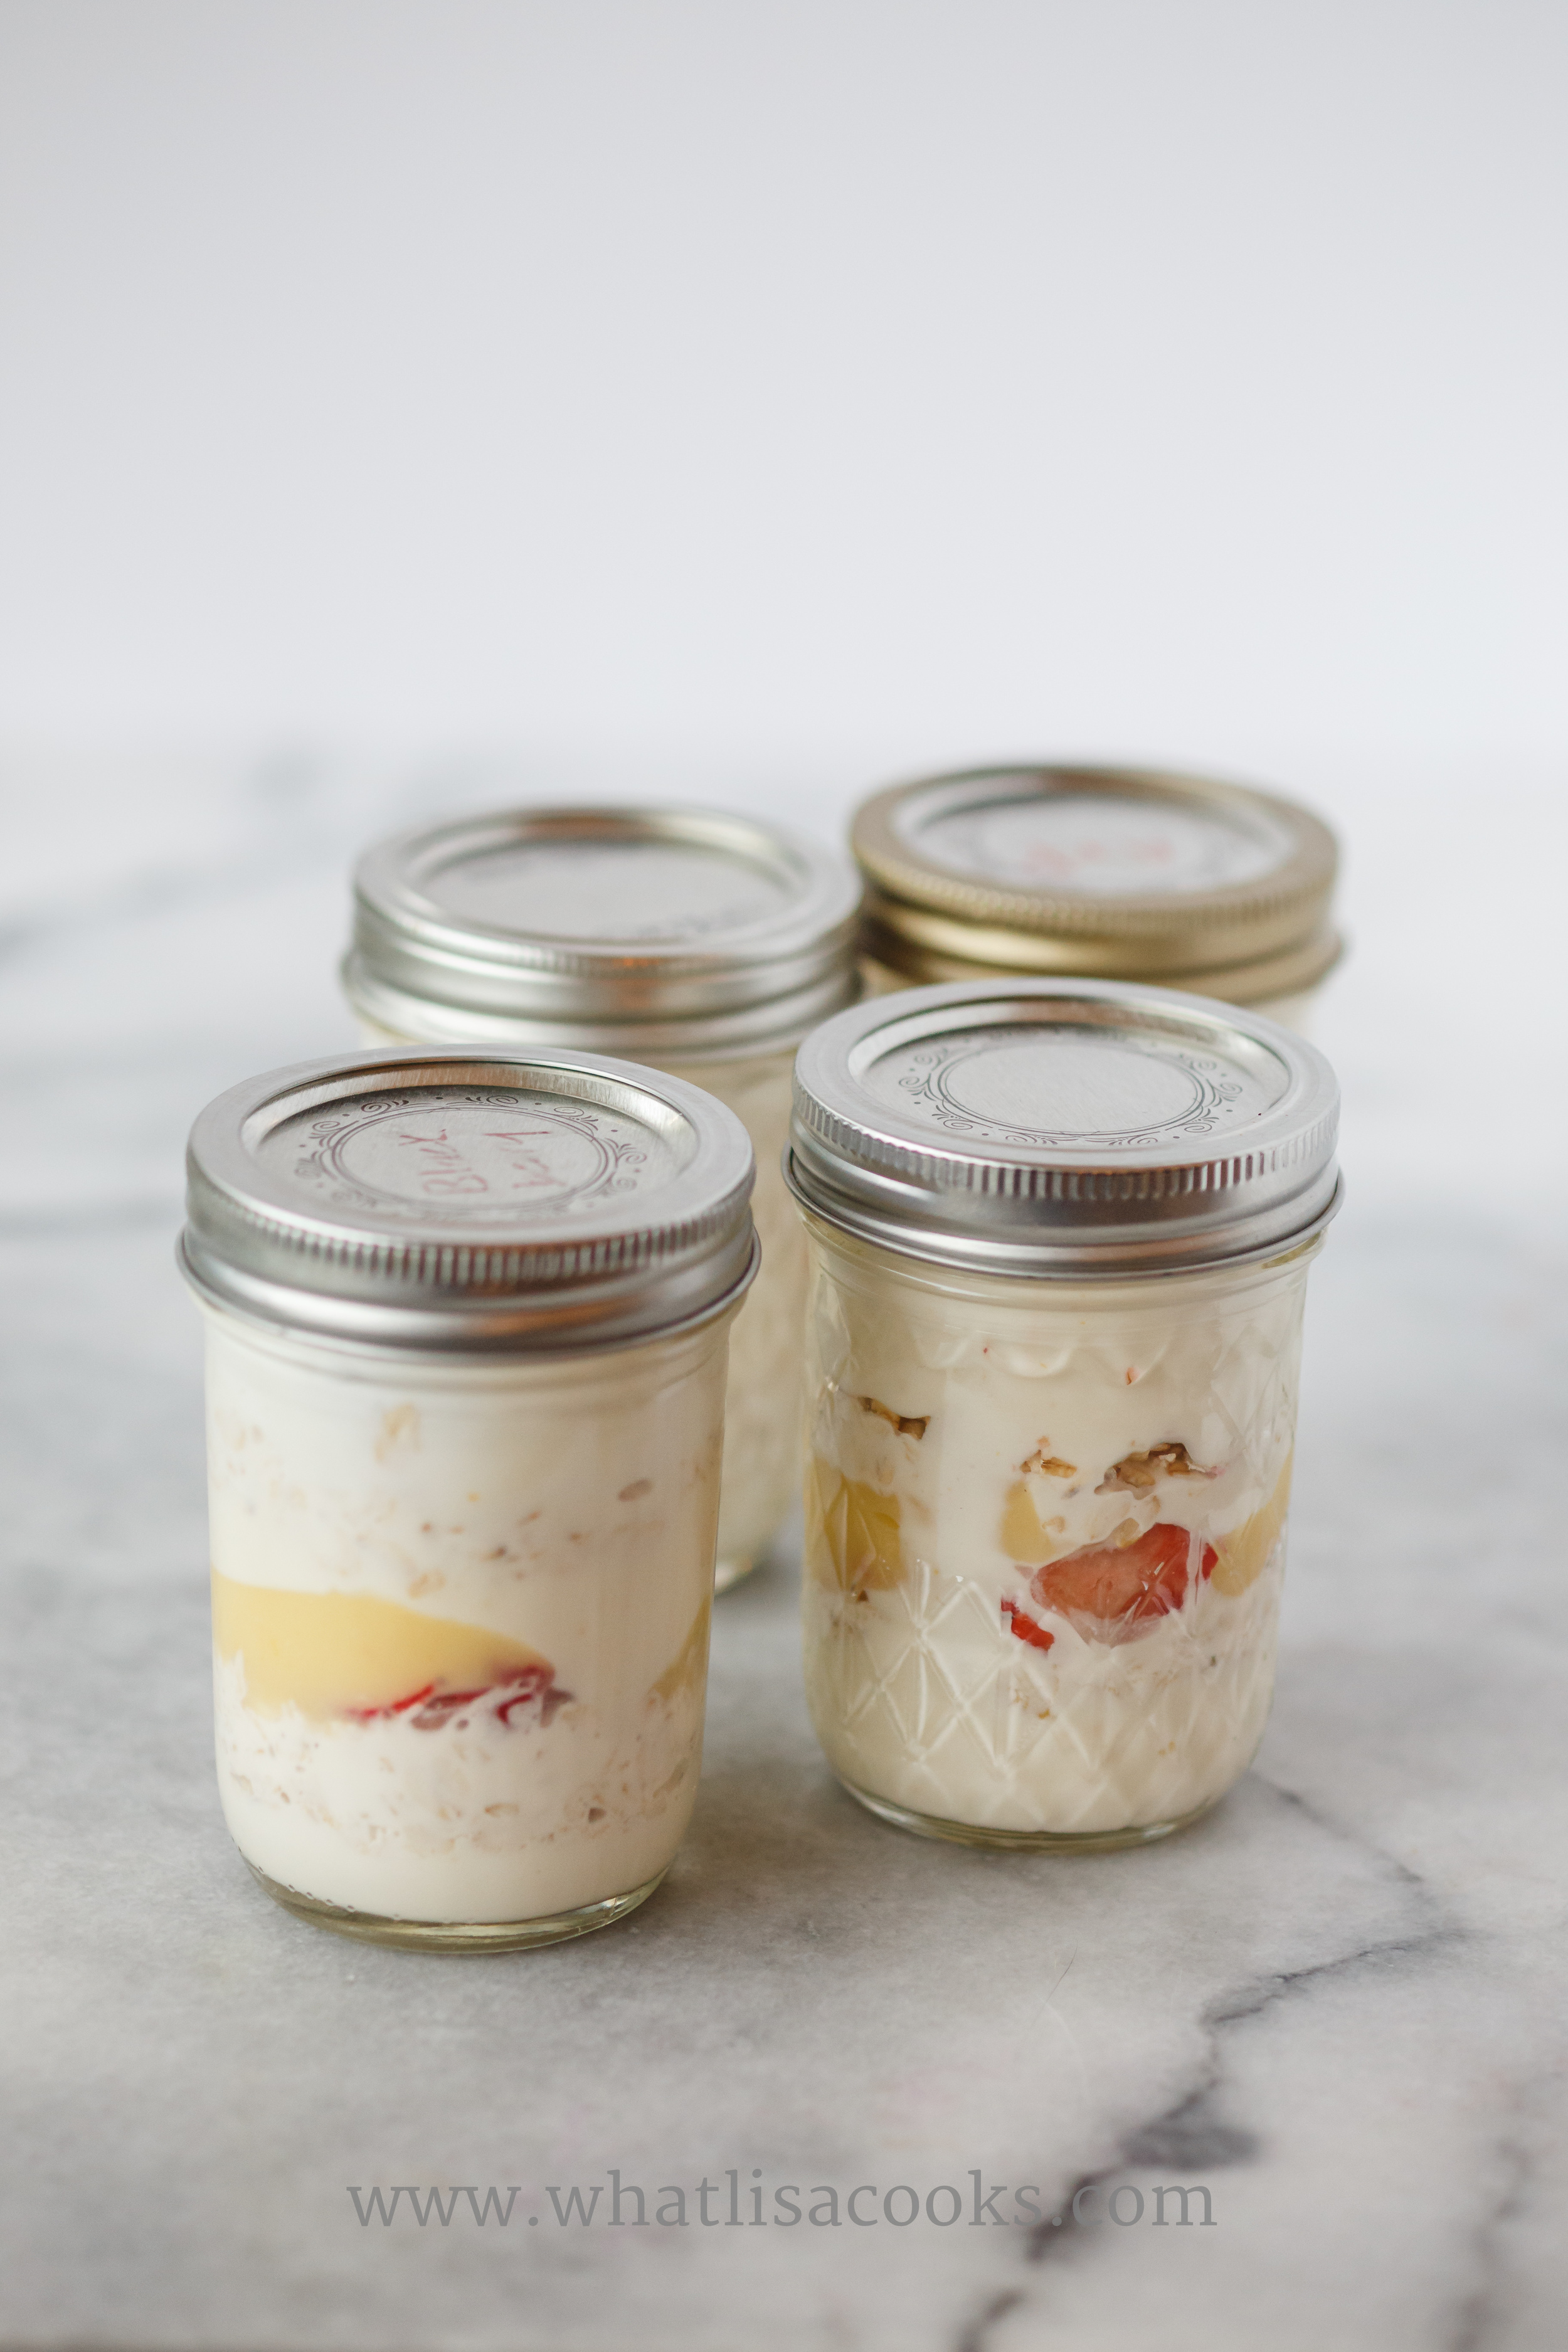
Yogurt Parfaits
I recently wrote about my super picky child, and how she is finally starting to try new foods, now that I have completely given up on pushing her. But we are still in the baby steps phase with that, she certainly has a ways to go before she is eating everything the rest of us eat. So for now, a very large part of her diet is still yogurt. I'm thankful at least that she really loves something that is so healthy, and I can load it up with fruit and oats to really make it an even more complete meal for her.

I recently wrote about my super picky child, and how she is finally starting to try new foods, now that I have completely given up on pushing her. But we are still in the baby steps phase with that, she certainly has a ways to go before she is eating everything the rest of us eat. So for now, a very large part of her diet is still yogurt. I'm thankful at least that she really loves something that is so healthy, and I can load it up with fruit and oats to really make it an even more complete meal for her.
I make plain yogurt, or if I haven't had time, I buy it. She likes her yogurt all dressed up with oats and honey and sometimes some jam or fruit. I recently made lemon curd, so lately that has been her topping of choice, along with a little whipped cream.
It's a fantastic meal for her, but it can be a bit of a mess to get all these things out, so to save myself some time I decided to make her some yogurt parfait's in jam jars, so that she can help herself to one in the fridge whenever she needs a snack. Or they are great for an easy week day breakfast.
These are kind of like a combination of a flavored yogurt + an overnight oats idea.

There's no real recipe here - that's the beauty of it. You just take whatever you would normally put in yogurt or an overnight oats, and layer it. Things like:
- honey
- oats or granola (it will get soft)
- berries
- bananas
- jam
- cream
- dried fruit
- nuts or seeds
For this batch I layered plain yogurt, honey, oats, cream, lemon curd, and strawberries. Just a little bit of each, and then repeat, until the jar is mostly full. Its a good idea to leave a little room for stirring.
Leftover jam jars seem to make the perfect size for a good serving, and I've got tons of them around. But I'm sure you could get creative with other kinds of containers.
Once you've layered everything, just put a lid on and put in the fridge. I think they'll be good for several days, and it will probably very depending on whether you used fresh fruit.
Enjoy!
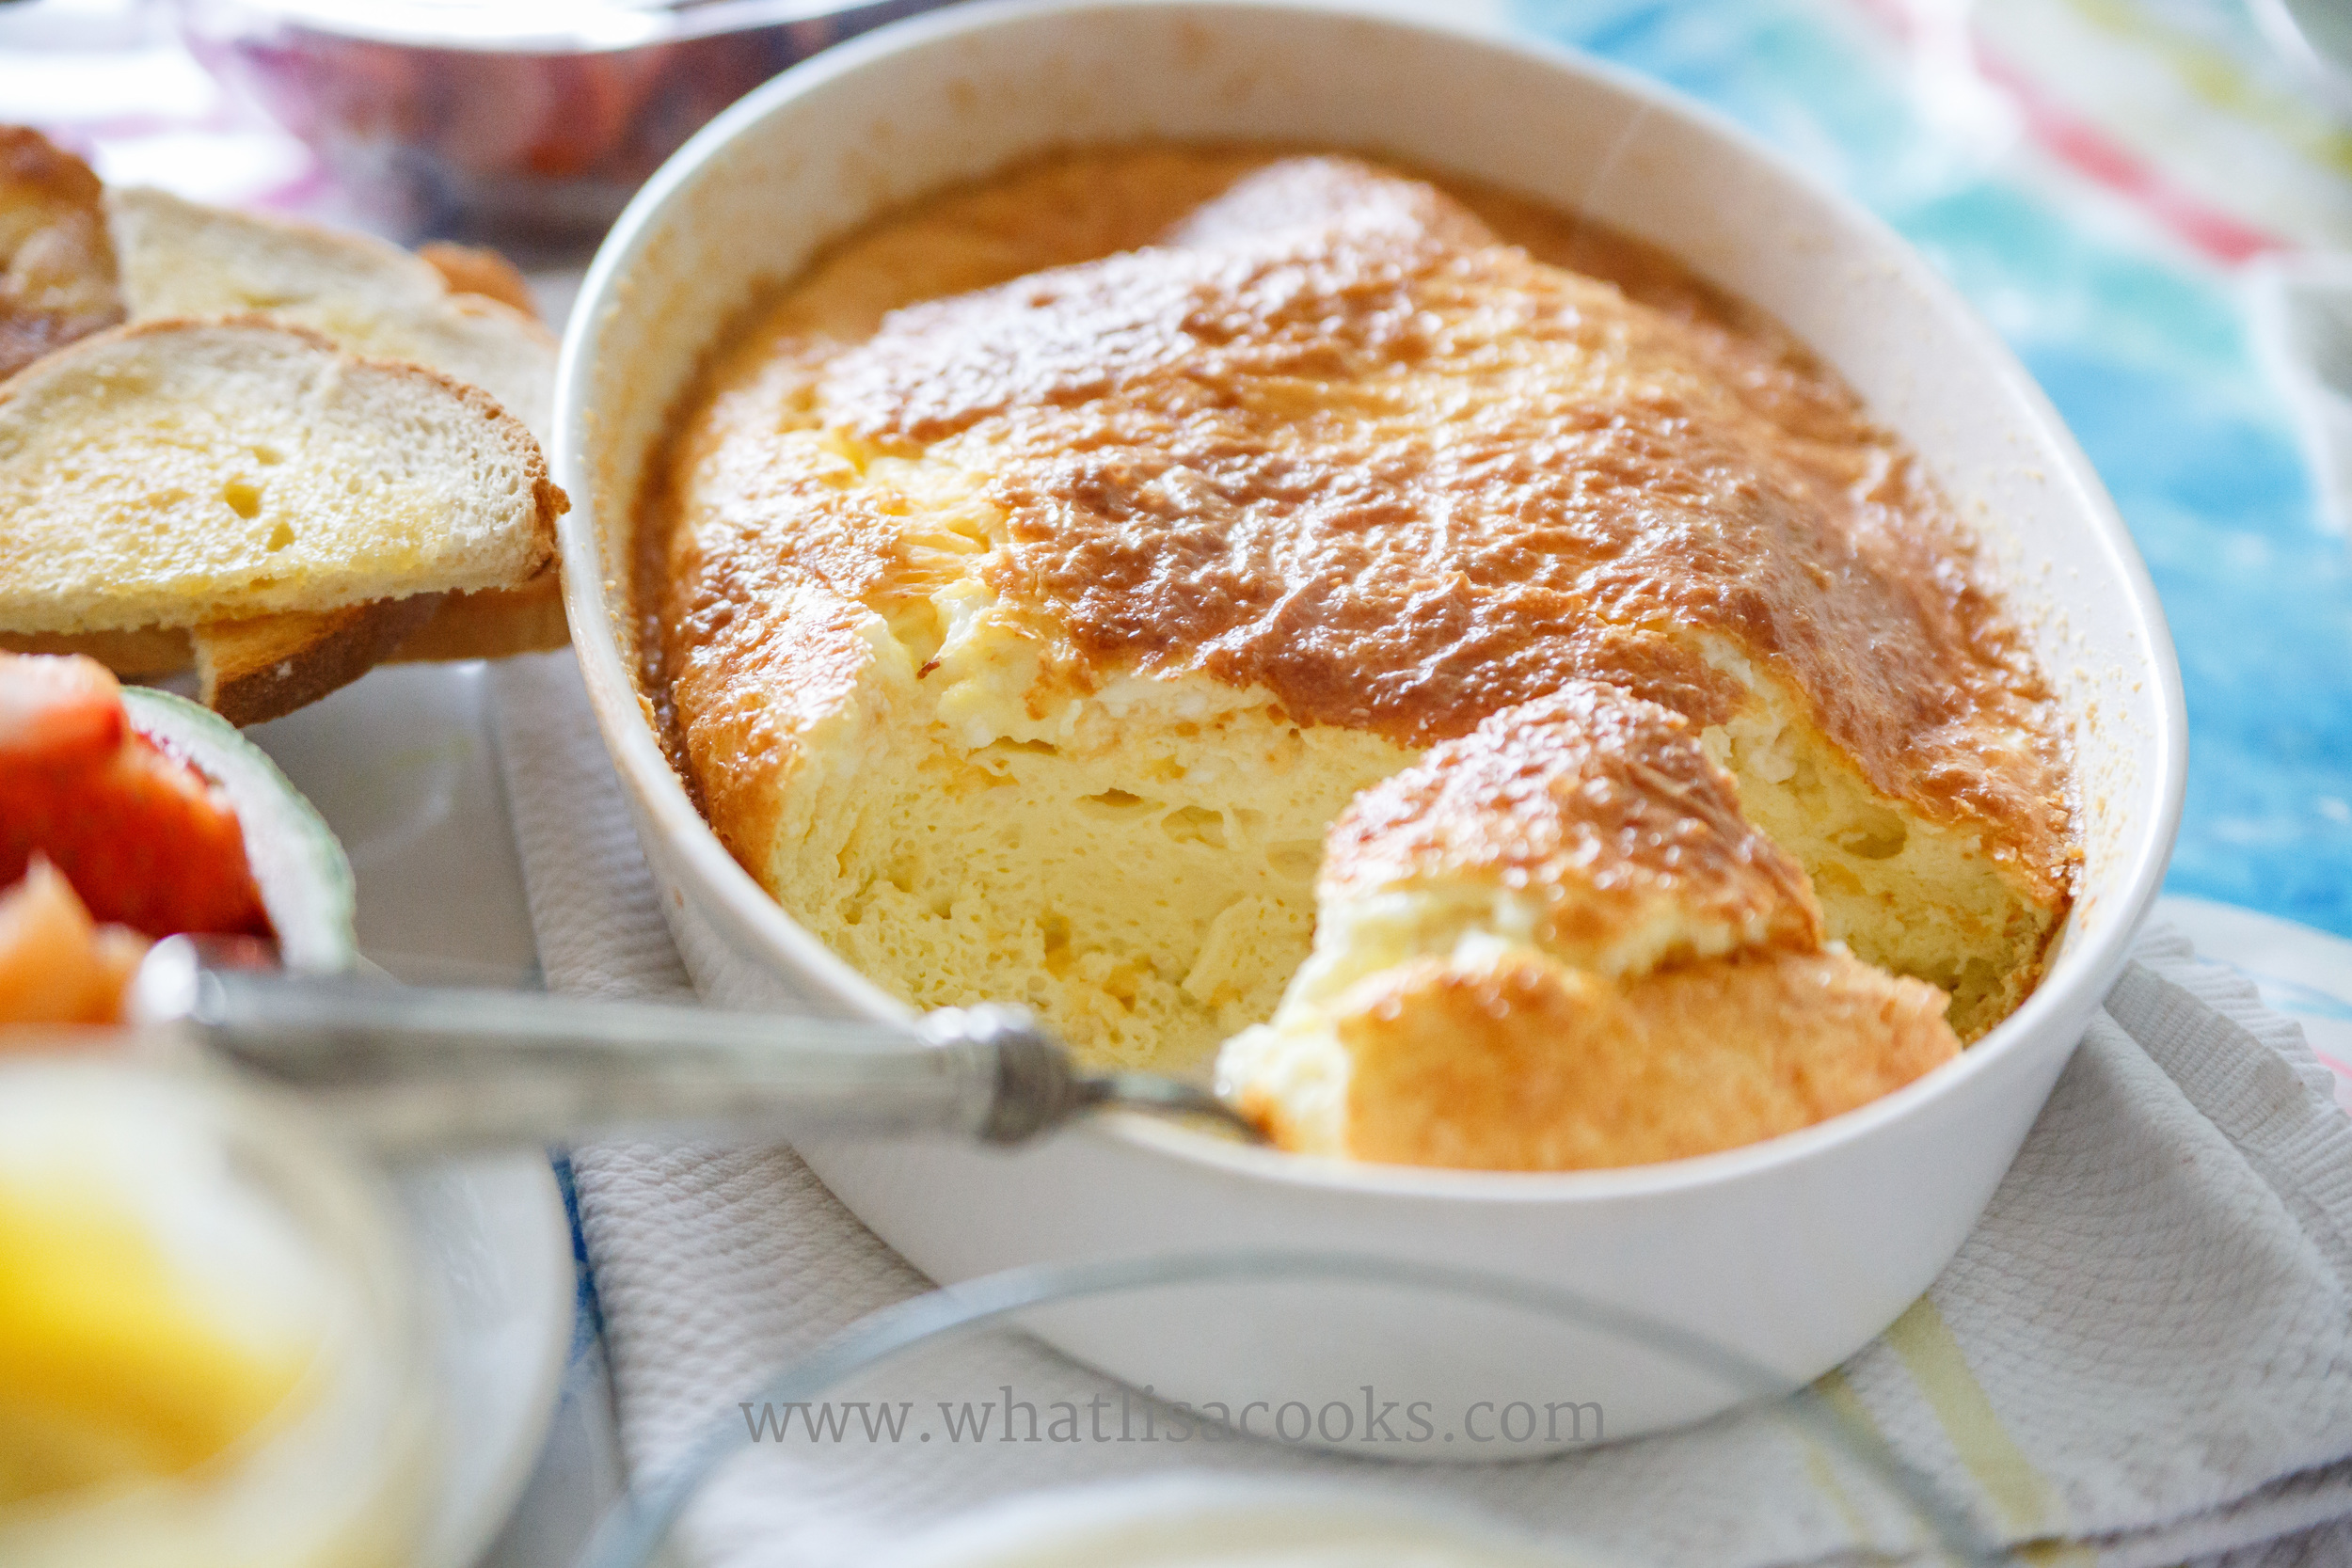
Easy Sunday Breakfast
I love Sunday breakfast with the family. It's a day of the week when we usually have no plans, we take our time, we relax, and we enjoy just doing our thing and hanging out. It's also usually the one day of the week when I get to take the time to fix a real full breakfast for the whole family, and I enjoy it.
I usually make some kind of pancakes or waffles, along with either bacon or sausage, and maybe some scrambled eggs. This Sunday I decided to freshen things up just a bit and experiment with a new egg dish. And I'm so glad I did - this was easy to make, mostly hands off, and very satisfying.
I'm not exactly sure what to call it - a crustless quiche, or maybe a baked scrambled egg. You could easily load this up with lots of extras, but I decided to keep it simple.
Ingredients: (which are approximate)

- 14 eggs (12 would have been fine, but I had 2 extra so I used them)
- 1/2 cup each of grated cheddar, jack, cottage, and parmesan cheese (any mixture of cheese will do)
- butter
- a splash of cream
- salt, pepper, garlic powder
Directions:
I greased by baking dish with butter, and then coated that with most of the parmesan cheese. Then I beat all the eggs very well until frothy, with the cream, and my seasonings, and then folded in the cheeses. I poured the egg & cheese mixture in my dish, sprinkled the rest of the parmesan cheese on top. Then baked at 350 for about 45 minutes until puffed and golden and set.
So easy.
With the eggs we had some fried polish sausage, toast, strawberries and cantaloupe, and honey yogurt (plain yogurt that has been sweetened with honey) with lemon curd. The lemon curd is an amazing addition to the yogurt and/or on top of the fruit. You can find my lemon curd recipe here.
