
Banana Chocolate Chip Blender Muffins
I think I need to just bow out while I'm ahead with this one - I will never try another muffin recipe again. My children have declared these to be the best muffins they've ever had. And if you knew my kids, you'd know that they are pretty tough little food critics (my fault, I'm sure).
I've made a couple batches of these over the last week, and they are inhaling them as fast as I can bake them. But it's totally ok, because these are super easy to make, and relatively healthy, as far as things containing chocolate chips go. We're talking from starting to in the oven in like 5 minutes.

You read that title right - blender muffins. Absorb that for a sec....
I think I need to just bow out while I'm ahead with this one - I will never try another muffin recipe again. My children have declared these to be the best muffins they've ever had. And if you knew my kids, you'd know that they are pretty tough little food critics (my fault, I'm sure).

I've made a couple batches of these over the last week, and they are inhaling them as fast as I can bake them. But it's totally ok, because these are super easy to make, and relatively healthy (as far as things containing chocolate chips go), and fast! We're talking from starting mixing, to in the oven, in like 5 minutes.
They are fast to make because they are mostly made in the blender!
I know it's an unconventional way to make this type of recipe, but it totally works. I love baking stuff like this for my kids, but all the steps and multiple bowls, and waiting for butter to come to room temperature so you can slowly cream it with sugar.... it was kiiillllling me. I had to find an easier way. I am an instant gratification kind of cook. I like to whip it out and move on to the next thing. So this is just my type of recipe.
Also the amount of sugar in so many recipes is just crazy! We're not making cake folks, we're making muffins. If I'm going to put 2 cups of white sugar in something, then let's just be honest and call it cake. I love cake, but I'm not feeding it to my kids every day. With super sweet ripe bananas and some honey, all that sugar is just not necessary.
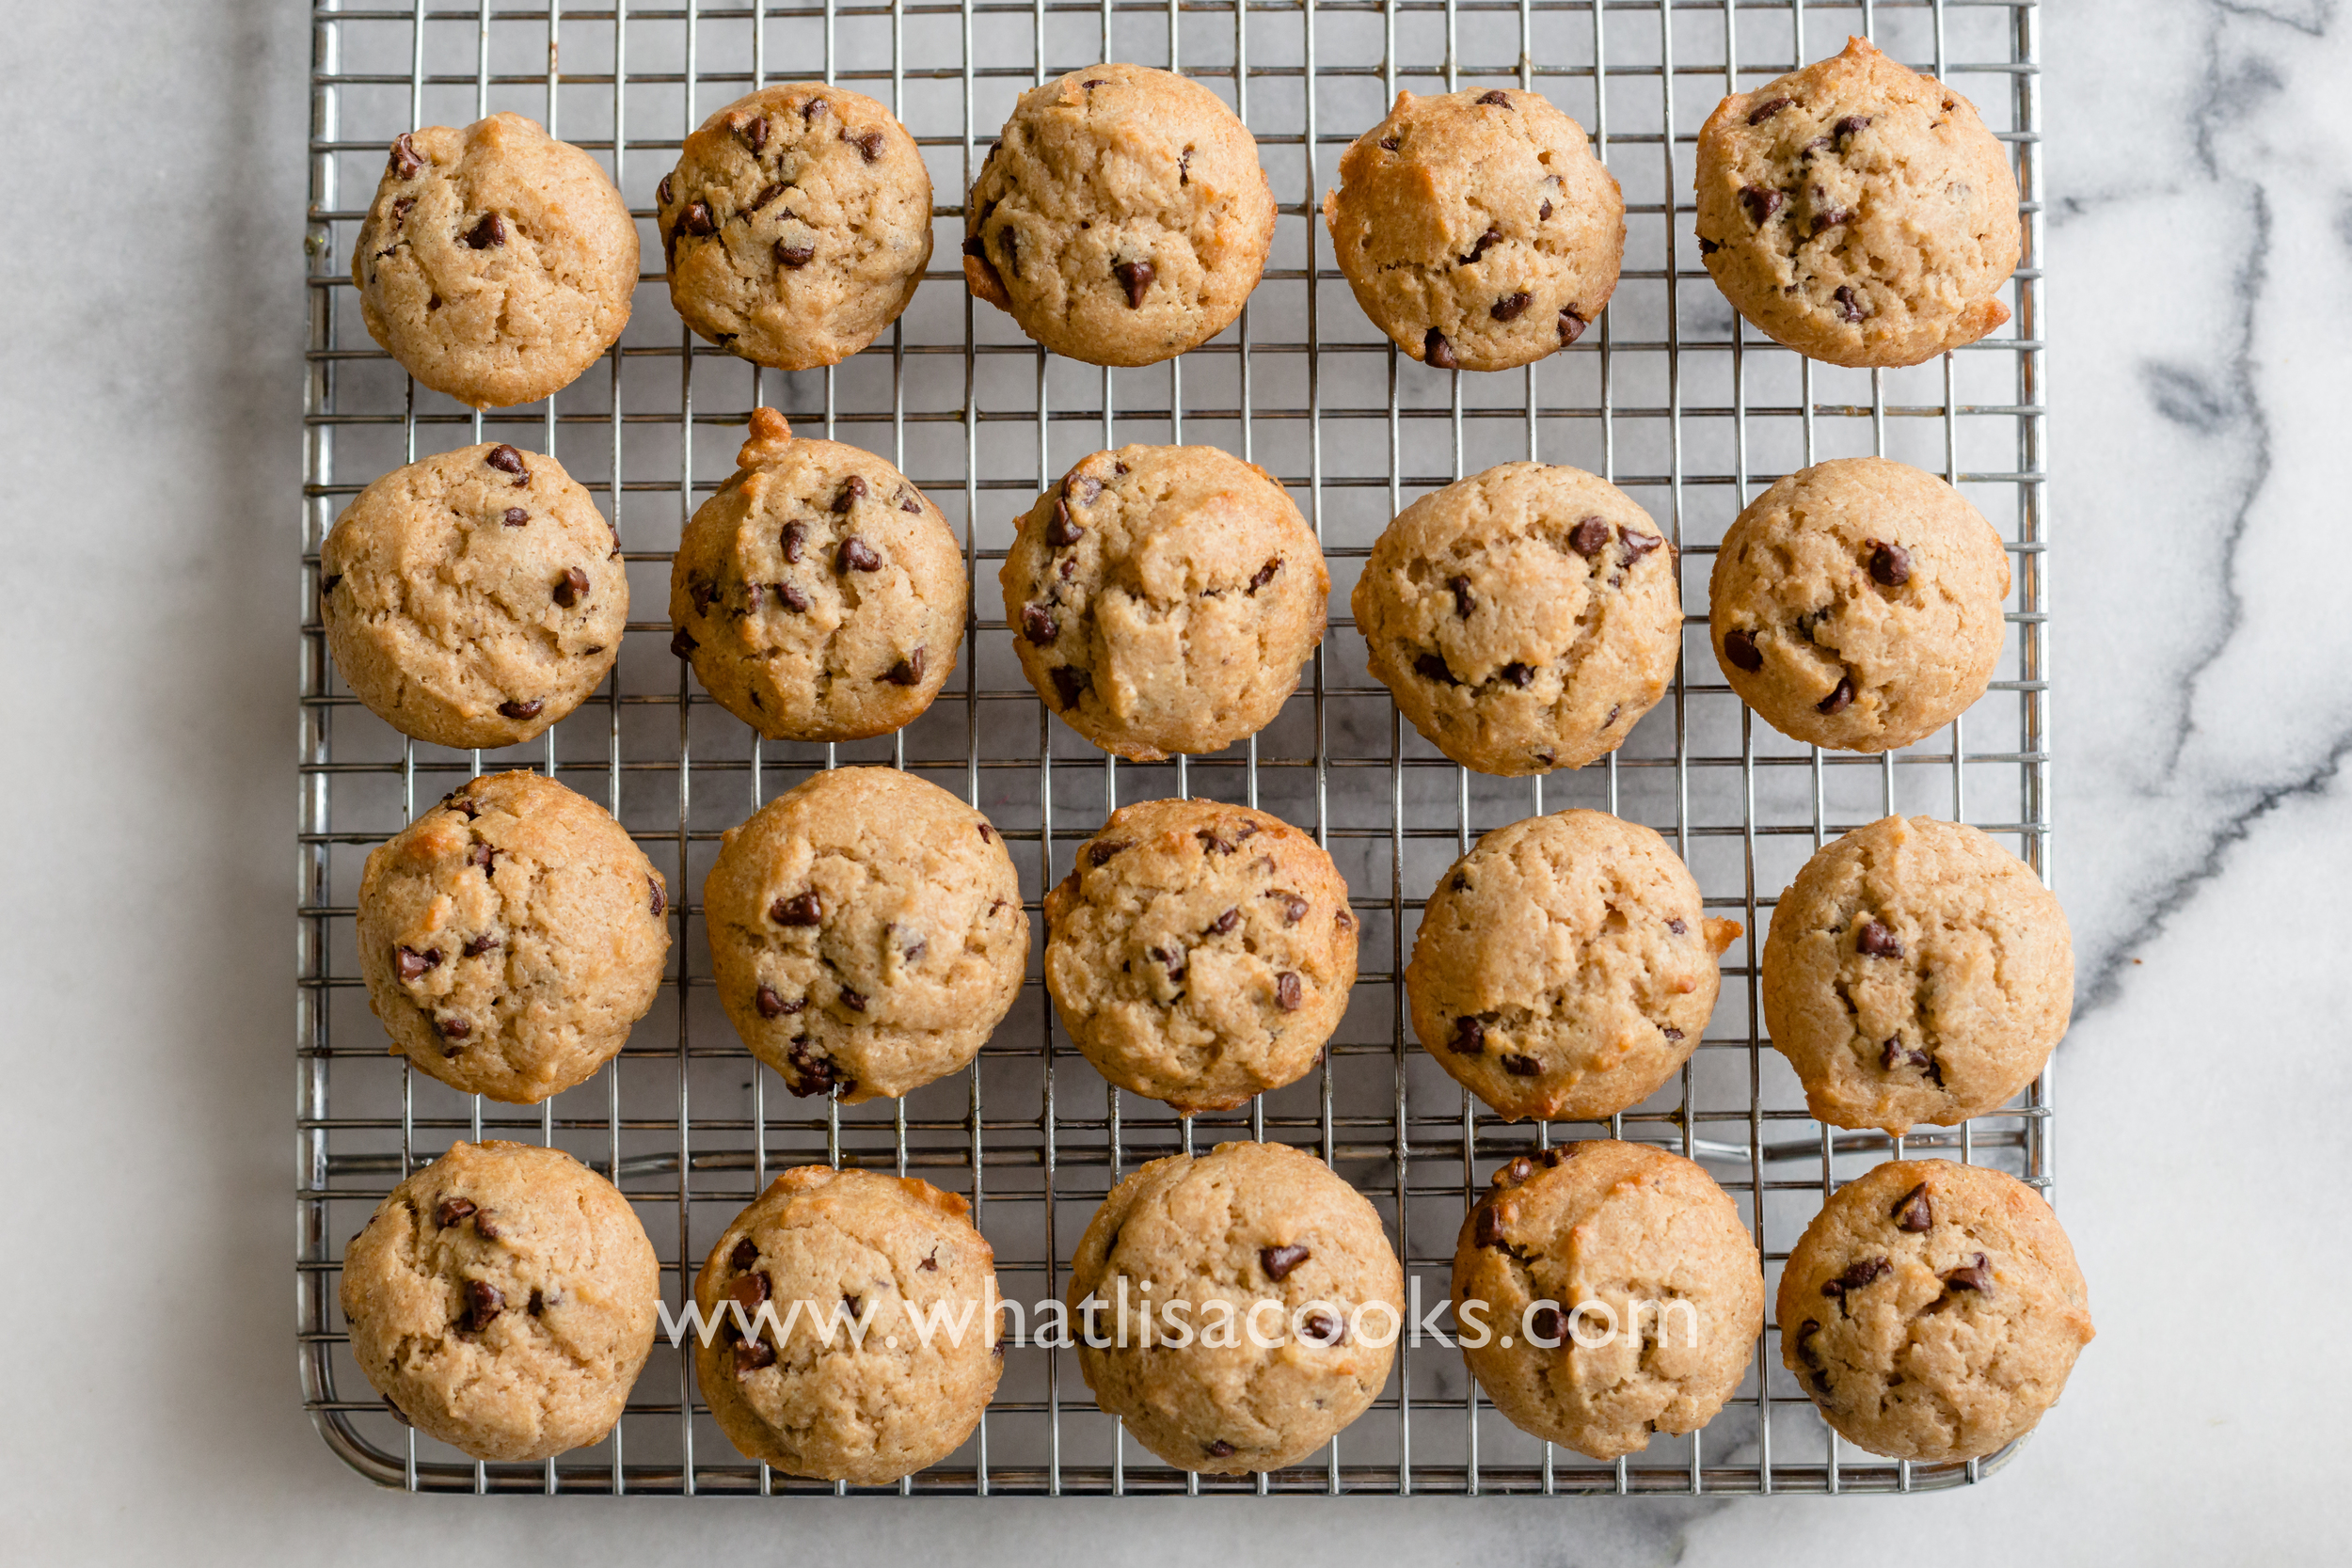
I think these work best as mini muffins, they are just a perfect two bite size, for a little sweet treat or snack. But full size muffins work great too. The whole wheat flour makes them feel really filling, and the little bit of yogurt adds moisture and just a hint of tang that balances out the sweetness really nicely. You can swap out sour cream if you don't have yogurt. Or add more banana.

Ingredients:
2 cups whole wheat flour
3 very ripe bananas
1/2 cup honey
1/2 cup (1 stick) butter
1/4 cup plain yogurt (I use whole milk Greek yogurt)
1 egg
1 1/2 teaspoons baking powder
1 teaspoon vanilla
1 teaspoon salt
2/3 cup mini chocolate chips
Directions:
Preheat oven to 350, or 300 convection. Grease muffin pans (we prefer mini muffin pans), or if you are using paper or silicone liners then just set them out.
In the container of your high powered blender, put bananas (broken into a couple of pieces), cold butter (cut up a little), honey, yogurt, vanilla, and egg.
Start out pulsing the blender to get it started. Stop and push the contents down if you need to. Pulse some more. Once the butter is starting to break up and the ingredients blend together, turn it up gradually. Blend just until everything is well mixed.
In a bowl, combine flour, baking powder, salt, and chocolate chips.
Pour the wet mixture over the dry and fold together gently just until all the flour is moistened.
Note: if you don't have a high powered blender, you can still make these! You'll just do it the old school way - let the butter soften, cream together with the honey, mix in the other wet ingredients (including mashed bananas), and then mix with the dry ingredients. They will still taste awesome, it will just take a little longer. So get yourself a blender, ok?
For mini muffins, I like to use a small cookie scoop to fill the muffin cups. I get the perfect amount every time and all the muffins end up evenly sized with no overflow.
Bake: 20 minutes for mini muffins. 30-40 minutes for regular muffins (depends on how big your cups are and how full you fill them). 1 hour for a loaf of bread.
If you're of the banana nut persuasion, you could totally add some chopped nuts to these. We just don't believe in mixing our nuts with our baked goods in this house. ;-)
Also, a hint: this recipe totally works with other mashed/pureed fruits too. I'm working an upcoming post about that, with a master quick bread recipe. But if you can't wait - just use this recipe, and swap out the bananas for any other pureed fruit, just make sure that it adds up to no more than 1 1/4 cups of puree, less if you're using something super wet (like apples). Leave out the chocolate chips and add nuts or raisins, and add a little spice.
Just a few ideas:
pumpkin muffins: pureed pumpkin, swap maple syrup for the honey, and add 2 teaspoons pumpkin pie spice
apple pie muffins: puree a couple of tart apples, and add 2 teaspoons cinnamon
carrot muffin: puree a couple of carrots & a zucchini, and add 1 teaspoon cinnamon
try other combinations - banana + zucchini, pear + carrot, apple + carrot
(Links contained here are affiliate links. If you purchase something from a product link I've provided, I get a small commission. It doesn't cost you any more, but it helps me keep the lights on here.)

Quick and Easy Homemade Peanut Butter
I really had no intention to make peanut butter. Don't get me wrong, I love the idea of homemade nut butters. I've done sunbutter before, and it was great. But I try to prioritize my time and making all my nut butters at home has never really made it to the top of my list of things I should be doing.
But I love peanuts. I mean, I love roasted, salted peanuts. A quick handful or two is an awesome snack - it satisfies my need for crunchy and salty, and gives me a little protein. I bought some peanuts a couple weeks ago, thinking I was buying roasted and salted peanuts. Only to get home and realize that what I had grabbed was roasted and NOT salted. (That's what happens when you're trying to squeeze in a quick grocery trip in between pickups and dropoffs.) As far as I'm concerned, there is no place in my life for snacking on nuts that aren't salted. I know you raw nut lovers can disagree, but I love my salt.

With four kids, we go through a lot of peanut butter in this house. I buy lots of it, but sometimes it's fun to figure out how to make some of our everyday things from scratch.
And I can definitely tell you - once you've had fresh homemade peanut butter, you will not want to go back. Especially if you can make it with fresh peanuts. I recommend buying them from the bulk bins at someplace that goes through a lot of bulk food, so you know they haven't been sitting around for very long.
Not only does it taste amazing, but it's so easy!

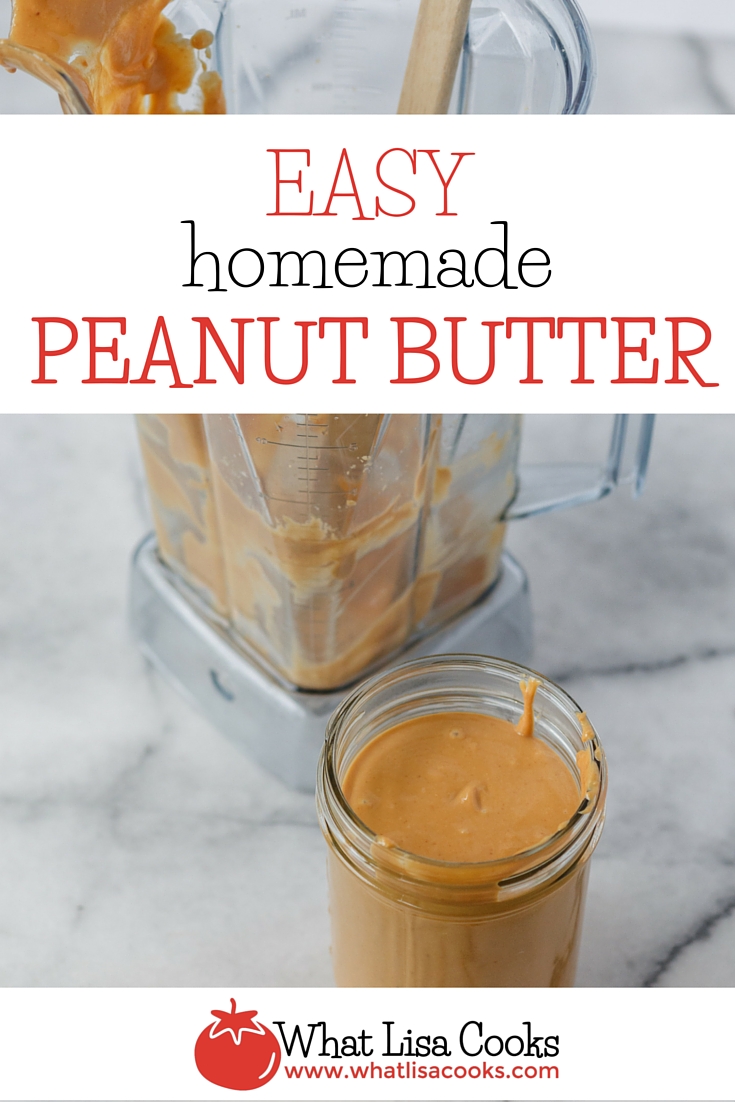
Basically, I took a pile of peanuts and dumped the whole thing into my Vitamix, added a dash of salt, and voila! Peanut Butter.
Ok, it wasn't quite that magical.
But it was close. I had to coax it along at first - pulsing off and on, pushing it down several times. But once it got going and all that oil was released, it very quickly turned into a super smooth and almost liquid consistency. Amazing how something that seems so dry can turn into liquid! And the whole process took less than 5 minutes.
Ingredients:
1 pound roasted shelled peanuts.
1/2 teaspoon (or so) kosher salt.
A drizzle of honey to taste (optional)
Directions:
Put peanuts and salt in blender. Pulse and push down until the peanuts start to release their oil. This is the only slightly labor intensive part. It takes a bit of coaxing to get it going. But once they start to release their oil then you can move faster, and blend to the consistency you prefer. We like creamy peanut butter here, so I really let it go until there were no chunks left. Once you think it looks good, taste it. At this stage you can add a little honey if you like your peanut butter lightly sweetened (most popular commercial peanut butters have sugar in them), and you can also add a little more salt if you like, and then just blend long enough to get that well mixed in.
Pour in a jar, let it rest to firm up just a bit, and then get out the bread and jam, because you're going to want to make a sandwich.
Also note - you can follow this same technique with basically any kind of nuts or seeds. I've also made sunflower seed butter this way, and it tastes great. If the seeds or nuts you buy aren't already roasted, then you'll want to either roast them in the oven or toast lightly in a pan first, to really bring out the flavor.

Easy homemade fruit leather
My kids love those little fruit leathers from the store. I refuse to buy the cheap ones that are filled with artificial stuff, but the better quality ones get expensive - especially when they want to eat 2 or 3 at a time! So having a quick and easy way to make my own seemed like a great idea.

Well I was going to wait until I did this again and took some better pictures, but life seems to be getting in the way, so I figured that I shouldn't let the lack of good photos get in the way of me sharing this with you.
My kids love those little fruit leathers from the store. I refuse to buy the cheap ones that are filled with artificial stuff, but the better quality ones get expensive - especially when they want to eat 2 or 3 at a time! So having a quick and easy way to make my own seemed like a great idea.
Yes, I know you can do this totally from scratch - puree your fruit, yada, yada. But that's not quick and easy, therefore, it doesn't get done.
I think this method is a perfect compromise.
It's much less expensive than buying fruit leather, but it's almost no work.
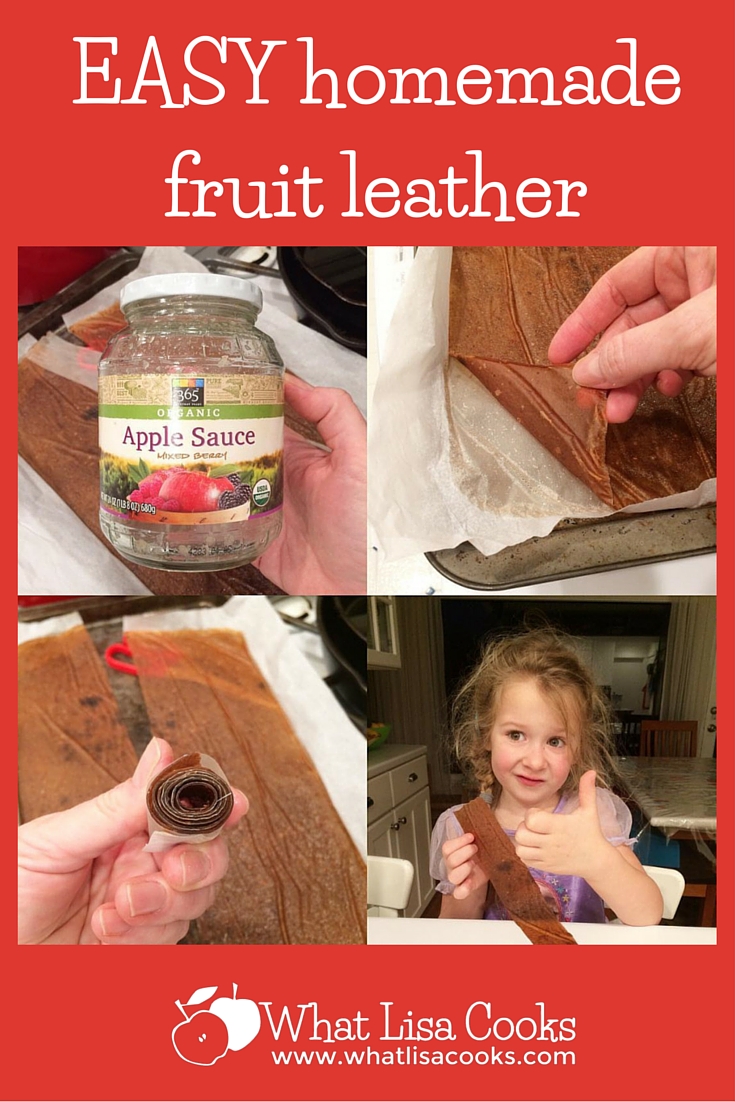
All you need is a jar of applesauce, a cookie sheet, and some parchment paper. You can use whatever flavor of applesauce you like.

All you do is line a cookie sheet with a layer of parchment paper, pour out the applesauce and spread it a little so it's even. Put it in your oven at its lowest setting, and walk away. Leave it in the oven until the top is no longer wet and sticky. My oven has a convection setting, and the lowest temp is 175. It took about 4 hours to dry. If you don't have a convection oven then you will probably need 6-8 hours or more, depending on the temp and how dry your air is and how thick it is.
After it's done, take it out of the oven and let cool. Then use a clean pair of scissors to cut it up. You can cut in small rectangles like some of the store bought ones come in. I cut mine in longer strips which I then rolled up with the parchment - sort of like some of those 'fruit by the foot' things you can buy.
And that's it! My kids loved it!
These are great for snacks or for a little something extra to throw in a lunch box. I can't wait to try it with other flavors of applesauce.


