
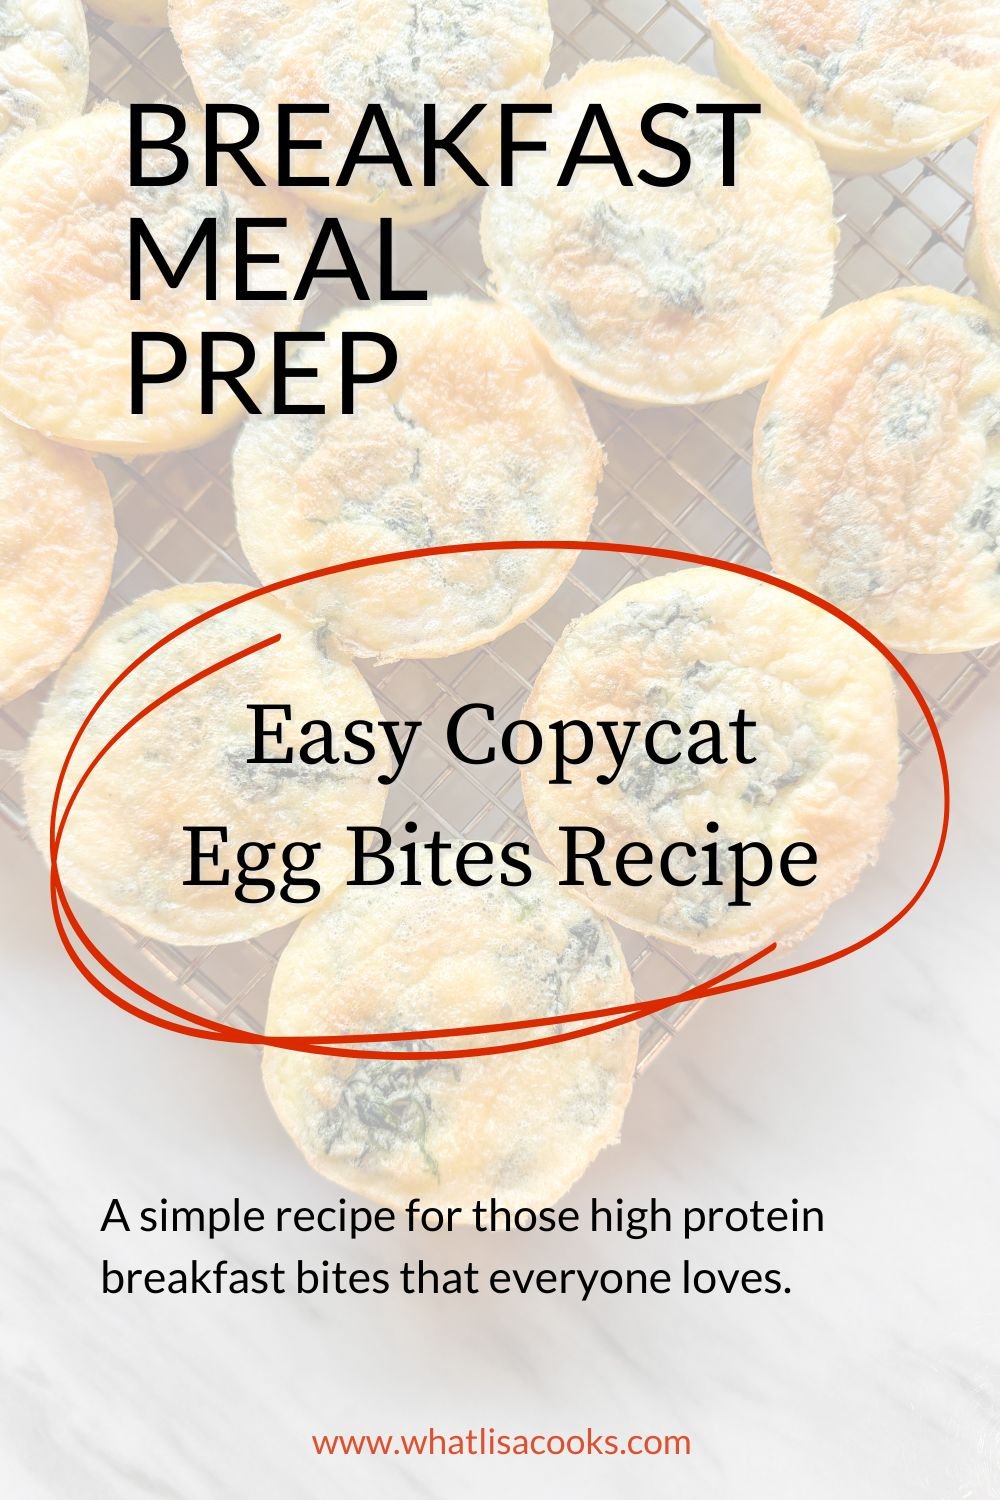
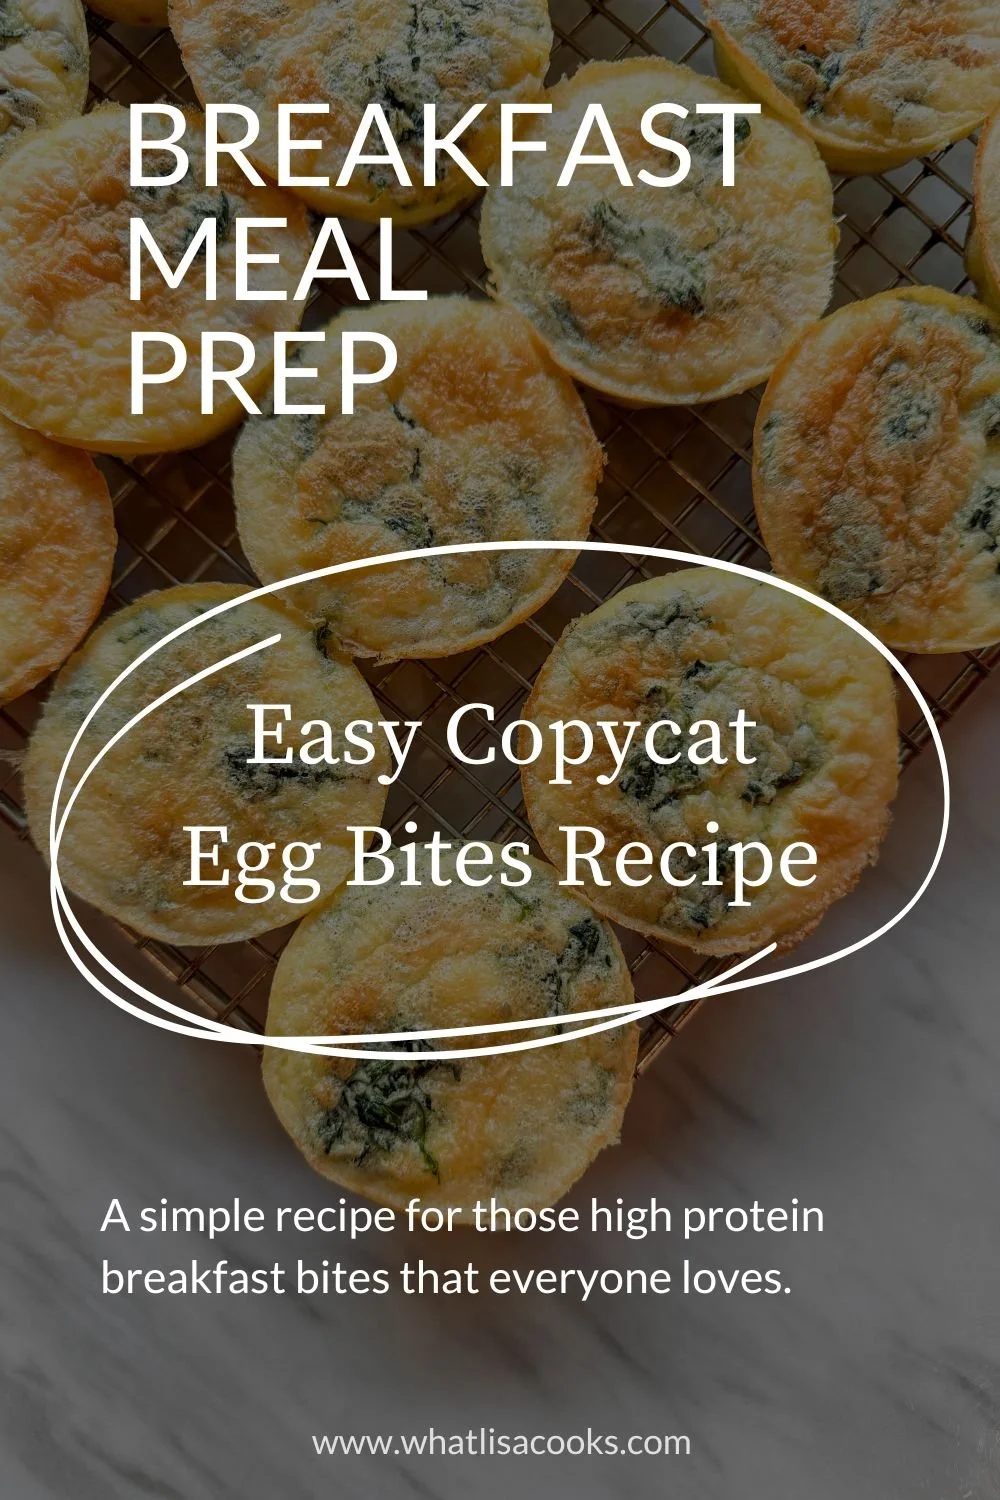
Egg Bites Recipe
Easy copycat egg bites recipe for weekday breakfast meal prep.
Here is my version of the popular copycat egg bites recipe that everyone loves.

My kids and I love those Starbucks egg bites as much as anyone, but they get expensive fast. There are other brands of egg bites too that you can buy at the store and are great for easy school day breakfasts, but those also get expensive when you are feeding a family of six. Once you figure out how to make them from scratch at home you will never have to be without a quick grab and go school day or work day breakfast again.
The secret to the texture is the cottage cheese all blended in with the eggs. That’s how you get that light, fluffy, creamy texture. I know you think you don’t like cottage cheese, but I can guarantee that you would never know it’s in these if I hadn’t told you.
I make up big batches of these for my teens for school mornings. They are a great protein packed easy breakfast. I usually put half in the fridge and then package up the other half two at at time in little snack bags and freeze, then they can just grab a single serving out the freezer and pop in the microwave for about 45 seconds for a quick weekday breakfast.
My version here is adapted from several different recipes and adjusted to suit our tastes and needs. This one probably makes more than a lot of other recipes you’ll find, because I always like to make lots of things that can be frozen for easy meal. You can use any combination of cheese, meat, and veggies you like. I’ve tried lots of combinations but our favorite is gruyere cheese (like the Starbucks ones), with a little bacon and spinach. So that’s how I’ve written the recipe, but you can easily customize with any combinations you like.

To make this egg bites recipe you will need:
Scroll down for the recipe card with the exact quantities.
eggs
cottage cheese
cheese (gruyere or sharp cheddar or other cheese you like)
bacon
salt & pepper
cooked chopped bacon (optional)
spinach or other veggies (optional)
spray oil
muffin pans, ideally silicone

If you haven’t already cooked the bacon you will want to do that first. Chop it up and cook until crispy. I like to buy big packs of bacon and dice and cook it all at once, then I have bacon to use for this recipe and lots extra for salads and topping in other recipes.
How to make these easy meal prep egg bites:
Preheat your oven to 300 degrees convection (or 325 regular bake). Place your silicone muffin pan in a deep sheet pan, and spray the muffin pan with cooking oil.
Put all of the ingredients except the bacon & spinach in the blender and blend until well combined.
Fill each muffin cup with a little spinach and bacon, or whatever other meat or veggies you are using. Then label the egg mixture into each one, to about 3/4 full.
Put the pan in the oven and fill the sheet pan with hot water to about half way up the muffin pan.
Cook for 25 minutes, and then I dare you to try not to eat several before you can get them put away for breakfast.

Egg Bites
Ingredients
Instructions
Notes
You can do this without the water bath in the pans if you prefer, I just think it gets you a slightly nicer, creamier texture that more closely mimics the Starbucks sous-vide egg bites texture that we all love. And this is especially useful if you don't have a convection oven, for more even cooking.

Extra Creamy Scrambled Eggs
A simple secret for extra creamy scrambled eggs.
One of my favorite quick and easy tips for making amazing scrambled eggs every time: mayonnaise.
I said what I said. Add mayo. You know what mayo is made of right? It’s eggs and oil, with some seasoning, mixed into a creamy emulsion. So adding that to eggs makes them extra creamy and adds seasoning and flavor.
I usually do at least 6 - 12 eggs at a time because I’m always cooking for a crowd so I add a couple tablespoons of mayo. Experiment for yourself and decided how much you like.
Pressure Cooker "Boiled" Eggs
The easiest way to make boiled eggs is to not boil them at all.
I've tried every trick out there for cooking easy to peel eggs. EVERY. TRICK. And I don't think there was a single one that worked consistently. Some methods would work one time, and then not the next time.


Then I discovered cooking eggs in my pressure cooker.
I'm telling you - perfect eggs every time, and the shells practically fall off.
If you have a pressure cooker and haven't hard cooked eggs in it yet, you must try. And if you like hard or soft boiled eggs but you don't have a pressure cooker - you must get one!
If you don't yet have an electric pressure cooker - let me just take a moment and tell you about mine. Don't be scared - they are not the dangerous things they used to be. They are electric and easy to program and super safe.
I have two! The first one I've had for several years and it is my favorite - is the Cuisinart Pressure cooker. It's a workhorse. The second one I had to try because everyone was raving about it is the Instant Pot. They are both great, and they both have their advantages. The Instant Pot is a multi cooker - it can be a slow cooker and a pressure cooker and a rice cooker and a yogurt maker, and I guess it does even more than that because they call it a 7-in-1 cooker. If you really think that you will use all those other features, then it is a great choice. But as for just pressuring cooking, I like the Cuisinart best. It has more options for adjusting your pressure cooking settings, and more options for timing, simmering, and sauteeing your ingredients before you start the cooking cycle. Those things are also possible with the Instant Pot, but I just find the Cuisinart to be more intuitive and easier to program and use. Also, it's less expensive. Either way though, you can't go wrong.
Anyway, back to the eggs. Here are the instructions.
Pressure Cooker Eggs:
Place a rack or trivet in the bottom of your cooker pot
Add about a cup of water - I like to use hot water just to get it going faster. You want the water to be under the rack, not touching the eggs. (be sure to read the directions on your cooker for the minimum amount of liquid you can use - I think it's about a cup for most.)
Carefully place eggs on the rack. A lot of recipes you read for this have you putting them in separate little cups or making little foil nests for them. I have never found this to be necessary and it just takes more time. Yes, occasionally one or two will crack, but I've found that this happens regardless of whether you "nest" them, so I really don't see the point. You can cook just one or two at a time if you prefer to eat them warm (best for soft cooked eggs), or I can fit about 10 at a time in my cooker without crowding them too much.
Close your cooker and set it to low pressure.
Cook according to the times below.
When your time is up - use the quick release method and get the eggs in an ice bath to quickly stop the cooking. I sometimes just dump a bunch of ice and cold water right in the pressure cooker pot on top of the eggs. This is quicker than lifting them out one at a time.
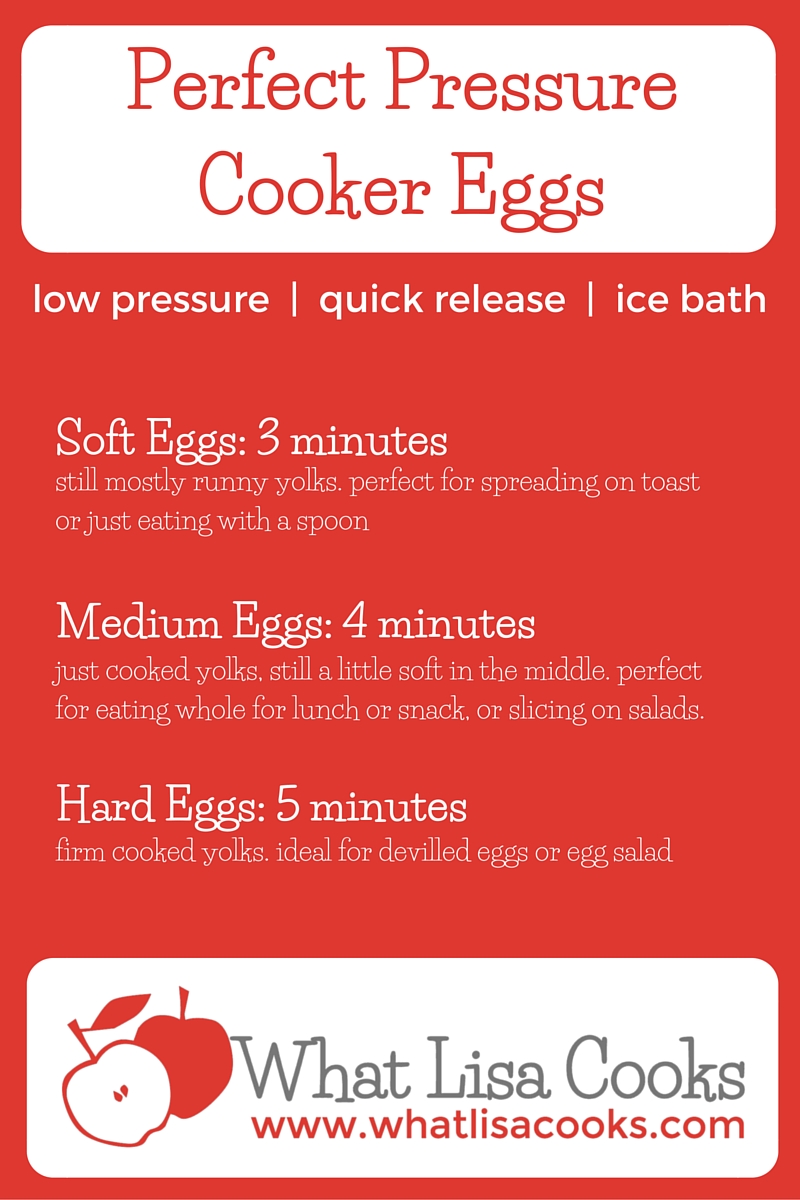
Cook times for pressure cooker eggs:
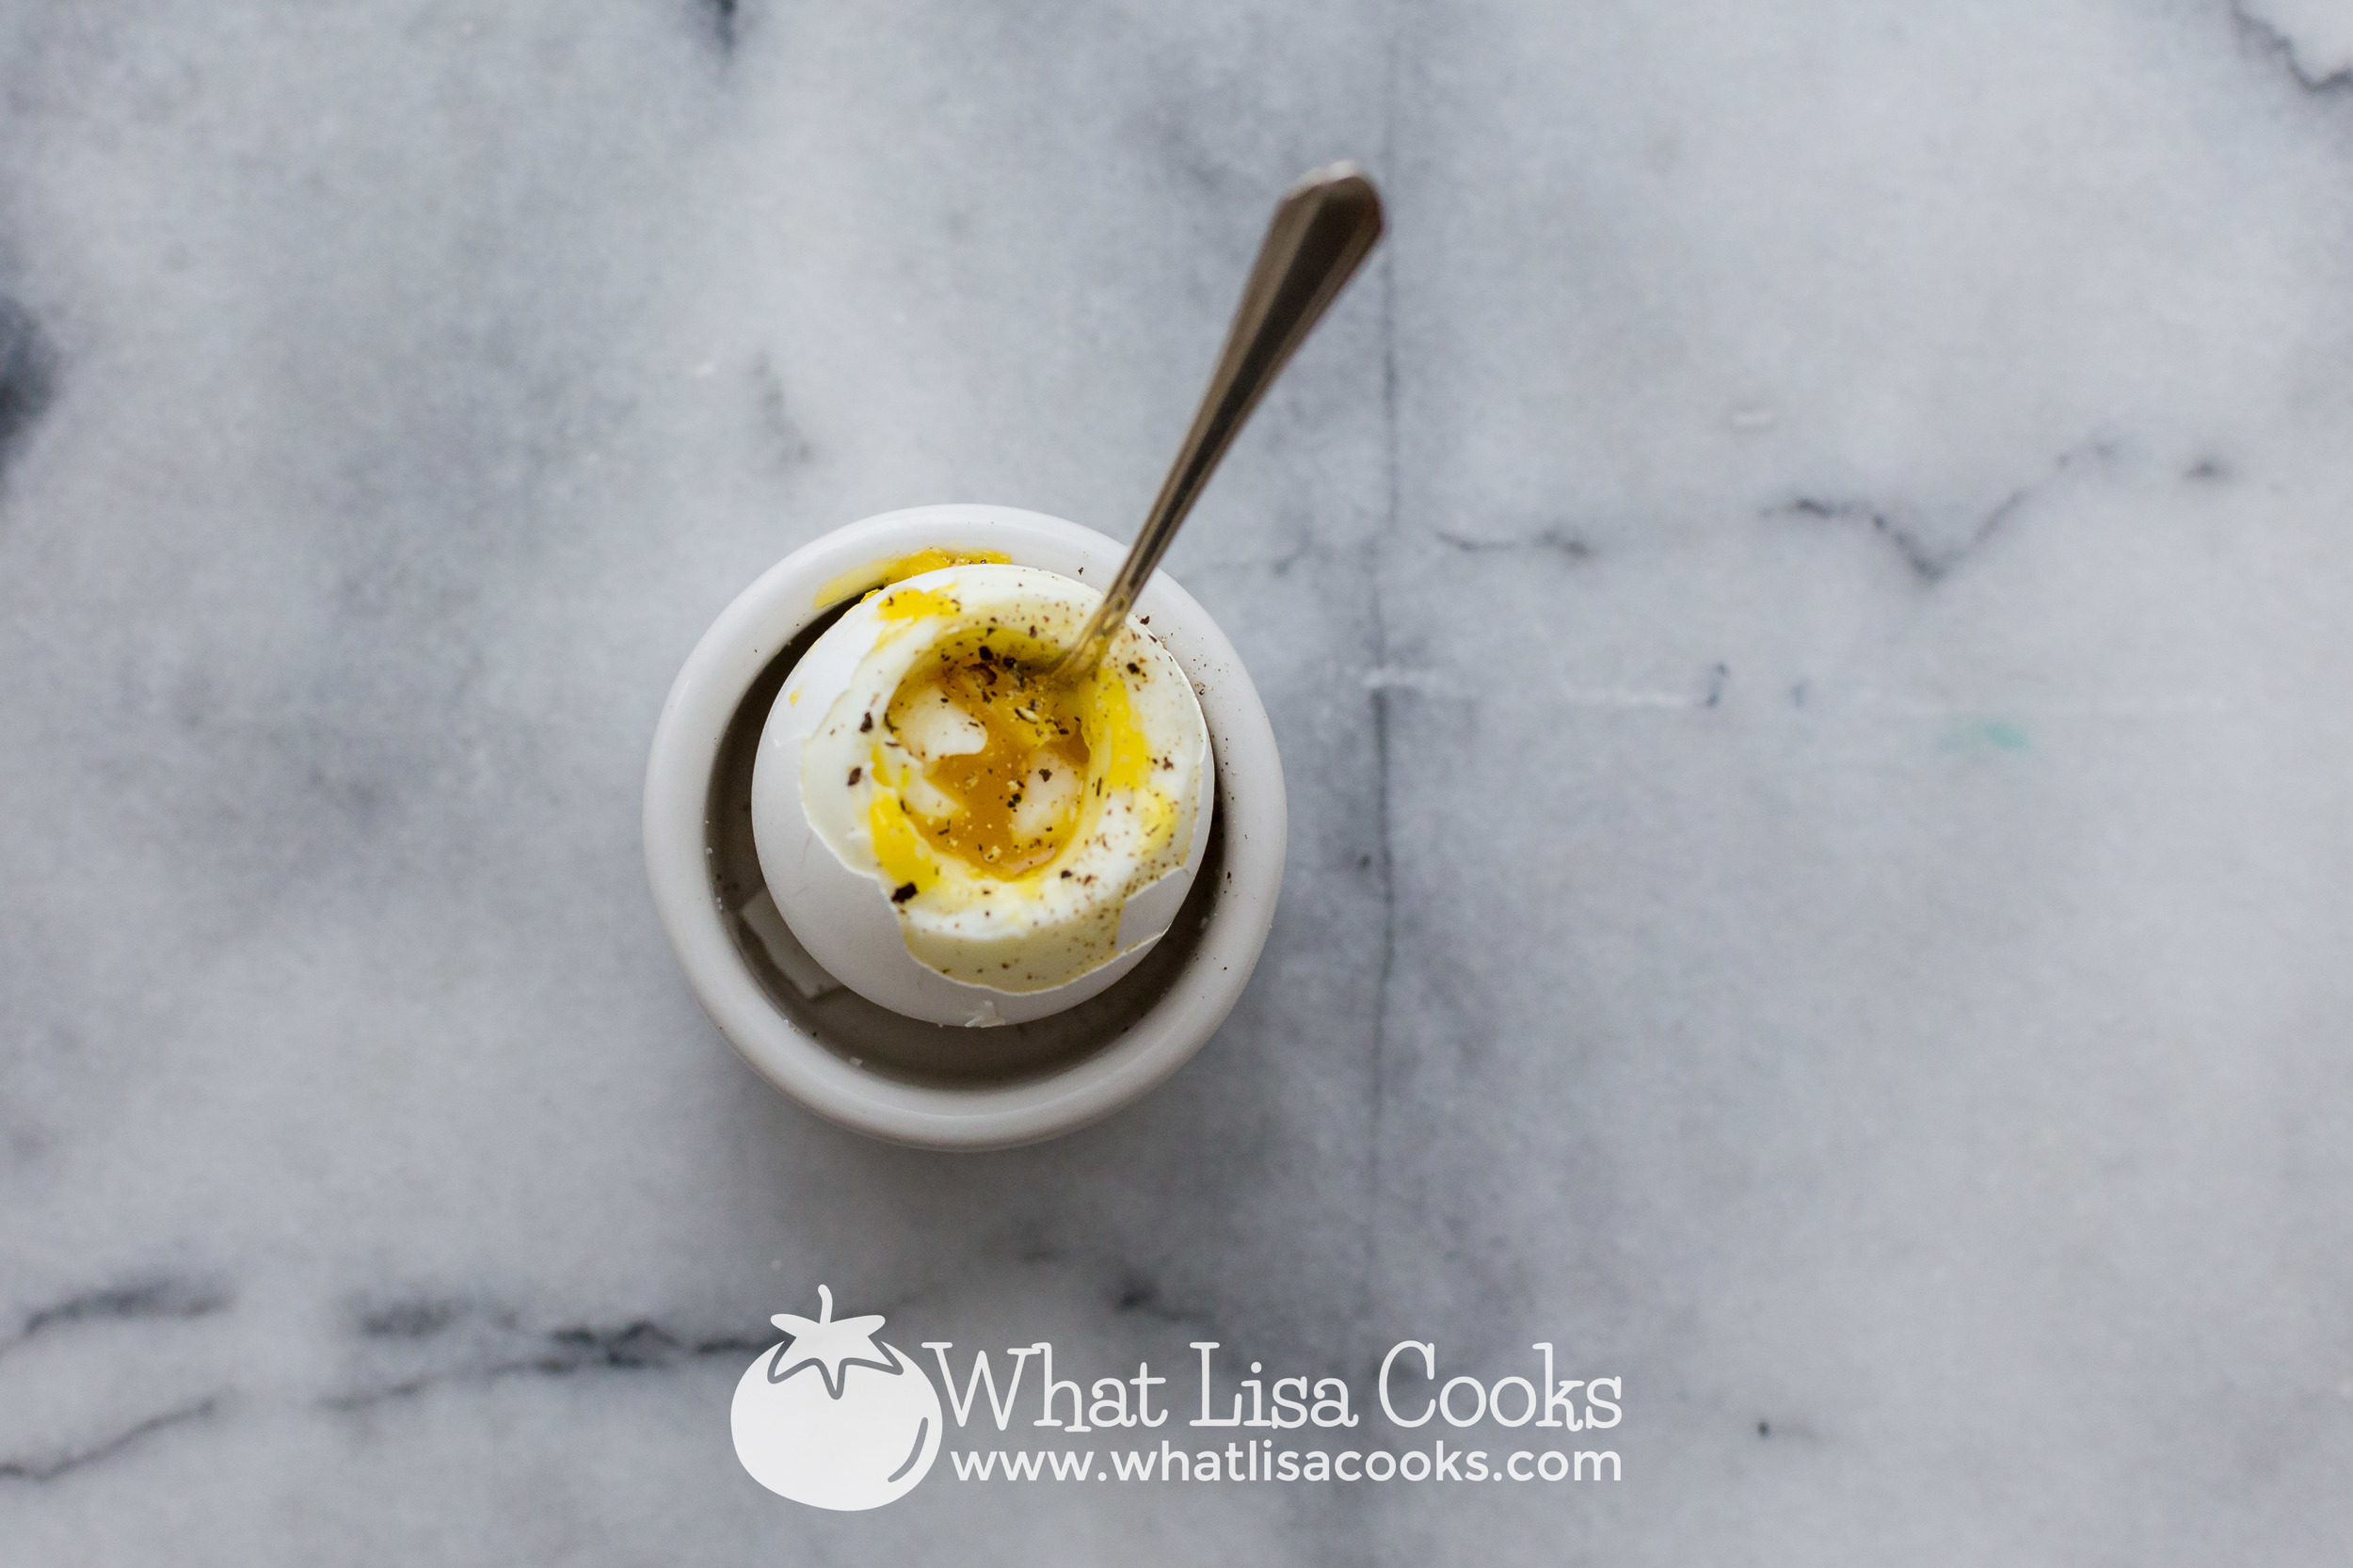
Soft Cooked: 3 minutes on low pressure, quick release, ice bath. These will have still slightly runny yolks. I LOVE these for breakfast - either mashed up on toast or just lop of the top of the shell and eat them with a spoon.
Medium Cooked: 4 minutes for on low pressure ,quick release, ice bath. These will have just solidified yolks, maybe sometimes with a small dot of wet still in the very center. This is my favorite if I'm making eggs to peel and eat whole for lunch or snack. I personally love to dip them in salt. I think this is also perfect for slicing on a salad.
Hard Cooked: 5 minutes on low pressure, quick release, ice bath. These will have fully solid yolks. This is best for making deviled eggs or egg salad.
But seeing is believing! You have to see how easy this is, so I made video. If you don't want to watch the whole cooking process, just skip forward to about the 4 minute mark, to see how they peel so easily that I can do it with one hand!
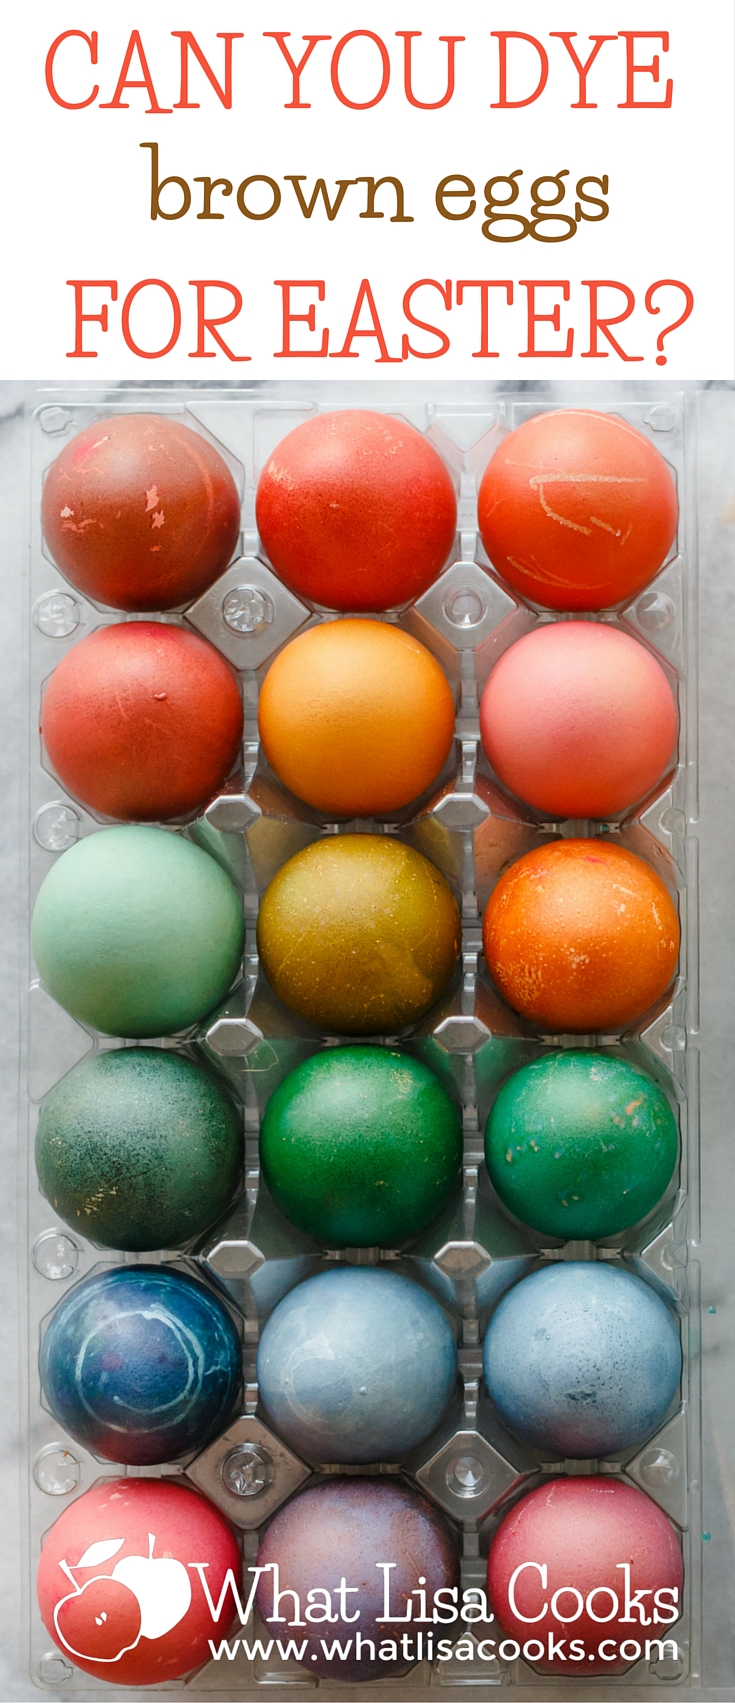
Can you color brown eggs?
Yes! You totally can!
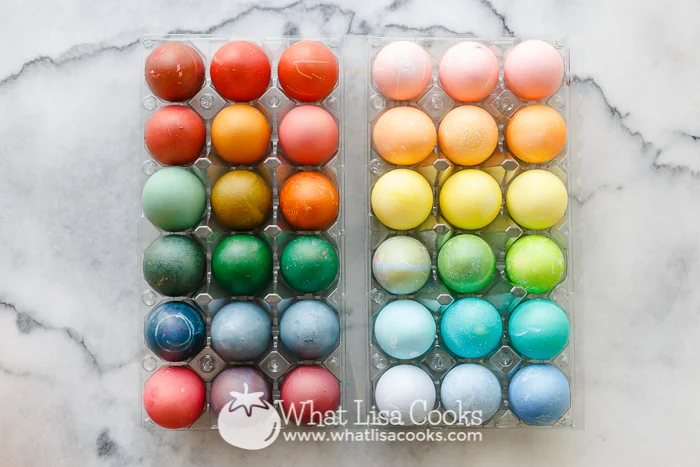
I think we all got in such a habit of dying white eggs that we've just been convinced that brown eggs won't work. But they definitely do, and I think they make some of the prettiest colors. You have to let them sit in the dye a little longer to get the color to really soak in, but the wait is worth it. You end up with beautifully rich colors that I think look more "earthy" than the same store bought egg dye applied to white eggs.
We did a little comparison - these eggs were all dyed with the standard old store bought egg dye, mixed with vinegar according to the package instructions for vibrant colors. The group on the left are brown eggs (except the blue row), the group on the right are white eggs. (and all the little white marks are just where my kids drew on the eggs with the wax crayon).
Brown eggs are usually more expensive, so I don't know that I would go out and buy them just for Easter egg dying. But if you have them and weren't sure if you could use them - go for it! I absolutely love how they turned out.
These are no ordinary deviled eggs: Soy & Wasabi Deviled Eggs
Never let it be said that I don't love the classics. Deviled eggs are one of my all time favorite things. There is no other preparation of eggs that somehow tricks you into downing a half a dozen eggs without even realizing how much you've eaten. There are reason why some recipes become classics that keep appearing year after year - because they are that good. I love them so much - when I was pregnant a friend used to make a batch of them for me and just hand me the container every time she would see me. When you're pregnant with twins you don't even have to share!

I love the original way to make them - when I am making classic deviled eggs I keep them very simple - a little salt and pepper, a bit of mustard, and my secret ingredient (which also makes amazing potato salad) is a little splash of the juice out of a jar of dill pickles. No pickles in the eggs! Just the juice. Try it, trust me.
But every now and then, I like to shake things up a bit. My deviled eggs made with soy sauce marinated eggs and wasabi mayo definitely fill that bill. I made a batch of these with leftover Easter eggs last year and they were a huge hit, so they are definitely on the menu for this year. This is a great way to use up those eggs in a way that you won't get tired of. They are far from ordinary.
But they are certainly not just for Easter - these are a great way to please a crowd any time of year. They are easy to make and one of those little appetizers that will really impress, but you'll know that they were actually quite simple.
This recipe does require a little bit of advance preparation - marinating the eggs in soy sauce ahead of time. I've got a whole recipe just for that. But don't worry, it's super quick and easy. And you'll also need to either make or acquire some wasabi mayonnaise. Once you have those two pieces - then these come together in no time.
Wasabi + Soy Sauce Deviled Eggs

Ingredients:
1 Dozen soy sauce marinated eggs
1/2 cup wasabi mayonnaise
1/8 teaspoon salt
Hot sauce - to taste (Sriracha, or whatever you like)
You can read my quick version of wasabi mayo here, or you certainly can use a store-bought one.
Directions:
As you would with any other deviled egg recipe - carefully slice your cooked and marinated eggs lengthwise and pop out the yolks. Put the yolks in a bowl and set the halved whites aside.
With a fork, mash the yolks a little and then add in the wasabi mayonnaise and salt and mix well. Then just carefully spoon the mixture back into your halved eggs, distributing evenly across all of them. I always inevitably break at least one the yolks, but that just means that I get a snack.
Top with a dot of your favorite hot sauce - Sriracha or other Asian style hot sauce goes well with the soy and wasabi flavors here.
That's it. Too easy.
Soy Sauce Eggs

People seem to fall into two very distinct camps when it comes to boiled eggs - you either love them or you hate them.
As for me - I never met an egg I didn't love. I'm somewhat obsessed with them. My husband and I can go to a restaurant and he knows immediately that if there is something on the menu that boasts an egg of any sort on it or in it, that is definitely what I will be ordering. I love them.
One of my very favorite things is when I go to an Asian restaurant and order some kind of ramen or noodle soup dish and they serve it with a perfectly soft cooked and soy sauce marinated egg floating in the bowl. This is seriously top notch comfort food.
Let me just tell you - if you like eggs, and you like soy sauce, but you haven't yet tried combining the two flavors - you are seriously missing out.
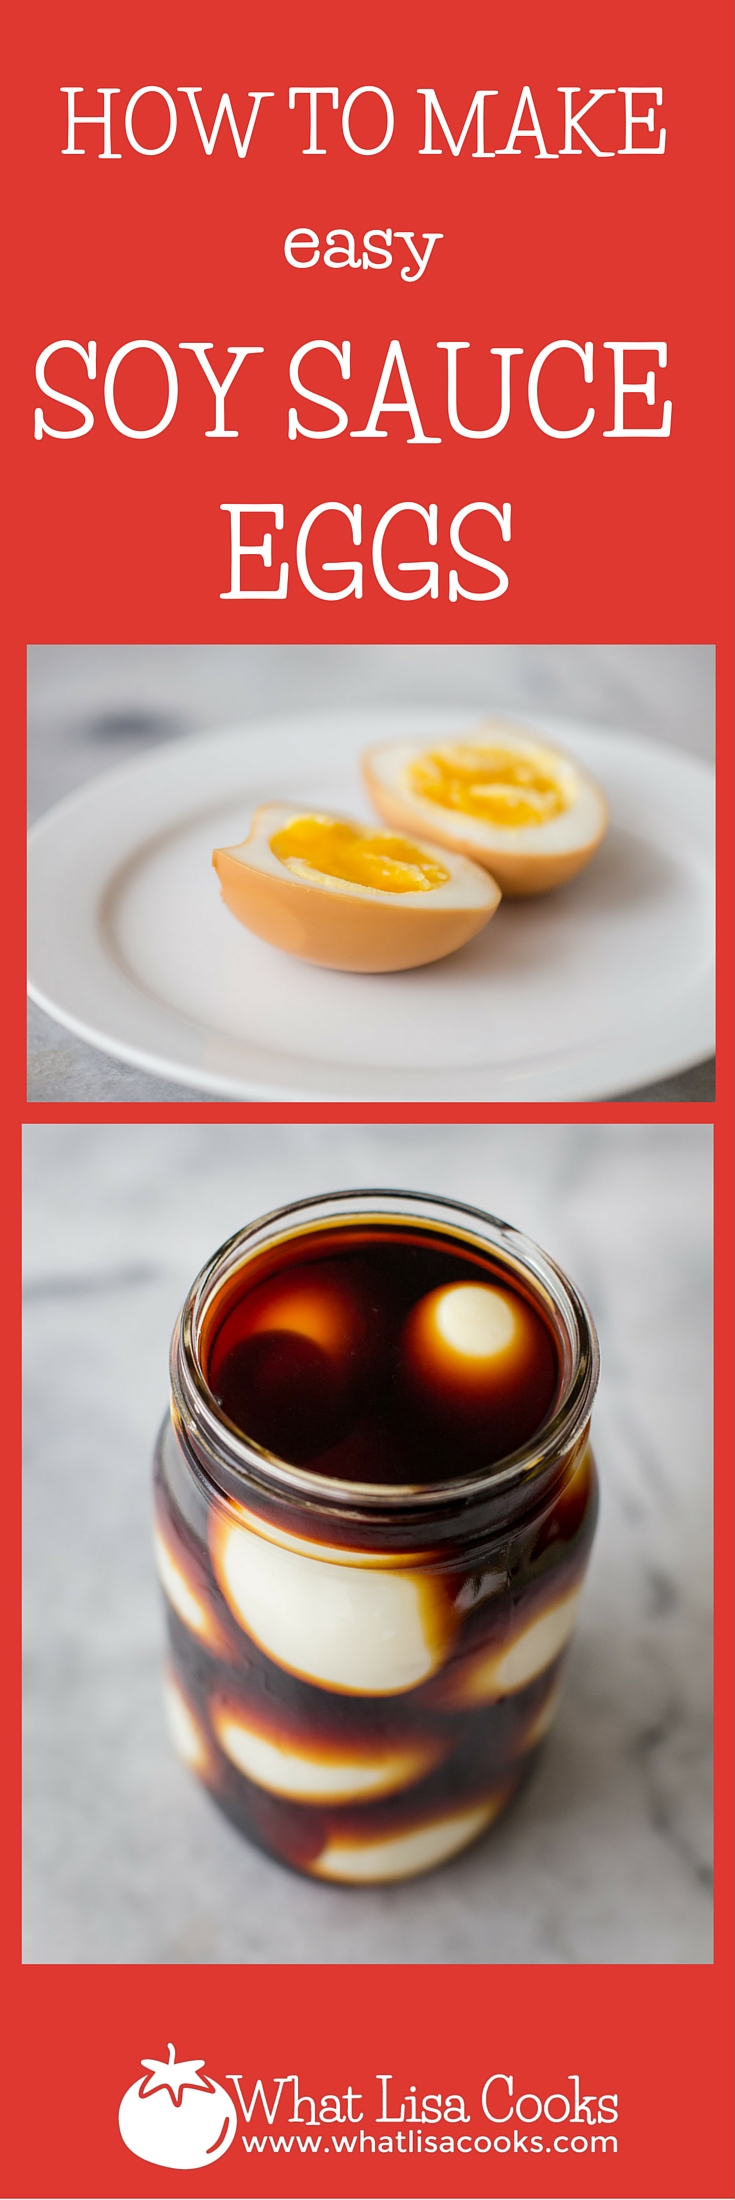
This is my version of a soy sauce marinated egg. If you haven't had them before - it's a bit like a pickled egg, but with added flavors from seasoned vinegar and soy sauce. As with everything I do, I took other recipes and methods that involve more ingredients and more preparation and I've distilled it down to what I think is the quickest and simplest way to get the same kind of flavor in as few steps as possible.
This is the quick and easy road to satisfaction.
Soy Sauce Marinated Eggs
You'll need a clean quart sized jar for this, or similar sized container.

Ingredients:
- 1 dozen boiled eggs - cooled and peeled. Go here for my fool proof method of cooking eggs so they peel perfectly every time. I love to do these with soft cooked eggs, but this is a PERFECT use for all those extra dyed Easter eggs that you don't know what to do with!
- 3/4 cup soy sauce
- 1/4 cup water
- 1/4 cup seasoned rice vinegar (you should be able to get this in the Asian section at any big grocery store).
Directions:
If you haven't already cooked your eggs, do that first. If you follow my method, you can have soft cooked eggs peeled and ready in no time. They don't have to be perfectly cool to do this, just cool enough to peel.

Carefully place all your eggs in a quart sized jar, or similar container. One quart sized jar will hold 1 dozen large eggs. Or keep one out if you think you can't get them all in without squishing too much.
Add the vinegar to the jar. Then combine the soy sauce and water together and pour that mixture into the jar until it's filled to the top. Depending on the size of your eggs you might not use quite all of this. If you do use it all and you still have room at the top of your jar, add a bit more water. Or if you want a little extra flavor, you could top if off with more vinegar instead.
Close the jar tightly, give it a few gentle turns to get the soy sauce and vinegar mixed together and distributed around all the eggs.
Refrigerate and marinade for as long as you can stand it. A couple hours is enough to start, but these will keep for weeks too and the longer they sit the more flavorful they get.
These are amazing for snacking on straight out of the jar. I've had one for breakfast every day this week.
Or you can take this to the next level and use these marinated eggs for a whole new twist on the classic deviled eggs.

This is after marinating for only a little over an hour.

This is after a full 24 hours.

Easy Sunday Breakfast
I love Sunday breakfast with the family. It's a day of the week when we usually have no plans, we take our time, we relax, and we enjoy just doing our thing and hanging out. It's also usually the one day of the week when I get to take the time to fix a real full breakfast for the whole family, and I enjoy it.
I usually make some kind of pancakes or waffles, along with either bacon or sausage, and maybe some scrambled eggs. This Sunday I decided to freshen things up just a bit and experiment with a new egg dish. And I'm so glad I did - this was easy to make, mostly hands off, and very satisfying.
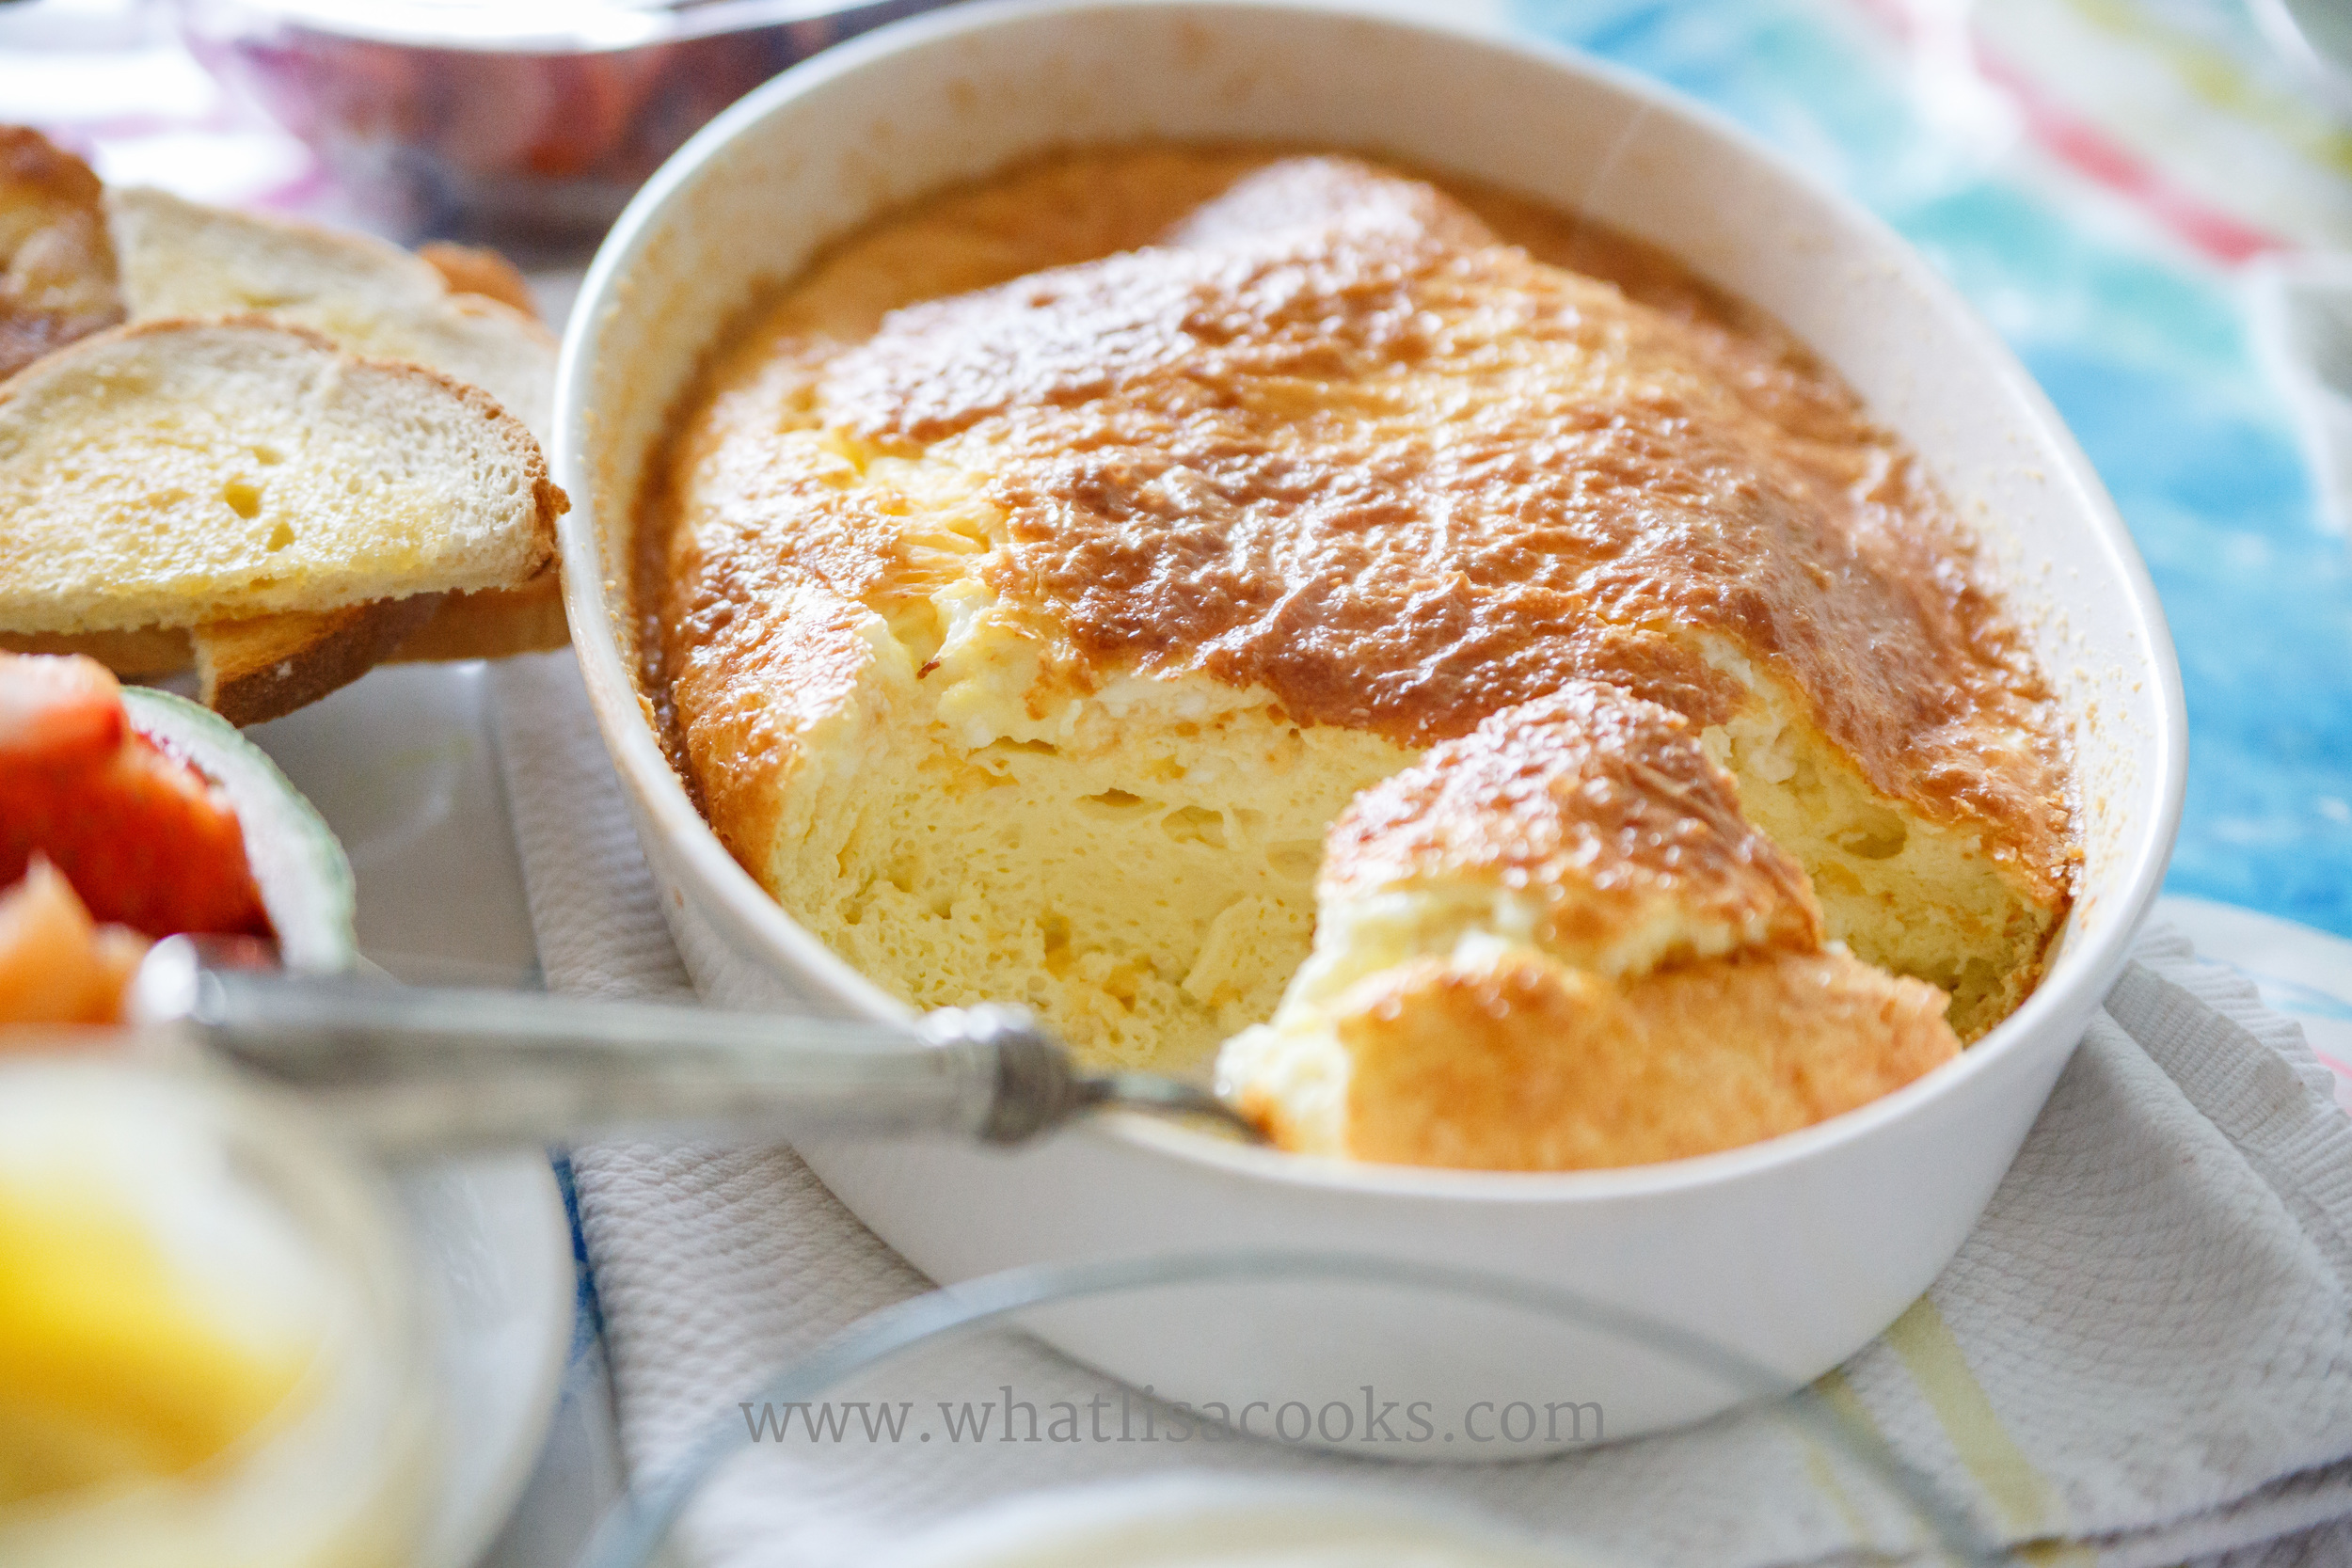
I'm not exactly sure what to call it - a crustless quiche, or maybe a baked scrambled egg. You could easily load this up with lots of extras, but I decided to keep it simple.
Ingredients: (which are approximate)

- 14 eggs (12 would have been fine, but I had 2 extra so I used them)
- 1/2 cup each of grated cheddar, jack, cottage, and parmesan cheese (any mixture of cheese will do)
- butter
- a splash of cream
- salt, pepper, garlic powder
Directions:
I greased by baking dish with butter, and then coated that with most of the parmesan cheese. Then I beat all the eggs very well until frothy, with the cream, and my seasonings, and then folded in the cheeses. I poured the egg & cheese mixture in my dish, sprinkled the rest of the parmesan cheese on top. Then baked at 350 for about 45 minutes until puffed and golden and set.
So easy.
With the eggs we had some fried polish sausage, toast, strawberries and cantaloupe, and honey yogurt (plain yogurt that has been sweetened with honey) with lemon curd. The lemon curd is an amazing addition to the yogurt and/or on top of the fruit. You can find my lemon curd recipe here.
