Easy Chicken Enchilada
A super easy method for tasty chicken enchilada that the whole family will love.
Chicken enchiladas are one of our favorite family meals. They are easy to make, really versatile, and always a crowd pleaser. The way I make this most of the time is actually more of a layered casserole, or what some people will call Mexican lasagna, but we just call it enchiladas.
You can make this with any kind of meat you like, shredded chicken cooked in enchilada sauce is our favorite so that’s what you’ll see below, but I’ve done it plenty of times with pork or beef as well. It’s nice to mix it up. Or you can leave out the meat altogether and use black beans instead. Or just layer the sauces and cheese for cheese enchiladas.
My favorite way to make enchiladas is with my homemade mild enchilada sauce. You can make this of course with any favorite enchilada sauce from the store, but if you really want to make them in a way that your whole family is sure to love, you’ll want to start with my super easy mild enchilada sauce recipe. I came up with this recipe because I love enchiladas but my little kids weren’t fond of anything spicy, so I needed to come up with a flavorful sauce that wasn’t spicy. I love the results so much that I make it all the time, and even make extra to keep in the freezer.

After you’ve got your sauce, the next step for these amazing homemade enchiladas is to cook chicken in the enchilada sauce. This method of cooking chicken is one of my favorites and I make it probably twice a month. You can again do this with a canned sauce, I do it all the time, or you can use my homemade sauce. All you need to do is pile a bunch of chicken pieces, fresh or frozen, in your favorite cooking vessel, and cover them with enchilada sauce, and cook until the chicken is falling apart. You can do this in a pot on the stove, in a dutch oven or casserole dish in the oven, in the instant pot or a slow cooker. And as I mentioned above, you can use the same method with any cut of pork or beef. It’s a great way to use less expensive cuts of meat, as they need to cook longer to get really tender.

Now lets make enchiladas!
I rarely make “real” enchiladas with the filling rolled inside tortillas- all that rolling is just too time consuming for my lifestyle. You of course can do it that way, but I find this method much faster and easier and just as delicious.
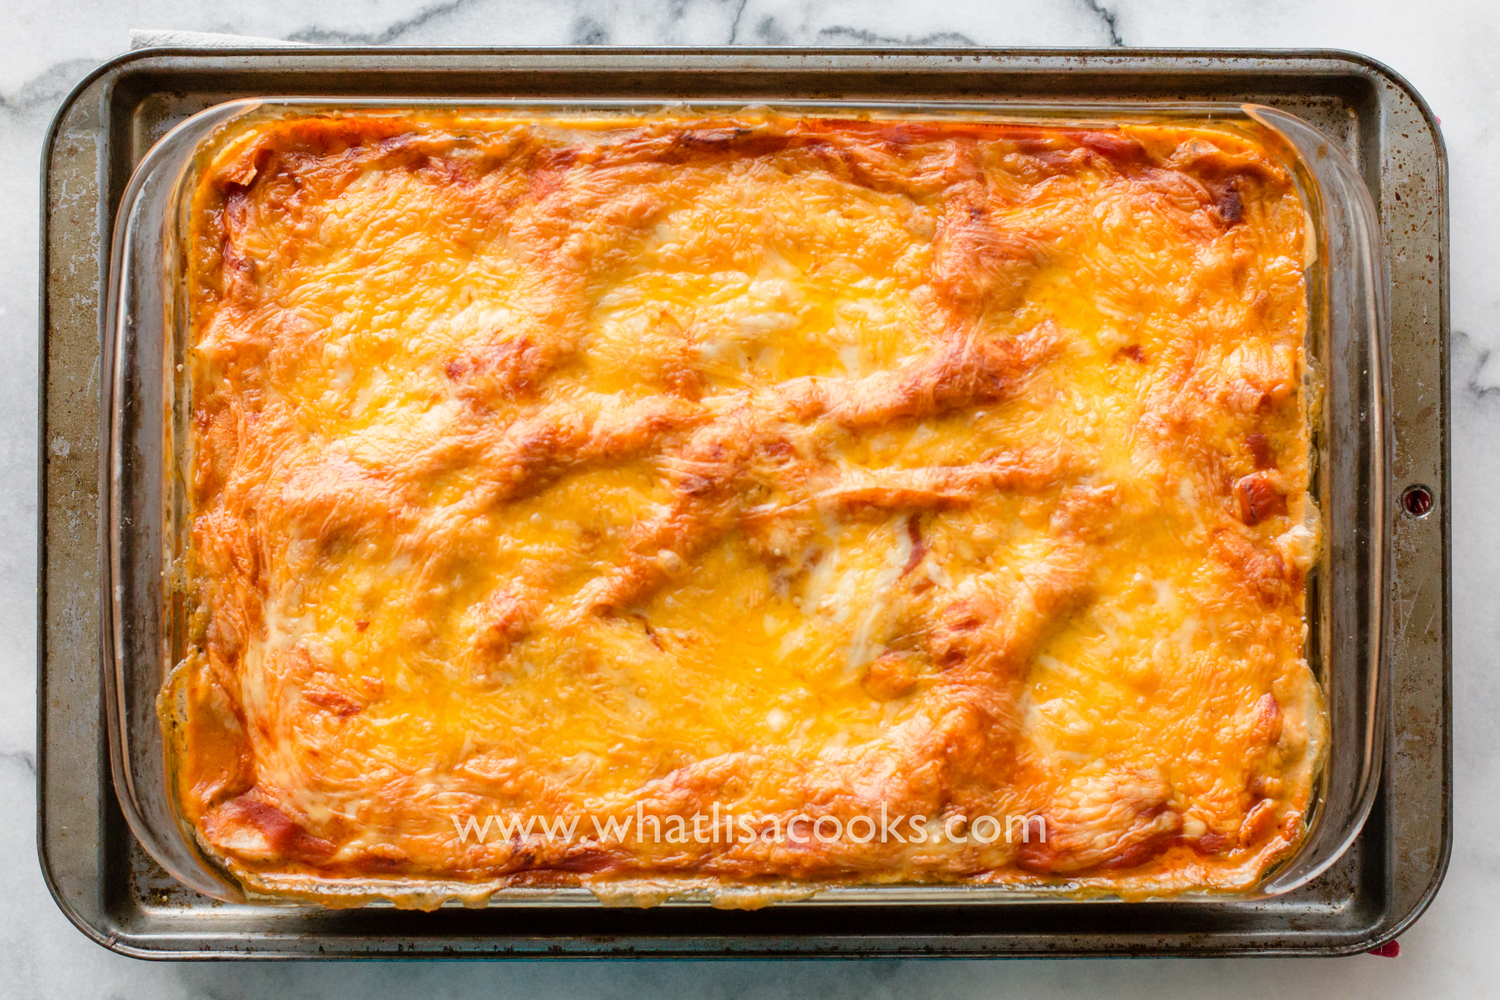
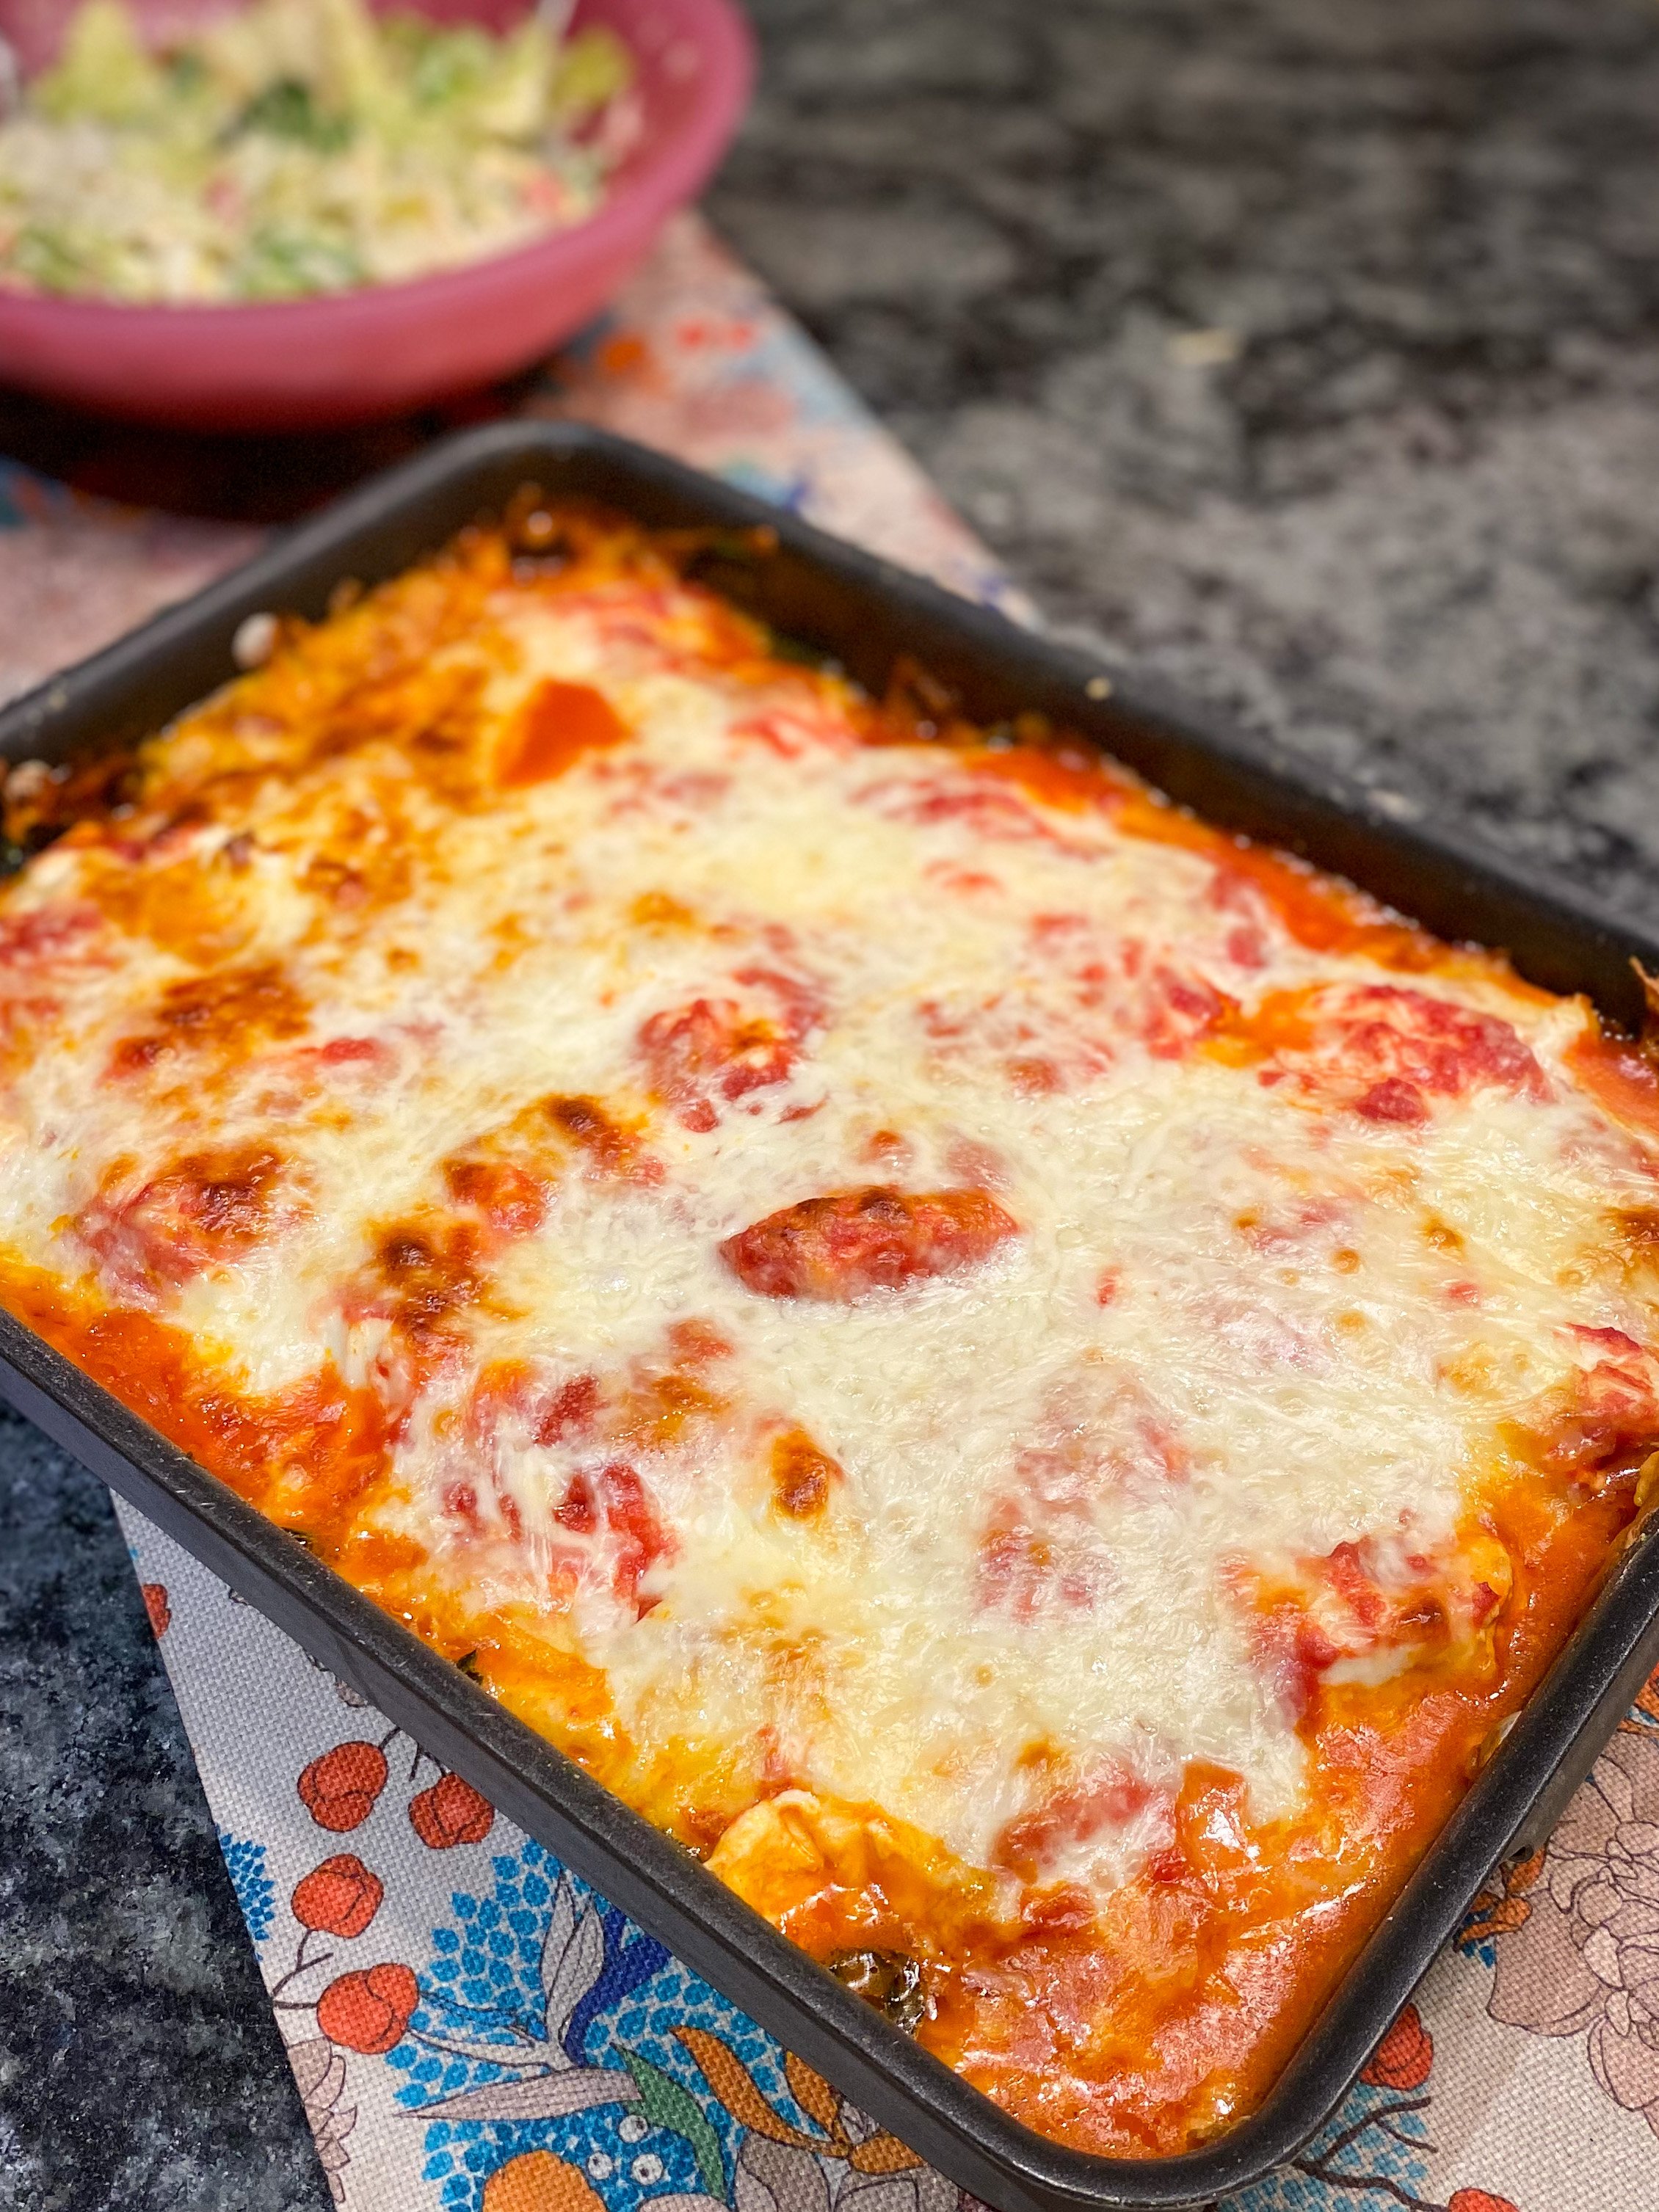
What we make here is an enchilada casserole.
It's basically everything you would put in enchiladas, but layered in a casserole instead of rolled up.


Easy Enchilada Casserole Recipe
Easy Enchilada Casserole
A simple layered enchilada casserole that the whole family will love. Kid pleasing, and great for a crowd.
ingredients:
- 2 cups enchilada sauce
- 3 cups grated cheese (a blend of cheddar and monterey jack)
- Cooked meat: browned ground beef, or shredded enchilada chicken
- 2 cans cream soup (cream of mushroom, cream of celery, etc.), or about 2 cups homemade white sauce (optional)
- 1 can diced green chilis
- about 2 dozen corn tortillas
instructions:
This is a simple layered dish, and the ingredients are very flexible. Use your choice of cheeses (we often just buy a bag of shredded "Mexican blend" cheese.
Mix the green chilis in to the cream soup or white sauce if using, otherwise just spread them between the layers. Or leave them out.
We use a standard casserole dish.
Spread a bit of sauce on the bottom of the casserole dish to prevent sticking.
Cover sauce with a layer of corn tortillas. Break up tortillas to fill in any overlaps or gaps.
Top with meat, if using. Then sprinkle with cheese.
Repeat layers of tortilla, filling, sauce(s), cheese... until the dish is full.
Top with shredded cheese and bake at 350 for about an hour, until the whole thing is bubbly and cheese on top is browned.
This can also be done in a slow cooker. Follow directions the same as above, and cook for 4-6 hours on low until bubbly and melted.
Serve with sour cream, extra cheese, salsa, shredded lettuce, diced avocado & tomato.

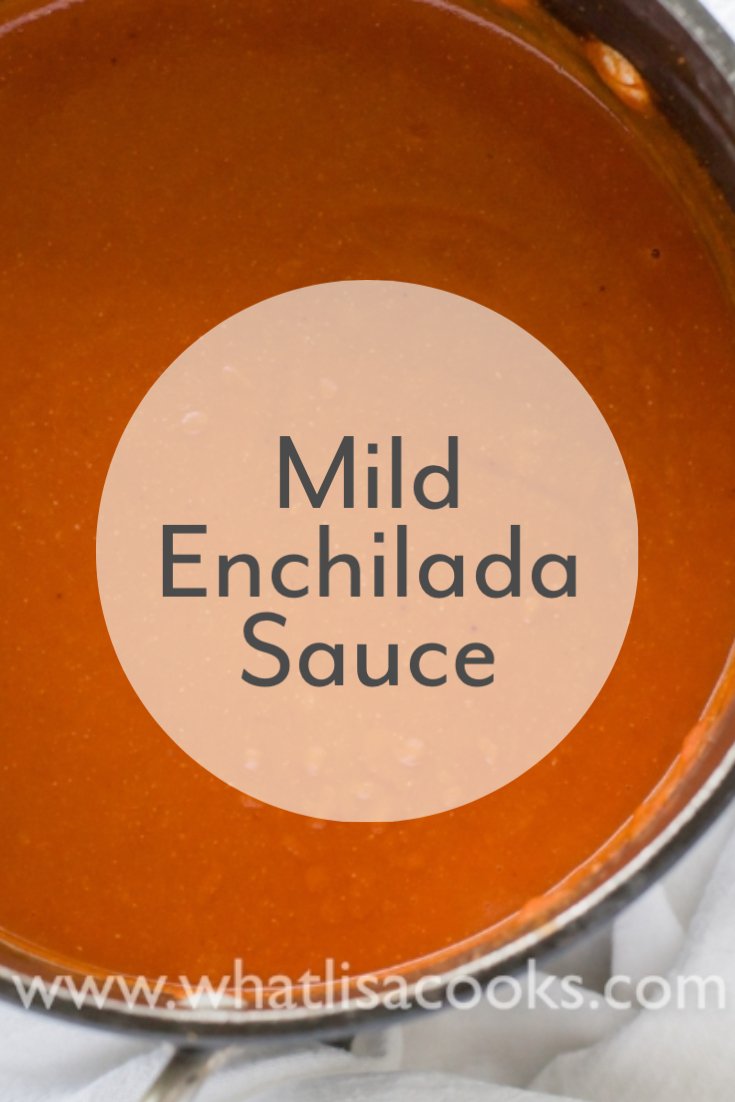
Mild Enchilada Sauce Recipe
An easy mild enchilada sauce recipe that the whole family will love.
Scroll down for the printable recipe card
This easy mild enchilada sauce recipe is one of my most favorite original recipes.
Necessity is the mother of invention.
I love Mexican and Latin style foods and I love making them for my family. But my kids, being typical American kids, didn’t like sauces with any kind of spice at all. And it’s not easy to find a pre-made enchilada sauce that isn’t at all spicy but is still really flavorful. It seems like you either get spicy, or you get bland.
So I came up with my own enchilada sauce recipe. This is a kid friendly, family friendly, easy enchilada sauce recipe that the whole family will love.
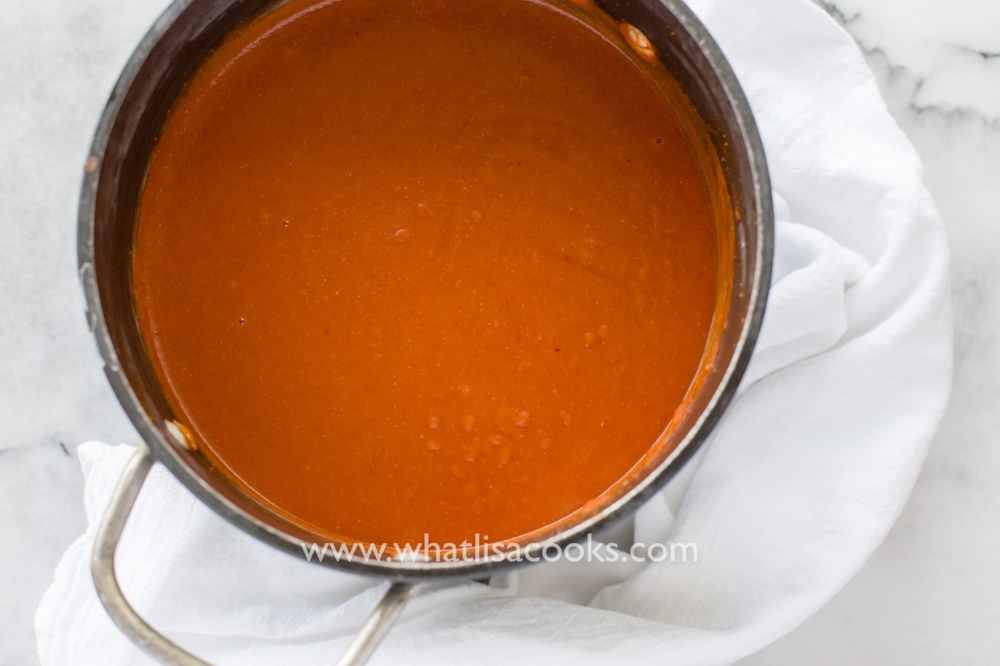
It’s basically a flavored and spiced gravy - so if you know how to make a gravy, this will be super easy for you. It makes a big batch, and I often even double this, because it keeps well and it freezes easily.
This one is a long post because I’ve combined a few recipes into one. Below the Enchilada Sauce Recipe I’ve also include my recipes for how I make enchilada shredded chicken, and how I use that chicken and the enchilada sauce in my easy enchilada casserole.
Once I gave up on buying enchilada sauce for a while, I needed to come up with my own. After looking at a bunch of different recipes online, I decided to come up with my own version of a simple sauce that suits us just perfectly.
It's really flavorful and gives a nice southwest style flavor to dishes, but it's not spicy at all. I love to use this for enchiladas, or more often just an enchilada casserole, but it's also great for simmering chicken or other meat in, to shred up and use for tacos, burritos, salads, etc.

I make no claims about this being any kind of authentic - 'real' enchiladas would definitely have a sauce made of chilis. But we're not in Mexico and I'm not Mexican, so this is just my American girl version of this style of dish.
I also love that this doesn't require any special or unique ingredients - I can whip up a pot of this sauce very quickly with just ingredients that I pretty much always have in my pantry.
It seems like a lot of spices, and it is.
But what we're doing here is making up for the lack of spice from peppers by adding a lot of other flavor. And, as with all of my recipes, this one is super flexible. The quantities of spices are just a guideline, and honestly most of the time I don't even really measure. I recommend you start out with measuring, and then as you go along and make the sauce you taste it and you can add more spices as needed.
Not sure how to use this sauce? Try my favorite enchilada casserole recipe. This is a regular favorite on our family menu.
Recipe: Lisa's Homemade and NOT Spicy Enchilada Sauce
Mild Enchilada Sauce
An easy recipe for a very mild enchilada sauce that the whole family will love.
ingredients:
- 1 quart of chicken broth
- 1 15.5 oz can of tomato sauce
- 1/2 cup (1 stick) butter
- 3/4 cup flour
- 2 teaspoons garlic powder
- 2 teaspoons onion powder
- 4 teaspoons cumin
- 2 teaspoons paprika
- 1/2 teaspoon chili powder
- salt, to taste
instructions:
Basically, you’re making a simple gravy with a butter & flour roux, and chicken broth + tomato sauce for the liquid, and spices added for flavor. Add all the spices (except salt) at the beginning with the butter and flour, so they toast a bit and get more flavorful. Then whisk in the liquid as usual, and taste to adjust seasoning.
- Put the butter, flour and all the spices except the salt in a medium stock pot over medium heat. Stir until the butter is all melted and you have a well blended paste.
- Once the butter and flour are well combined, slowly add your broth, whisking the whole time to avoid lumps.
- Then add the tomato sauce.
- Let it all simmer for about 10-15 minutes, not boiling, stirring frequently.
- Taste as you go and decide whether you think you like the flavor, or you want more garlic, or more chili powder, etc. I hold off on the salt until I have everything else combined, because the saltiness of any particular batch of chicken broth or tomato sauce can really vary. So get it all mixed up and then add salt if you feel like it needs it.
- This recipe is very flexible. The spice quantities are just a guideline and you should totally play with the amounts. If you actually want to make this spicy, add a little cayenne pepper, or a bunch more chili powder.
- You can also make this without the tomato sauce, I’ve had it that way and it’s great too - like an enchilada spiced gravy.
- This freezes great. This recipe makes more than you’ll need for one recipe of enchiladas. Set aside half and freeze for next time.
- Use vegetable broth to make a vegetarian sauce.
- Make it gluten free by using gluten free flour.


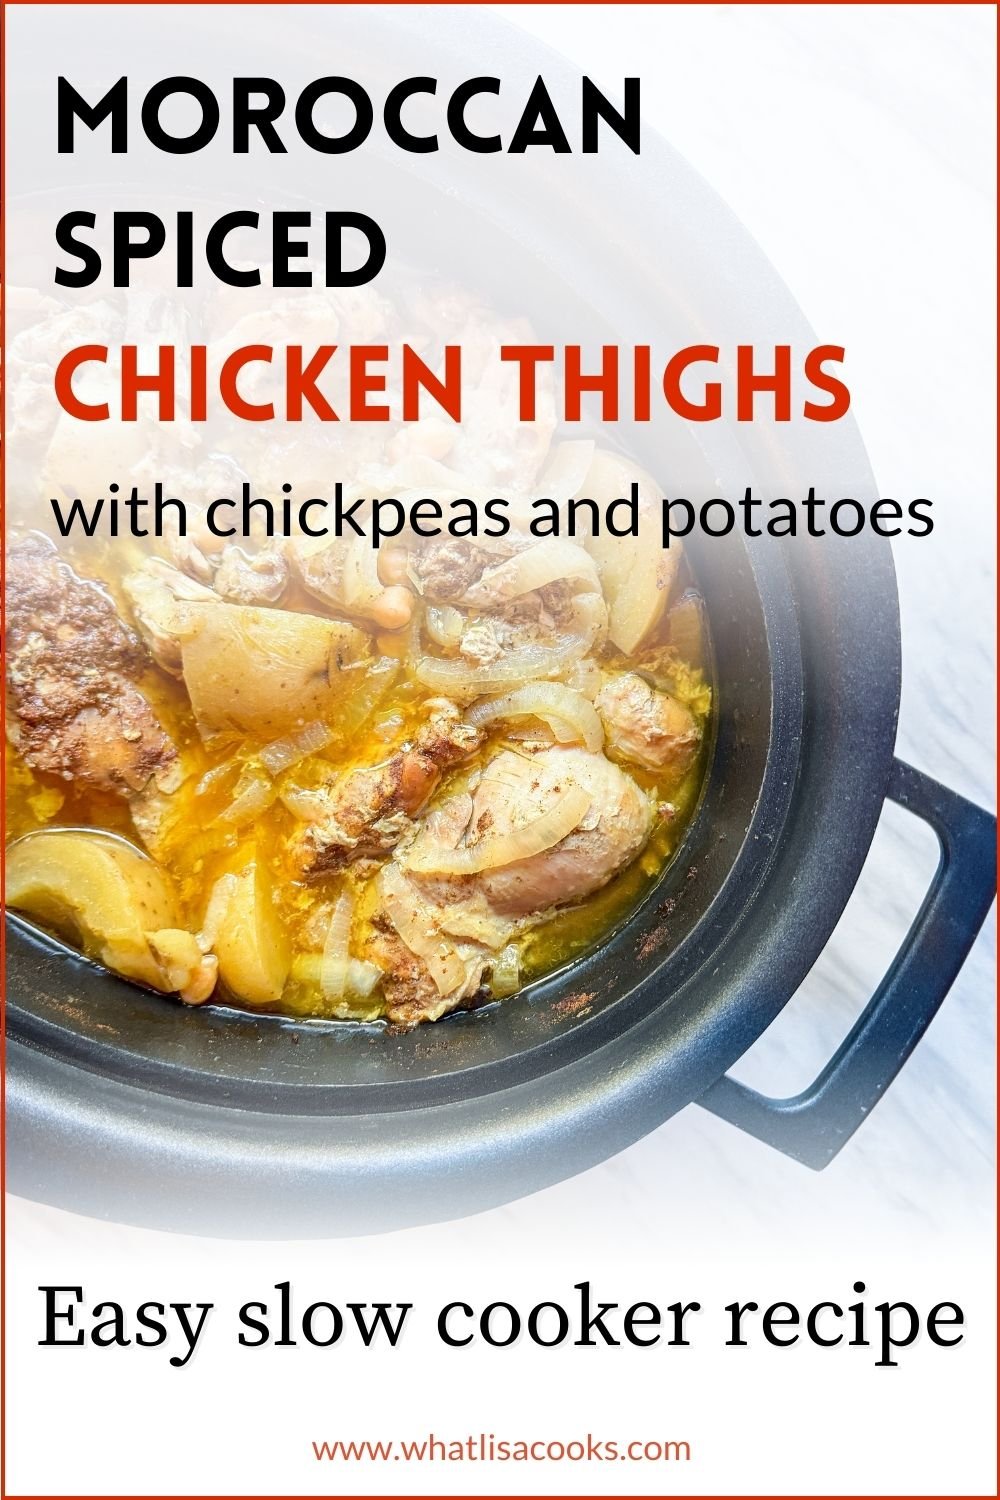
Moroccan Spiced Slow cooker Chicken
A super easy dump and forget it slow cooker recipe with amazing flavor.

There is a printable recipe card at the end of this post.
Recipe: Moroccan Spiced Slow Cooker Chicken with Chickpeas and Potatoes
Now that we are back in school and our days are getting really busy, I’ve been looking for more slow cooker recipes. There are more and more days when I need to be able to put dinner together earlier in the day because we are running around and on the go right up until dinner time. I don’t want to get home after all the pick-ups and drop-offs and still have to start cooking, so slow cooker meals are perfect for this busy season of life with kids.

This meal I’m sharing with you today started out as an experiment, when I couldn’t find an existing recipe that was really grabbing my attention so I just came up with something on my own that sounded good. And it was a definite success! Every now and then I come up with something that is an instant winner on the first try.
This recipe has everything you want in a slow cooker meal - it’s literally just layering the ingredients in the cooker, with no pre-cooking or browning required, very minimal prep (really just slicing some onion and roughly cutting a few potatoes), hands off cooking time, and amazing flavor. It does require having a couple of specialty ingredients already pre-made if you want this to come together fast, but fortunately they are items that I keep ready in my kitchen almost all the time and I highly recommend that you do too.
So here’s what’s in it:
canned garbanzo beans / chickpeas (with their liquid!)
onions
preserved lemons
moroccan spice blend
salt
yellow potatoes
frozen chicken thighs
When I first made this I debated about adding the potatoes but I’m so glad I did. They absorb so much wonderful flavor and get melt in your mouth soft and delicious.
The preserved lemons and moroccan spice blend are two items that require advance prep, but they are things I absolutely love for adding a huge punch of flavor to so many dishes. I always keep a jar of preserved lemons in my fridge, and when I mix up this moroccan spice blend I always make a lot so I have it ready for quick meals.
Preserved lemons are very easy to make. They are just lemons and salt, but the process that happens as the salt preserves the lemon creates a really one of a kind flavor that’s hard to substitute. It’s such an easy way to add a huge burst of flavor to your dishes that I highly recommend you make some to keep on hand. I have a short little post about them here, and you can find plenty more online. This is one that you don’t have to be super precise about it, you are basically just layering lemons and salt in a jar. When I make these I like to leave them out on the counter for the first few weeks to let them do their magic, and then I store in the refrigerator. Because you are eating the whole lemon rind when you use this, it is nice if you can find organic lemons, but if you can’t then I just recommend that you wash your lemons first. Most recipes tell you to scrape away the pulp of the lemon before using the preserved lemon peel, but I almost never bother doing that. I love the extra flavor that the pulp adds to my dishes.
My Moroccan inspired spice blend is a version I’ve developed after trying several different recipes I found. This version packs a big punch of flavor without making foods spicy hot, which my kids don’t like. I’m always trying new ways of adapting spices for recipes to capture flavor without heat and this one really fits that requirement perfectly. It’s become one of my favorite go-to seasonings. It’s amazing on all kinds of meats as well as roasted vegetables.

How to make this Moroccan Spiced Slow Cooker Chicken with Chickpeas and Potatoes.
First you’ll want to slice your onions and cut your potatoes into big chunks. It’s good to leave the potatoes relatively large so they hold up to the long cooking time that the frozen chicken needs. If the potatoes are on the smaller side you might even leave them whole. I used yellow potatoes here because I like the hint of sweetness they add and I think they hold their shape better with longer cooking, but feel free to use your favorite kind. You could also decide to add the potatoes in a bit later, but I love all the flavor they absorb and how soft they get in the longer cooking time, and I wanted this to be a dump and walk away kind of recipe, not one you have to come back to and add things.
In your slow cooker you are just going to layer all the ingredients. Start with the canned chickpeas and their liquid. This part is important. You need some liquid to get that slow cooking process going, and the liquid from the can of garbanzo beans is full of flavor you don’t want to waste. So don’t drain - just pour the whole can in there. If you accidentally drain that liquid then you will need to add a little water or broth. On top of that place sliced onions, chunks of potato, then several pieces of preserved lemon, and then the spice mix. Then I put the frozen chicken thighs on top of all that and more spices. Cover and cook.
Quantities and cooking time are in the detailed recipe card below. As with all of my recipes though, the quantities don’t have to be exact. Feel free to use more or less of any ingredient and customize to your liking. If your chicken isn’t frozen you’ll want to cook this for less time. You could certainly also do this with bone-in thighs, or with breasts, and I’m sure it would be equally delicious. I also think this would be amazing as a vegetarian dish leaving out the chicken altogether and just using more beans and potatoes and maybe even adding other veggies like cauliflower. The frozen chicken adds a lot of moisture, so if you aren’t using that then you’ll probably want to add a half cup or so of broth or water.
I served this over couscous with a dollop of plain yogurt, but we also ate it leftover both just by itself and over some leftover pasta. It was amazing no matter how it was served, and only got better after it sat in the fridge overnight.
I hope you enjoy and let me know if you try it.

Moroccan Spiced Slow Cooker Chicken Thighs with Garbanzo Beans and Potatoes
Ingredients
Instructions
Notes
Feel free to adapt any of the ingredients to your preference - more or less of any ingredient will work out just fine. If you choose to use fresh instead of frozen chicken you will want to cook this for shorter time, I suggest about 3 hours. See the original post on whatlisacooks.com for more suggestions and notes.

Favorite Ground Beef Recipes
Family - and budget - friendly ground beef dinner ideas and recipes.
Stressed about the price of meat these days?
You’re not alone.

Meat has gotten so expensive, I hardly ever buy big pieces of beef any more. When I buy beef these days it’s usually ground beef, so I needed more ideas for budget friendly meals using ground beef.
I got a little tired of my usual ground beef dinner recipes, and I suspect you probably do too.
So I did my new favorite thing - I reached out to my followers on Threads and asked for their favorite ground beef recipes. My friends did not disappoint with suggestions for ways to use ground beef, I got so many suggestions for budget friendly ground beef dinner recipes.
Are you following me on social media? Click on over to follow me and join the conversations.
What follows below is the list of all the ground beef ideas my crowdsourcing came up with. This list includes so many favorites, quick and simple ground beef recipes, comfort food ground beef recipes, one pot ground beef recipes, and so many more family friend ground beef dinner ideas.
I’m linking recipes where I have them, and keep checking back to see if there’s more.
Ground beef dinner ideas:
Chili: chili with ground beef is actually my favorite kind. It’s somehow just more comforting. I have a recipe here on the blog that we love. I’ve made this for years so this one isn’t new to me, but it’s at the top of my list to recommend to you. This is a family friendly chili that my kids, and anyone else I have ever made it for, absolutely love. It’s full of flavor but not spicy. Try serving it in bread bowls, or with hot dogs. I’m on team no beans in chili, but feel free to add beans if you like them.
Stuffed eggplant: This recipe with spiced beef and pine nuts sounds amazing. Based on Yotam Ottolenghi’s lamb-stuffed eggplants.
Meatloaf: so many amazing recipes out there! Here is a great recipe from Natasha’s Kitchen. You can also take any favorite meatballs recipe and cook it as a loaf as well. I’ve done that many times when I wanted the flavor of my favorite meatball recipe but didn’t feel like taking the time to make the balls.
Meatballs: another one with practically limitless options. Our family favorite meatball recipe is from an old Moroccan cookbook that I’ve had for years. It’s no longer in print but you can find used copies of it. I highly recommend this book anyway, it’s got so many amazing recipes. I also have another favorite meatball recipe here on the blog, it’s a very basic recipe that’s super easy to adapt. You can also generally take any favorite meatloaf recipe and make it into meatballs instead.
Meat sauce / Bolognese / Ragu: these sauces are another favorite of ours and they are so versatile. I usually make a huge batch of it and we will have it one night on pasta and then later in the week I will make lasagna with it. A lot of recipes call for a variety of ground meats, but you can use just ground beef and it will still be delicious. My favorite bolognese recipe is in another of my favorite cookbooks - How to Cook Everything, by Mark Bittman
Hamburgers - need no explanation! There are so many options, I don’t think my kids could ever get tired of them. You can get creative with toppings to keep it interesting.
Picadillo - this is a new one to me, so I am looking forward to trying it. It’s a Latin dish with ground beef and spices and olives, some versions have potato too. In my brief searching, it seems like Cuban versions don’t have potatoes, while the Mexican style includes potatoes. Here’s one that looks delicious without potatoes, and here’s another that has potatoes. We’re going to have to try it both ways I think.
Shepherds pie: always a favorite. I think a lot of families have their own recipes for this, I’ve made it a lot and don’t usually follow a recipe. But if you’ve never had it, or never made it - you must give it a try. It’s basically a savory mixture of ground beef, veggies, and gravy - like a thick stew - topped with seasoned mashed potatoes and baked. Classic comfort food. Some will say that with beef it’s technically cottage pie, and shepherds pie is lamb. I say call it whatever you like. Here’s a great recipe from The Wholesome Dish.
Stuffed peppers: ground beef, rice, spices, cheese - what’s not to love? You can find a million recipes if you do a quick search, here’s one that looks great to me, from WellPlated.com.
Homemade crunch wrap supremes: Ok this was a new one to me. It’s a Taco Bell thing and I don’t eat at Taco Bell, but a homemade version sounds amazing. A loaded ground beef taco in a crispy taco shell, then wrapped in a flour tortilla and fried. Sounds too good to be true! Here’s a recipe that sounds amazing, from Spend With Pennies.
Tacos: obviously, the possibilities are endless. You can season up your ground beef really well, or you can keep it super simple. I do it all ways - sometimes with lots of chili powder and cumin and garlic, but sometimes with just a little salt and pepper and I let the toppings and salsa add the extra flavor. You can of course use packaged taco seasoning, but I stopped buying that years ago when I realized it was just as easy to season it myself.
Nachos with seasoned ground beef topping: anything you can put in a taco, you can put on top of nachos instead. It’s a fun way to mix it up.
Tamale pie: believe or not, I’ve actually never made this! But I’ve had it and it’s delish. Kinda like a tex-mix Shepards pie - a spiced ground beef and veggie mixture, with corn bread on top. Here’s a recipe that sounds fun.
Goulash (the American kind): I had to specify this because Hungarian goulash is a whole other kind of thing. But American goulash is a more eastern US regional thing, so I’ve actually never had it but it sounds amazing. It’s like a spiced tomatoey ground beef sauce with elbow macaroni pasta and it sounds like the kind of thing my family would love. Here’s a one pot version from Rachel Cooks, where the pasta cooks in the sauce, and you know that’s right up my alley.
Lasagna: the ground beef lasagna I grew up with was very American, which I didn’t realize until well into adulthood. But that doesn’t mean it isn’t delicious. I mentioned above that I make a lasagna sometimes with bolognese, and it is amazing. But you can also do the more classic American style with browned ground beef layered in between the layers of pasta, sauce and cheese. Or you can make a simple ground beef tomato sauce. Here’s a great simple recipe for a ground beef lasagna from Jo Cooks.
Unstuffed peppers: all the goodness of the stuffed versions, but maybe a bit easier cooked together in one pot. Here’s a recipe that sounds simple and easy.
Stuffed cabbage rolls: I love these but I haven’t made them in years, I really need to do it again. Here’s a recipe that sounds very easy and budget friendly from Spend with Pennies. There are also “unstuffed” versions of recipes like this, a quick google search will bring you several options.
Lettuce wraps: lettuce wraps of all kinds are among my favorite things. I love all the flavors in these, and how versatile they can be. You can search and find dozens of recipes, but here’s one that sounds particularly delicious.
Japanese curry: My kids love the flavors of Japanese curry. You can buy the sauce in cubes that you melt into a sauce. It’s so versatile, you can use the sauce with any combination of protein and veggies that you like. We buy the mild version, my grocery store usually carries it, but you can order it online if you can’t find it. This is a staple that I always keep in my kitchen because it’s such an easy weeknight dinner. The recipe is on the box - you just brown your meat and veggies, and add the sauce and liquid. I love to also add coconut milk to give it an extra creamy flavor.
Bibimbap / Korean beef bowl: oh another favorite. Spiced ground beef served with a variety of sides and toppings, on a bowl of rice. Another that is really flexible and great for weeknights, you can cook it up very fast or make ahead. Here’s just one recipe, but there are so many more if you search.
Stroganoff: a family classic. Typically this is made with strips of beef but I think it’s just as good with ground beef. I used to make this all the time while camping, it’s an easy one pot camping meal that everyone loves.
Salisbury steak: I have fond memories of having this in TV dinners as a kid (I’ve just dated myself), but I’ve never tried making it, and why not? A seasoned beef patty, browned and served with mushroom gravy and probably some mashed potatoes. This is going on my list for a winter comfort food meal. Here’s a great recipe from Recipe Tin Eats.
Sloppy joes: an old school school cafeteria classic that can be made so much better at home. Ground beef in a hearty tomato sauce served on a toasted hamburger bun. Natasha’s Kitchen is one of my favorite food blogs and I’m sure her version is amazing.
Loco moco: I may have accidentally saved the best for last. If you’ve never had loco moco, you’re in for a treat. This is a Hawaiian classic comfort food - a ground beef patty, served over a scoop of rice, with a mushroom gravy and a fried egg. My mouth is watering just thinking about it. Here’s a simple classic version that you need to try.
I hope this has given you lots of great ideas for your weeknight budget meal planning.
Happy cooking!


Pizza Rolls
Recipe for easy homemade pizza rolls. A homemade spin on a kid food favorite that the whole family will love. Easy and fast to make.
Easy homemade pizza rolls are a family favorite.
This post was updated Sept 2024.

Pizza rolls are easy to make, kids love them, adults love them, and the possibilities for customizing are practically endless. I shared a picture on my Instagram and Facebook pages of my kids lunches with these pizza rolls and I got so many requests for the recipe!
Pizza rolls are one of my favorite things to pack for lunch - really anything in the pizza for lunch category is always a hit with the kids.
The full pizza rolls recipe is at the end of this post, so keep reading because I’ve got lots of handy tips for you about how to make these. But if you really want to just skip to this easy recipe, you can click the button below.

You can make these with as little 3 items from your fridge, only a few minutes to put together.
You could totally go make some of these now and be eating them in 20 minutes - that's how fast! And as with most of my favorite recipes - the ingredients here are very flexible.
I think these might be one of the perfect kid foods.
They're small enough for little hands, they are not messy, they seem to travel and keep well, and - best of all - they taste like pizza!

A few tips about how I make these pizza rolls.
Because my goal with this recipe is to have something that comes together super fast and easy, I go with a packaged dough most of the time. Usually I use a can of crescent roll dough from Trader Joe's. But use any quick and easy dough you like.You could also use biscuit dough, or certainly if you have homemade dough, go for it!
If I'm buying pre-made dough I try to look for one that's not got too much nasty stuff in it. The TJ's brand is not too bad. It's not as easy to handle as some others (maybe because it's missing some of the chemical dough conditioners and junk), but for this recipe that's ok. You're not actually making crescent rolls with it.
For the sauce I used a canned pizza sauce or sometimes just plain tomato sauce. Any kind you like will do. I use traditional mozzarella for ours most of the time, but any flavor if cheese you like would be great too.
The amounts of the sauce and cheese are also flexible - it's really about your personal taste. Just don't add too much - you don't want to squish it all out when you cut.

These are such great kid food, my kids scarf them up.
But the husband and I eat our fair share too. I think they are a perfect make-ahead item for kids lunches.

Everybody loves homemade pizza rolls!
Let's be honest - a big green salad with a few of these on the side, doesn't that sound like a perfect weeknight dinner? These freeze great. Whenever I make them I always at least double the recipe and I put a bunch in the freezer.
It doesn't get any easier for packing a school lunch - to pull out a few of these, throw in a few carrots and a little fruit, and lunch is done.
Pizza Rolls Recipe

Easy Homemade Pizza Rolls
A crowd pleasing favorite!
ingredients:
- Dough - 1 can of prepared crescent roll dough. Or any other dough of your choice.
- A little flour (any kind will do - it's just for rolling the dough)
- A few tablespoons of pizza sauce (or just plain tomato sauce)
- About 1/3 cup shredded mozzarella cheese, or whatever cheese you like.
- Other fillings of your choice - cut into small pieces (pepperoni, ham, veggies, etc.)
instructions:
- Preheat oven to 350 degrees
- Take the dough out of the can, sprinkle both sides with a little flour
- Fold it over on itself once or twice (otherwise it's trying to come apart at the seams)
- Roll out into a rectangle until it's about 1/4 inch thick
- Spread pizza sauce or tomato sauce thinly and evenly across the whole piece of dough
- Sprinkle cheese evenly
- Add other toppings as desired
Start rolling from the long edge, you want your final roll to be long and narrow. Try to get it as tight as you can without feeling like you're squishing it.
- At this point if you've handled it a lot and you feel like your dough is getting too soft to slice, stick it in the fridge for 20 minutes or so to firm up.
- Slice into 3/4 inch pieces with a very sharp knife.
- Lay your cut rolls out evenly on a baking sheet - either spray with a bit of cooking spray or line with parchment
- Bake at 350 for about 12-14 minutes, or until cheese is bubbly and dough is golden brown.
NOTES:
Double or triple or quadruple this recipe and make lots extra. These freeze great and are perfect for the lunch box.


Ravioli Lasagna Recipe
Ravioli Lasagna recipe - an easy and delicious family dinner recipe.

We have a new family favorite dinner. This ravioli lasagna recipe is so easy and sure to please a crowd.
When we were in the process of moving last year we were in a state of limbo for several months. We had to have a lot of work done on our old house before we could sell it, so after the months of packing and moving out of our house, we then lived in an AirBnB for two months while the house was remodeled before we could list it.
With all the chaos and upheaval I didn’t have the energy to do a lot of cooking from scratch. We were very close to a Costco so we basically lived off all the amazing pre-made dinners from Costco every night. They had so many options and we tried them all, but definitely found a few favorites - and their ravioli lasagna was one of our top favorites.
Now that we’re all settled in our new home and I’m back to cooking every night, I thought I could probably easily recreate that amazing ravioli lasagna recipe at home. And I was right. This is so easy to make and everyone loves it, and I’m sure this ravioli lasagna recipe is going to become a regular on our family meal plan.
You hardly need a recipe, but I’ve listed it out below for you anyway.
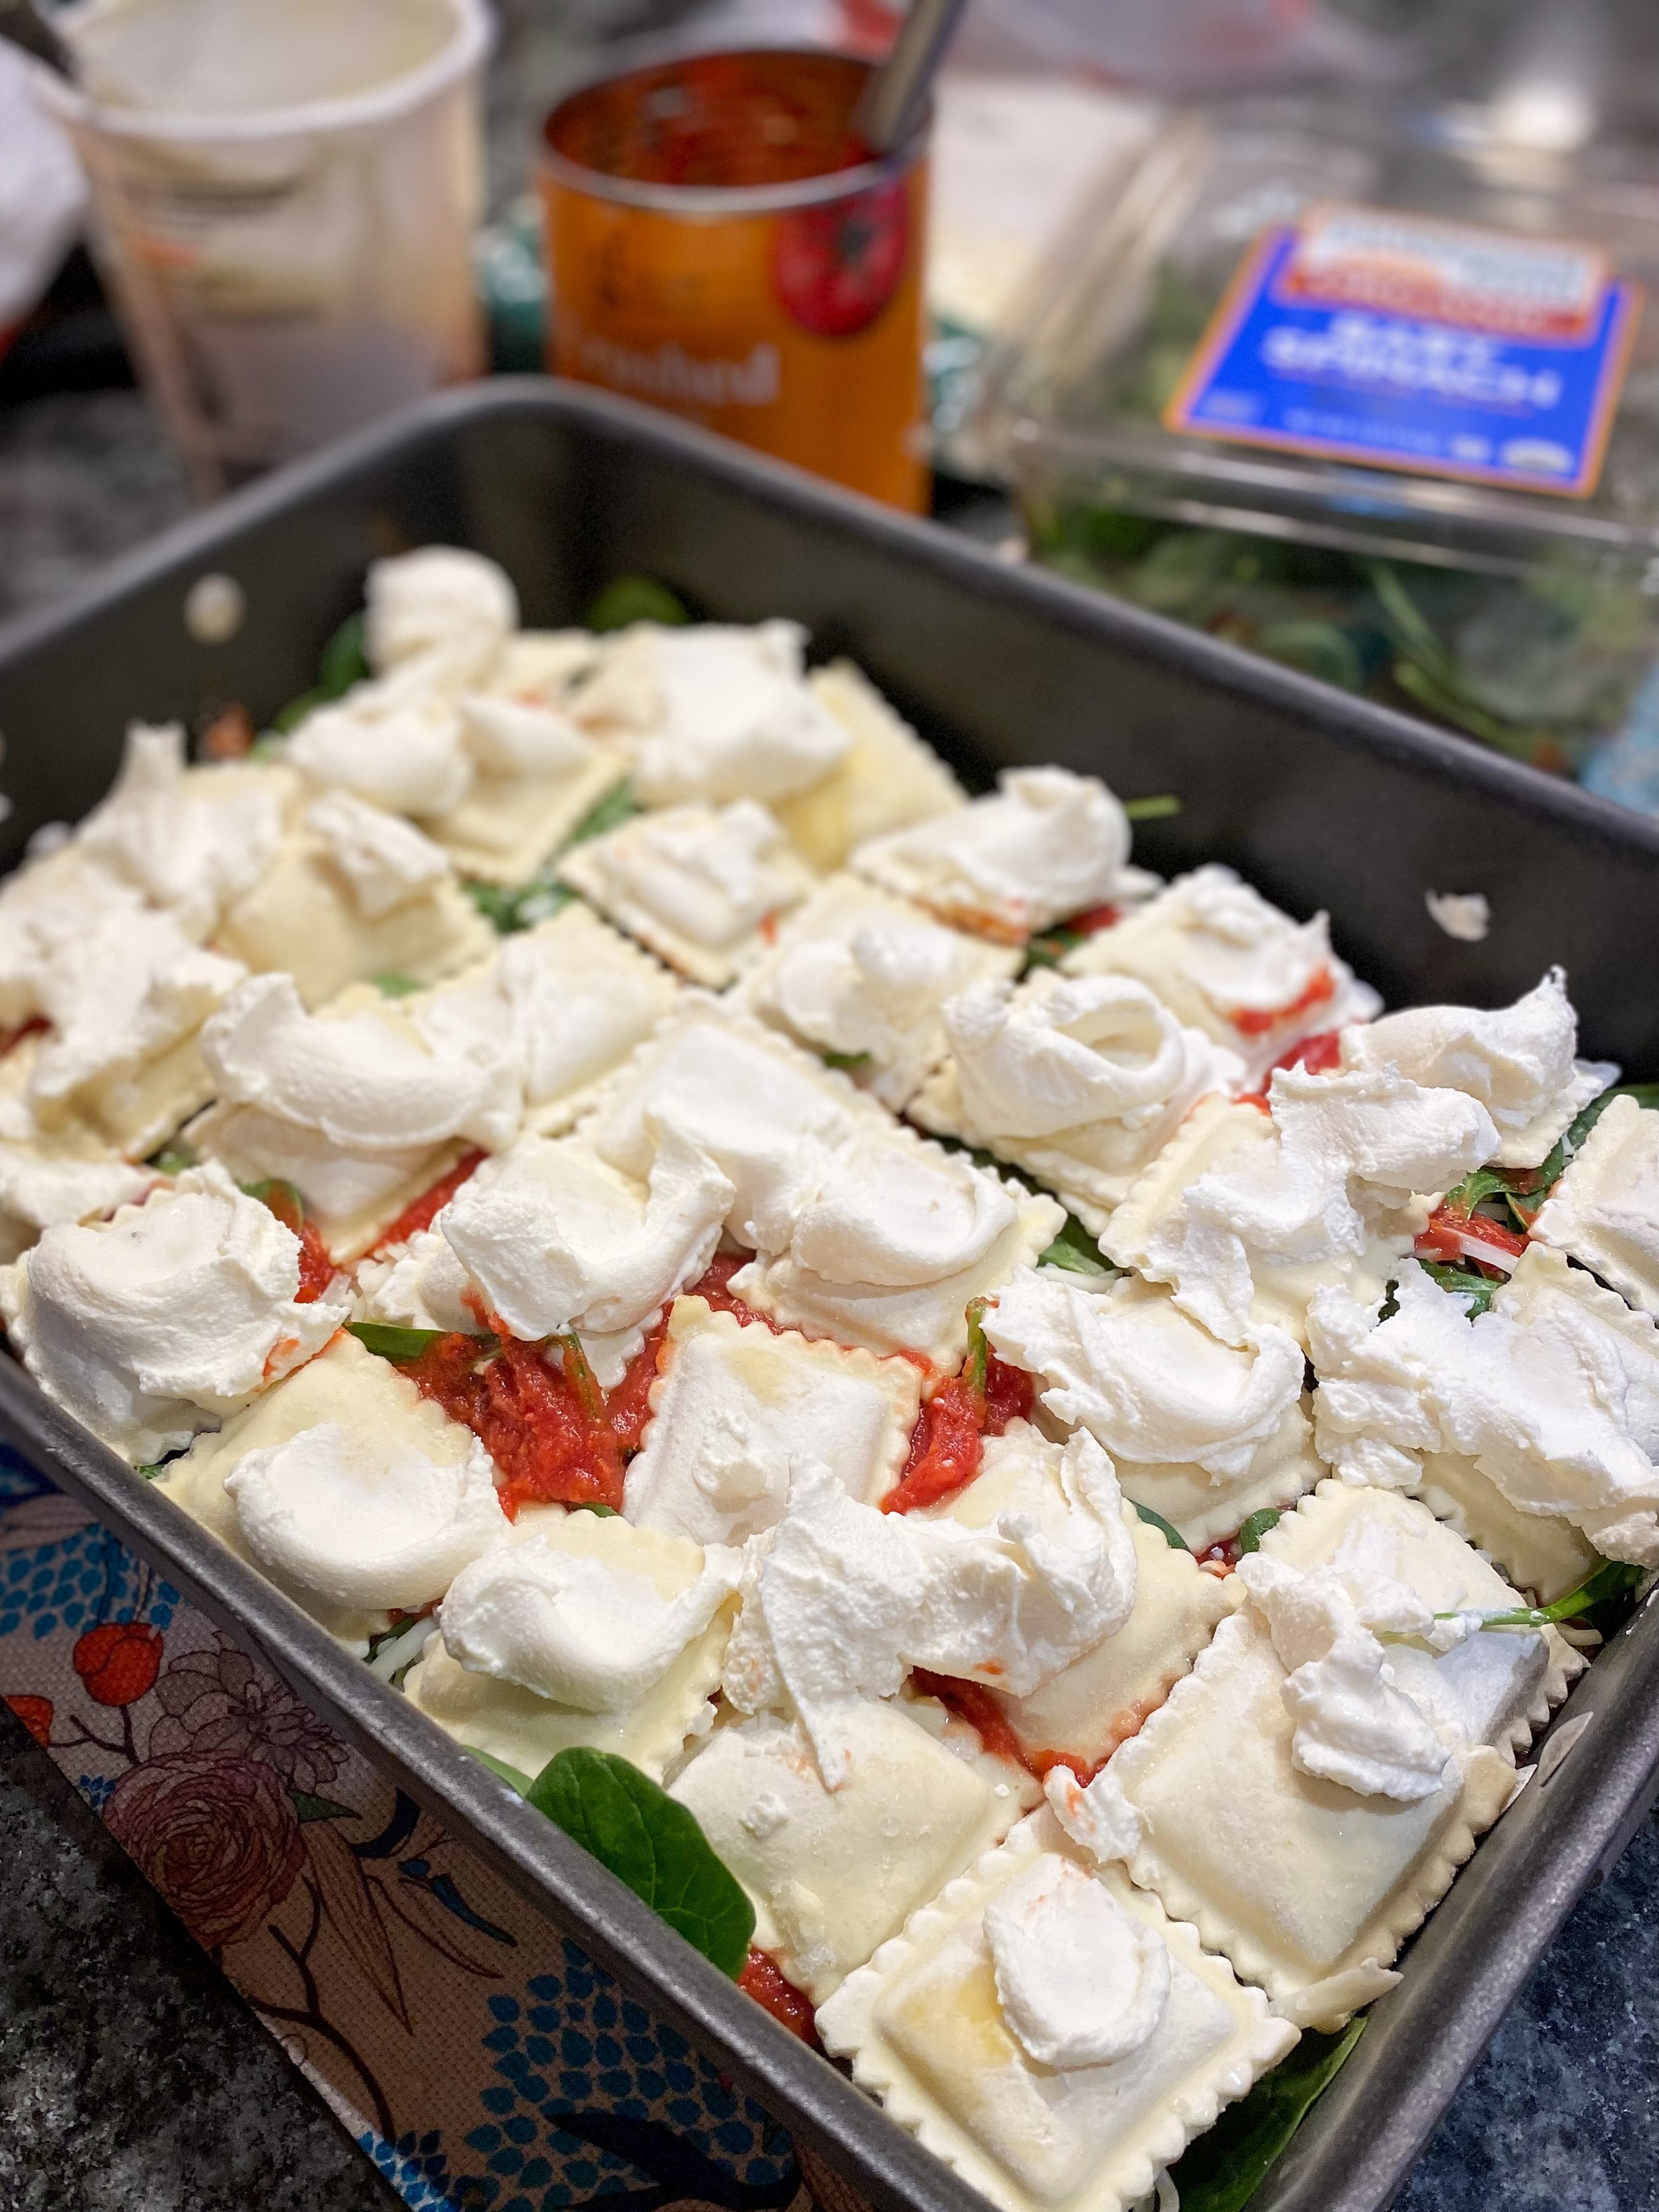
As with everything I make, this will be super flexible and you can basically add anything to it you want. I kept this one vegetarian, mostly just to keep it simple. I added some fresh baby spinach to add a bit more nutrition and some green to the mix. You could certainly add some meat in here too if you like, some crumbled up sausage or browned ground beef. And you could use any kind of ravioli you like, I just went with the inexpensive store brand cheese ravioli because my kids love those.
Ravioli Lasagna Recipe

Two bags of frozen cheese ravioli
Two 28 oz cans of crushed tomatoes (or sauce of your choice)
One container of washed baby spinach
One 32 oz container of ricotta cheese
Several cups of shredded mozzarella cheese
Parmesan cheese
Seasoning as desired - a little salt and pepper, some dried herbs (I like thyme and rosemary), a drizzle of olive oil.
All you’re going to do is layer all these things in your pan. I use a big nonstick roasting pan for lasagna, because we like it thick with lots of layers. I always start with a bit of sauce on the bottom, just to keep things from sticking. And then just layer - pasta, cheeses, sauce, spinach, etc. - until your pan is full. One last layer of cheese on top and then cover it with foil and pop in the oven at 350 for about and hour and 15 minutes, and then take off the foil for another 15 minutes. About 90 minutes total should do it - you just want it all bubbly and melted and getting a bit brown on top.
A note about sauce: I’ve taken to using canned crushed tomatoes as my tomato “sauce” of choice in almost all things. They give you great tomato flavor without any added sugar or salt. I always try to keep several cans in my pantry. This is what I use on pizza also. Sometimes I season it with a little olive oil and salt and pepper, and a little ground thyme and rosemary. Sometimes I leave it plain if I’m in a hurry.


One-Pot Macaroni and Cheese
Easy homemade mac and cheese recipe that cooks in one pot in 15 minutes from start to finish.
Are you looking for an easy homemade mac and cheese recipe?
Below is my recipe for the best easy homemade mac and cheese you will ever make!

Not only is it delicious, but this Macaroni and Cheese Recipe also is FAST and EASY to make, and you make it in ONE POT!
Nobody wants to stand over a hot stove on a summer day - so this easy mac & cheese recipe comes together in 15 minutes!
I came up with this recipe when I was in a hurry for a kid dinner one night not too long ago, and it has been one of my favorites ever since.
This is the easiest homemade mac and cheese you will ever make!
It is just as good as Grandma's old fashioned recipe. Maybe even better, because you didn't slave over it.
It takes 15 minutes, about as long as it would take you to make one from a box!
Seriously, I timed it.
I had the whole thing done and the stove turned off exactly 15 minutes from the time I turned the burner on.

You've seen all those Pinterest posts about "one pot wonder" pasta dishes. Well this is like one of those. But it's homemade MACARONI AND CHEESE.
You might look at this and realize that it's similar to a lot of other homemade mac & cheese recipes. It is. The ingredients are basically the same. But the technique is different.

This is a one pot recipe. You don't drain the pasta!
This is comfort food - it is creamy and cheesy and fills your tummy, just like comfort food should. But unlike a lot of comfort foods that take hours to make, this takes only minutes. It almost sounds too good to be true, but it's not!


One Pot Macaroni and Cheese
Ingredients
Instructions
- Put macaroni, salt, 5 cups of water, and butter in a pot. Bring to a boil and then simmer, stirring frequently, until most of the water is absorbed (about 10-12 minutes). If the water is almost gone but you don't think the pasta is done enough, then add the rest of the water, 1/2 cup at a time. Thicker pasta is going to absorb more water.
- Meanwhile, mix the flour and spices into the cold milk.
- When the pasta is mostly cooked and the water mostly absorbed, add the milk mixture and stir until well combined.
- Then add the shredded cheese, and mix over low heat just until the cheese is melted and mixed in.
- Turn off heat, cover, and let sit for a few minutes to thicken.
Notes
- Use whatever kind of cheese you like - I think it's great with a combination of cheeses.
- If you really want this to look like the box stuff, get the small elbow macaroni. If that doesn't matter so much to you, then try other shapes - little shells are nice, or curly pasta - you just want something that is going to grab that cheesy sauce and hold onto it.
- If you really want it to taste more like the box stuff, then go ahead and use a little processed cheese. I've done it with American cheese and it tastes great! I just use the slices and tear it into pieces. I think a blend of a little American cheese plus a little sharp cheddar gets you a really nice flavor.
- The seasoning and spices are definitely flexible. I keep it mild because my kids are picky. But if you want more spice or kick to it, then go for it.
- It reheats great - just add a little more milk.


Game Day Chili
An easy ground beef mild chili recipe the whole family will love.
This isn’t your grown up chunky chili. This is my recipe for the kind of chili you would want on a hot dog at an amusement park. This is kid friendly chili, hot dog chili, the kind of chili that goes down smooth and feels like the meat has melted in your mouth. This is game day chili. Rainy day chili. Snow day chili. This can be mild chili or spicy chili. Top a steaming bowl of chili with a bit of shredded cheese and sour cream, and you’ve got the key to happiness. We’ve even done this in sourdough bread bowls and it was amazing!
I made this recipe to be super kid friendly. My kids don’t like big chunks of meat, and they don’t like heat, but they do like flavor. If my picky kids love this chili - then I’ll bet yours will too.
A bonus for those of you following a low carb, keto, or grain free diet:
I’ve made a variation of this for you! Scroll all the way to the end to read the instructions for a Low Carb / Keto / Grain Free Chili. I’ve made this recipe both ways many times now, and honestly I can’t tell you which I prefer. My kids like the regular way, it’s got a bit more of a gravy/saucy consistency to it. But the low carb version is more meaty. So you decide!

I’ve played around with chili recipes for years. Many years ago when it was just the two of us, I would make a chunky chili - one with cubes of meat that simmered until they were almost falling apart, but still felt like a mouthful of meat. I still do love that style, but for a family friendly recipe I wanted to come up with something that was more like kind of old fashioned ground beef chili that you might get on a ballpark or fast food chili dog - but with better ingredients and made at home!
After trying a bunch of different variations - I think I’ve just about perfected it! This recipe comes together quick and easy - so easy that my 11 year old daughter now makes it herself from scratch. It is packed with wholesome healthy ingredients - nothing pre-processed, nothing artificial. This is the kind of recipe that you can throw together quickly and then let simmer away all day and make your house smell amazing. If I make this while my kids are at school they will notice immediately when they walk in the door - “what smells so good?”

This is the kind of chili you want to make on a rainy or snowy day. You could make this ahead and set out your slow cooker to simmer it all day while you head out for a day or skiing or playing in the snow, or after those rainy soccer saturdays.

As with all of my recipes - this one is super flexible. Feel free to make it your own by adjusting the amount of spice. My mother now makes this all the time and she likes to add a can of beans to hers at the end. If you like beans in your chili - go for it!
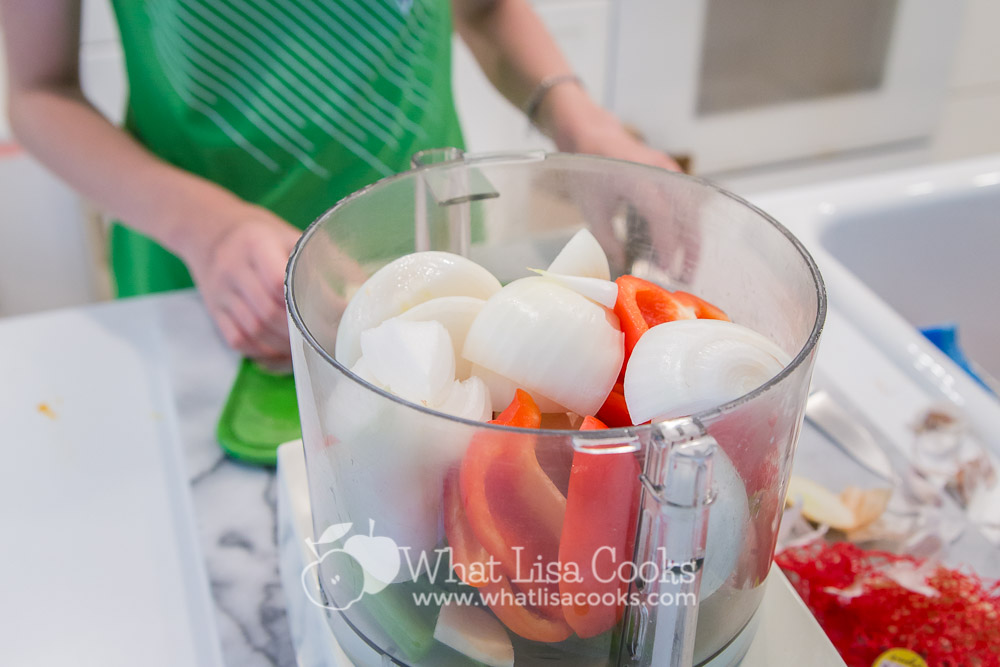
Below is the recipe. There are a few secret tips here that make this amazing - a lot of it is about the texture, you want your veggies to be diced very fine, so they just melt into the flavor. I use a food processor for mine, it really pulverizes everything and gets it into tiny bits.
If you really want your meat to also be in very small bits and almost melt in your mouth - add a bit of water as you are browning it. That will help if cook more evenly and makes it easier for you to really mash it around and break it apart with your spoon.
Most of the time I double this recipe. It is awesome for feeding a crowd, and it freezes great.
BONUS Keto / Low Carb Chili:
Make a low carb version by following the variation I included after the recipe card below.
How to control the spice level:
This spice here comes from the chili powder. You can really control how spicy the chili is based on the type and quantity of chili powder you use. If you get an ordinary grocery store brand of chili powder that’s not very spicy, then you can add more. If you buy a more authentic Mexican style chili powder that’s more spicy you might want to add less. I suggest you start with less, unless you know you want it spicy. Get it all mixed together and then taste and see what you think.

Game Day Chili
The kind of chili that's meant for rainy sports days in front of the TV, or piling on hot dogs - a smoother texture, not too spicy.
ingredients:
- 2 pounds ground beef
- 1 large onion
- 2 red bell peppers
- 3 cloves garlic
- 2 stalks celery
- 3 tablespoons chili powder
- 3 tablespoons cumin
- 1 tablespoon garlic powder
- 1 tablespoon onion powder
- 2 teaspoons salt
- 1 (6oz) can tomato paste
- 1 (12 oz) can tomato sauce
- 2 cups beef broth
- 1/4 cup flour
- 2 tablespoons yellow mustard
- 2 tablespoons honey
instructions:
- Brown the ground beef (tip: add a bit of water for faster browning and softer texture)
- Finely chop or dice veggies (use food processor or a mini chopper)
- Add chopped veggies to browned meat and cook until soft
- Add spices and mix well
- Combine tomato sauce, tomato paste, beef broth, and flour in a separate bowl, mix well so there are no lumps
- Add liquid mixture to pot
- Add mustard & honey
- Stir well to make sure everything is combined
- Simmer on low for several hours, stirring occasionally, or slow cook on low 4-6 hours
NOTES:
Don't feel tied to these ingredient quantities! As with all of my recipes, these ingredients are flexible. Feel free to add more or less spices, more or less meat. Add in other finely diced veggies if you want to sneak veggies in! If you want to add a little kick to it, use a dash or more of cayenne pepper. Enjoy! ~ Lisa
Low Carb (Keto, Gluten free, grain free) Variation Instructions:
Leave out the honey, tomato sauce, and flour.
Cut the beef broth quantity at least in half - just add a bit of broth as needed to get to your desired consistency.

Meatballs for the family
My basic recipe for meatballs for your weeknight spaghetti and meatballs dinner.
Oh meatballs! Who doesn't love them? I think they have become a staple for busy American families. A big bowl of spaghetti and meatballs, I think we all grew up on that. I've got one who, at 4 years old, already begs me to make it for her. It's a classic melting pot thing, originally Italian, but now I'd say it's classic American food. But all too often meatballs are purchased in big bags at warehouse stores, with way too much filler and salt and who knows what other processed ingredients. I get it, I used to buy those. But with a little bit time on a weekend afternoon, you can make something that is so much better! They are not hard to make, and are yet another very flexible recipe, and you'll be so glad you did.
To top it off here - I'm not only giving you a great meatball recipe, I'm going to tell you how to cook them so that you'll end up with the most amazing tasting sauce to serve them with!
Ingredients:

4 pounds of ground meat (any kind you like, but I like to use at least 3 kinds together)
3 eggs
1/2 cup grated parmesan cheese
1 Tablespoons worchestershire
1 Tablespoon horseradish
1 Tablespoon garlic powder
1 Tablespoon onion powder
1 Tablespoon dried parsley
1 Tablespoon dried celery
2 teaspoons salt
1 teaspoon fresh ground pepper
a couple quarts of good tomato sauce
First - about the meat. This is totally personal preference. Some people do all beef, some do all turkey. I personally like a blend of meats, I think it makes the meatballs more flavorful. I usually do beef, turkey, and either lamb or pork (this time I actually had a pound of each).
A few eggs help hold everything together. A lot of recipes suggest that you need bread to help bind them, and I have found that this is simply not true. Bread is a great filler. If your budget is tight and you want to make a couple pounds of meat go even further, then bread works great for that, so go for it. (And if you're going to do that to save a little money, then you might as well go one further and use free bread crumbs. I keep a bag in my freezer, into which I throw the ends of the loaves of bread that my family won't eat. When the bag is full, I dump it into the food processor and let her rip - and you have free bread crumbs. Don't buy them!) Anyway - I sidetrack. The point is - breadcrumbs aren't in my recipe because I don't think they're necessary, but feel free to add them if you want to stretch your meat a little further. To this amount of meat I would add maybe up to a cup of breadcrumbs.
After that - the other ingredients are all about adding a little flavor. But I try not to go overboard, I want to actually taste my meat. So many recipes have so much other stuff in them that it's hard to even know what the meat tastes like. I like meat, so I want to taste it. Don't feel like you have to follow this to the letter - if you want more or less of something, go for it. Dried celery can be hard to find, but I dry my own, so I have it handy. Leave it out, or add a little celery seed instead. Or add some oregano, or basil, whatever you like.

Directions:
Throw everything, except the tomato sauce, in a bowl. Roll up your sleeves, and get in there. I've tried other ways, and really the easiest is to just mix it with your hands. Don't worry. You're washable.
Meanwhile - get your sauce in a big pot on the stove and get it simmering. I made a super simple sauce in the summer time with just fresh garden tomatoes, garlic and salt, blended in my vitamix - for this dinner I just took some of my homemade sauce out of the freezer. But it's not summer any more, so fresh tomatoes are not the thing. But you can easily make a similar quick sauce with just a couple quarts of good organic canned tomatoes. Throw them in the blender with some garlic and salt, a little basil if you want. In my opinion, that's all you need. You can buy jars of premade sauce if you want, but I don't think it's necessary.
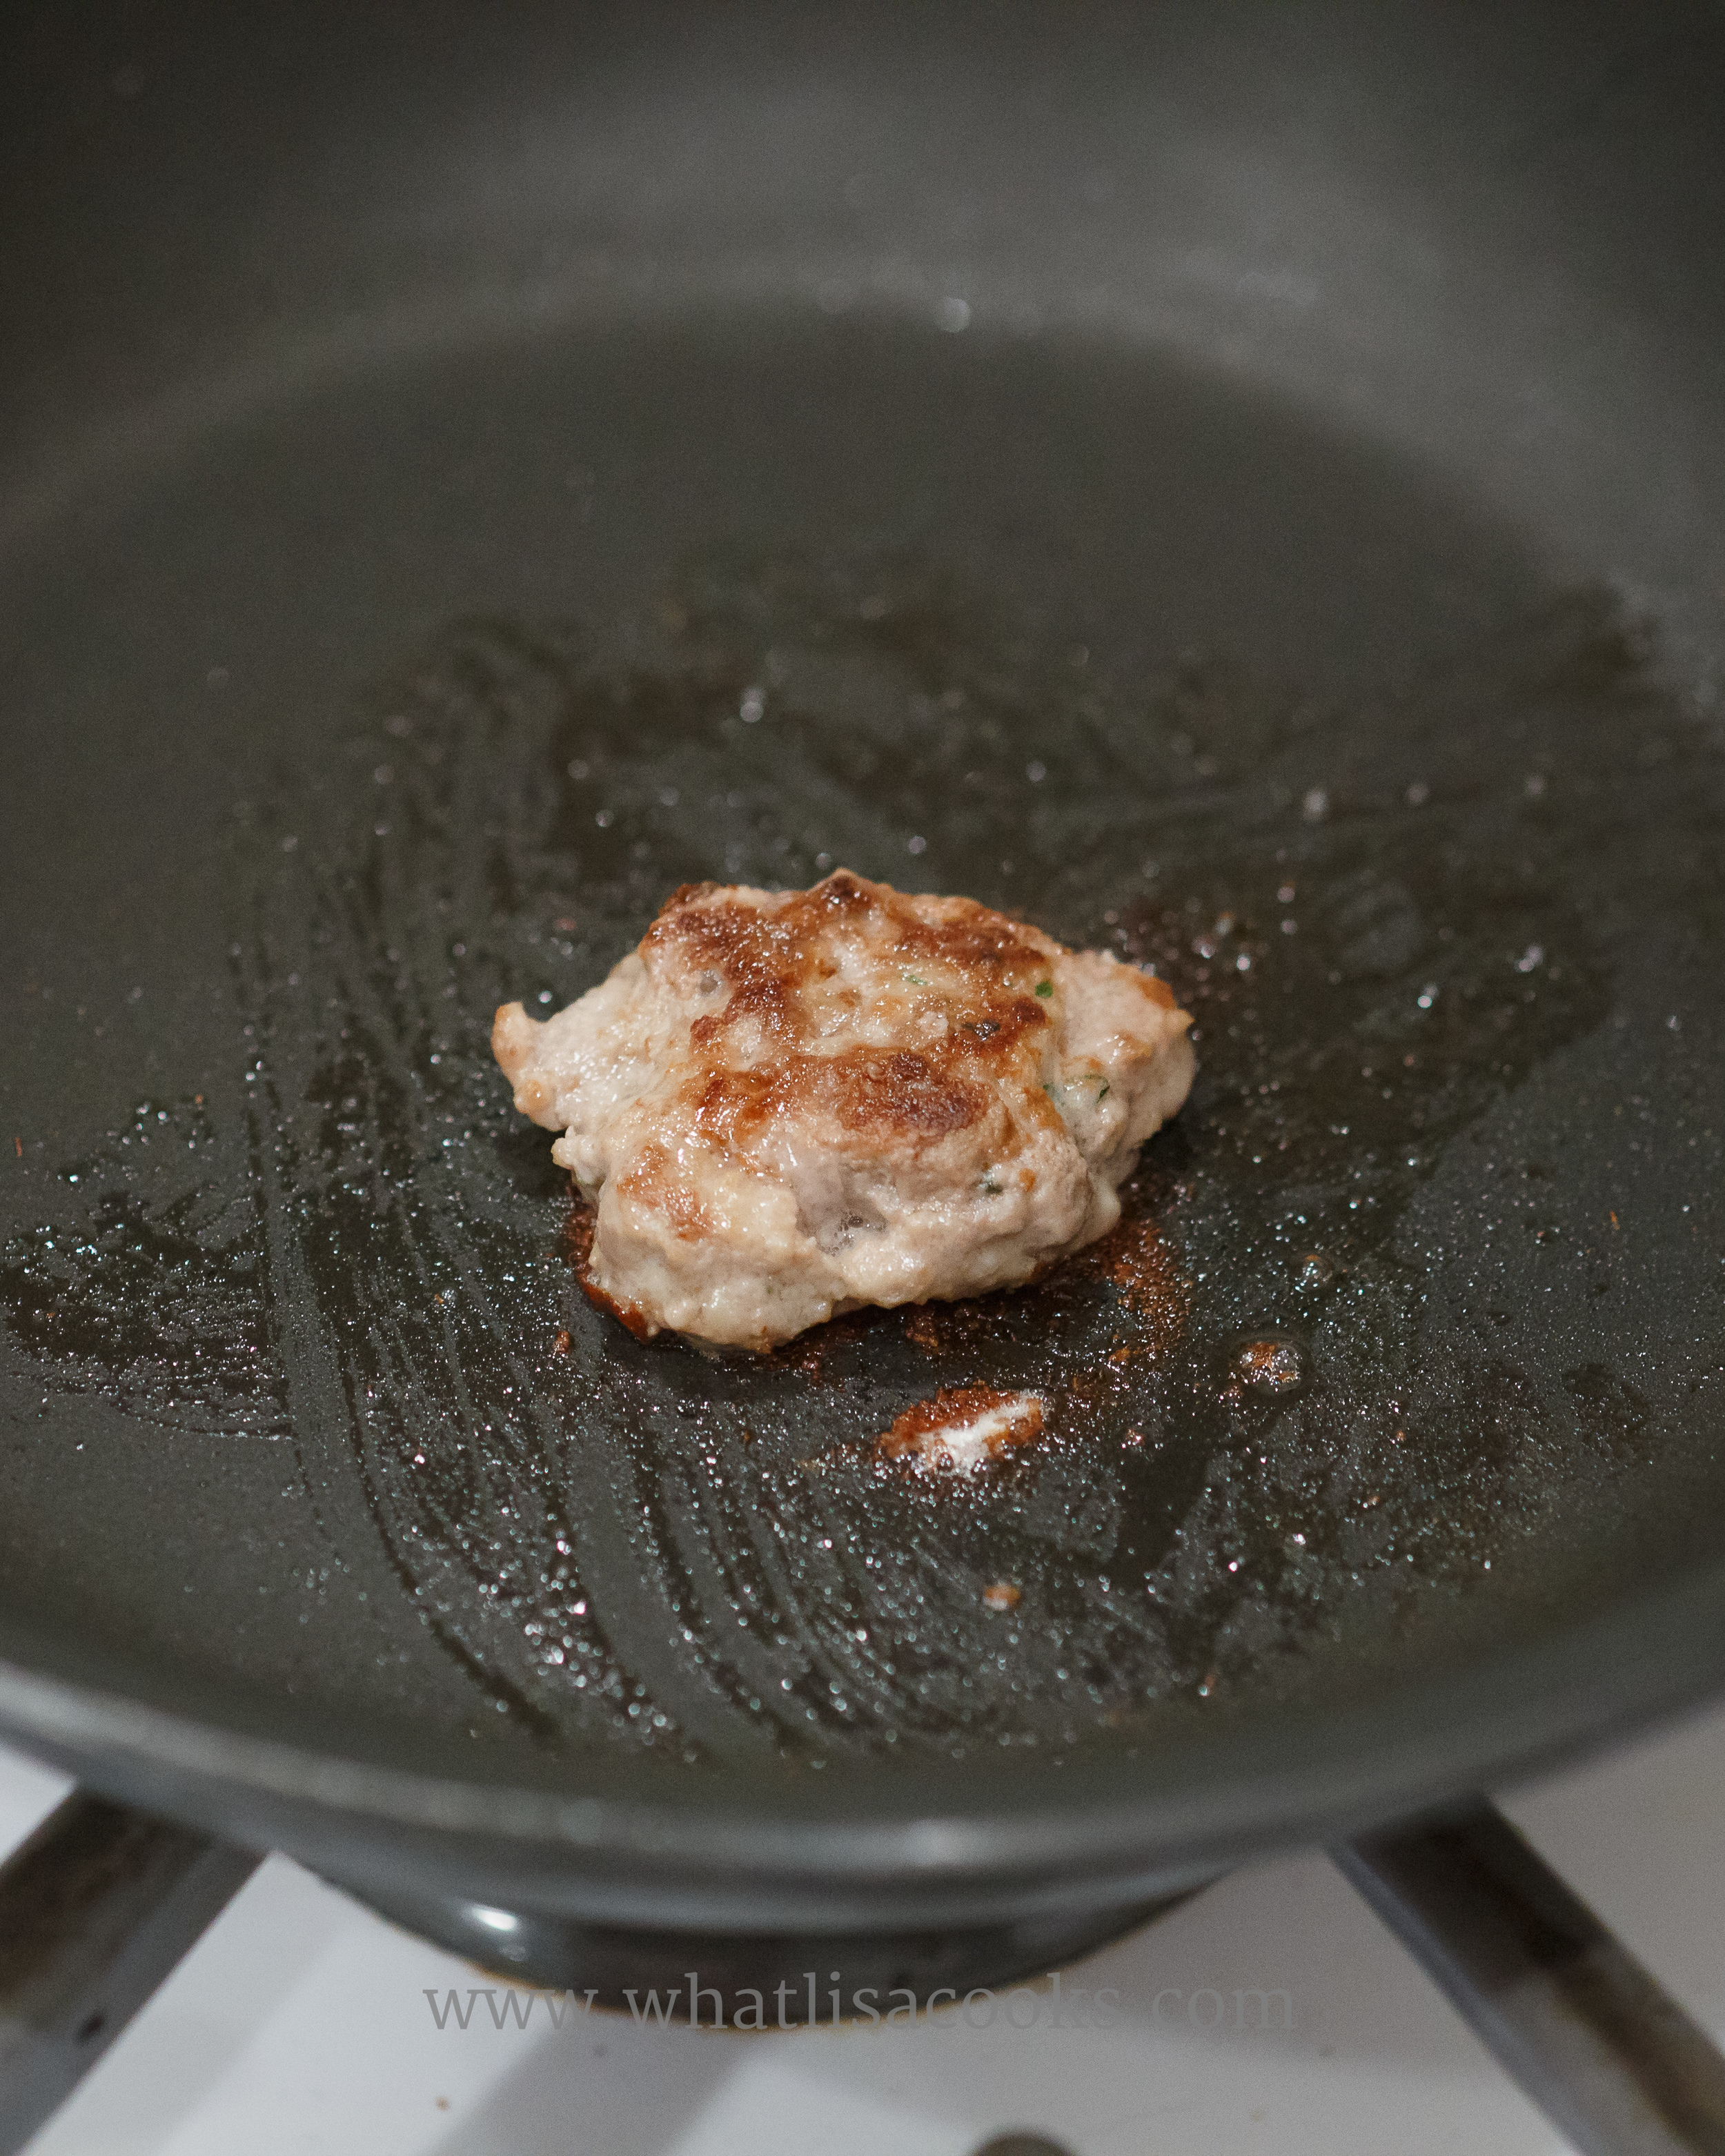
Back to the meatballs. Once it's all really well mixed, pinch off a little piece and cook it in a pan. You want to taste it for seasoning before you cook them all up. A few minutes on each side over medium/high heat should be good. Give it a taste and see what you think. Need more salt? more garlic? more cheese? Adjust your seasoning and then you're ready to go.
Start shaping them into balls. I like to make them small-ish, about the size of a walnut or a golf ball, maybe a little smaller. I love an over-sized meatball as well, but I think smaller is more practical for family meals - little kids have an easier time handling them, they cook more evenly, and they are easier to freeze and reheat.

Now here's where it gets a little different from how you might be doing it. A lot of recipes have you cook off those meatballs in the oven. That's how I did it for years (and sometimes still do). But then a friend mentioned how she did them. Actually, she said something about her son wanting some chicken parmesan. But she didn't want to take the time to make it, because in order to make chicken parm, she first had to make meatballs. Wait, what? What do meatballs have to do with chicken parm? Well, it's the sauce! Her tomato sauce recipe for her family's chicken parm recipe requires that you have sauce that has had meatballs cooked in it! Seriously. I had to try this.
Think about it - have you cooked meatballs in the oven? You know all that yummy flavored stuff that oozes out of them and gets left on the pan? Well that now ends up in your sauce!
So go ahead and cook those meatballs in that simmering sauce! Depending on how wide your pot is, it might take 2 or 3 batches of cooking, so you're not crowding them too much. Just set them gently in the sauce, cover, and let simmer on med/low heat for about 15 minutes. Take them out with a slotted spoon so you're leaving the sauce behind for the next batch.
Now you've got a pile of the juiciest meatballs ever, and a pot of sauce with the most amazing flavor. What you do from here depends on what your plans are. If you're serving spaghetti and meatballs for dinner, then you can put the meatballs back in the sauce to keep warm, and then cook up your spaghetti. Or go ahead and use that sauce for your chicken parm, and spread your meatballs out on wax paper lined baking sheets to freeze.
This recipe should leave you with a lot of meatballs. Depending on size, at least 4 dozen, probably more. You can have a nice dinner and then end up with plenty to freeze. Just lay them out on a wax paper lined baking sheet and freeze, then when they are frozen you can peel them off and bag them. Now you have a bag of frozen meatballs that are just as handy as the ones from the store, but taste so much better.

If you don't want to deal with the whole sauce thing, of course you can still use this recipe and just bake the meatballs in the oven. They will still taste great and be great to freeze.

Posole Rojo: a traditional recipe, and a shortcut
Easy Posole Rojo Recipe. A shortcut recipe for a traditional posole rojo.
Posole has been a favorite of mine since I first discovered it. We typically think of soups as a winter thing, but I love it in the summer too. With the addition of the cool, fresh toppings, it makes a great summer meal!
If you are not familiar with posole (or pozole), it's a traditional Mexican soup or stew, with hominy and meat (usually pork) in a spiced broth. You dish out the fairly basic soup, and then you top your bowl with lots of fresh garnishes. There are both red and green versions, both are equally good, depending on whether you prefer the deep richness of dark red peppers, or the brighter tanginess of green peppers and tomatillos.
Traditional posole is, obviously, made completely from scratch. The real recipes have you soaking and pureeing dried chilis to flavor your broth. It gives amazing flavor. It's not particularly difficult to make, but it is time consuming and so usually reserved for special occasions and holidays. It's not generally something that could be an easy weeknight meal unless you've made it ahead.

With a busy family, I'm all about easy weeknight meals. I love taking a classic recipe and looking and the pieces of it to figure out how I can make it quicker and easier and taste just (or almost) as good. I have a great traditional from scratch recipe that I've made many times which is great to make on a weekend. I've included that one down at the end below - I don't know what the original source of this recipe was, I've had it scratched on a piece of paper for years. I highly recommend you make the scratch version at least once. But I also have developed my own cheater version.
If you start with good flavorful ingredients, I really think this version is just as good, and it is so much quicker and easier to make.
Lisa's Cheater Posole Rojo:

Indredients:
1 can/package of enchilada sauce – mild or spicy, however you like it.
1 quart of chicken broth
A large can of hominy, or a couple small cans
An onion or two
Cooked pork – I use pre-cooked pork carnitas from Trader Joes, Costco has some too. Chicken works great too - Costco and Trader Joe's both have packages of grilled chicken, or get a rotisserie chicken and pick the meat off. Or just use whatever cooked meat you might have leftover.
Garnishes: (choose any, all, or none - whatever you like!)
grated cheese
crushed tortilla chips
sour cream
diced tomatoes
diced avocado
chopped cilantro
diced or chopped yellow, white, or green onions
sliced radishes
shredded lettuce or cabbage
quartered limes
Directions:
Easy! Just combine everything in the ingredients list in a pot and let simmer for 15-20 minutes. Basically by the time you've got your table set and your garnishes ready, you'll be ready to eat. It will taste even better if you let it simmer longer, but it's great even if you don't have a lot of time. You could saute the onions first in some oil, but you don't have to. It’s even better if you make it a day ahead and let it sit overnight.
Serve in nice big bowls with your choice of toppings. Really you can put anything you want on this. Keep it simple with just a little lime and cilantro, or load it up. It's yummy either way. Either version of this is great for a party - lay out a beautiful spread of the garnishes and people are very impressed.
Try a few different enchilada sauces and find one you like. I find it's best with a nice dark rich sauce. I've recently used the Frontera brand and I think it was the best yet - very deep rich flavor without being spicy.
This version is such a great weeknight meal for a cold and rainy day. And here's a tip for you - make a big pot of this for a dinner party or other gathering and people will be blown away! They will think you've made something really amazing, when really all you did was throw a bunch of stuff in a pot.

Original Pozole Rojo
serves 8-10
Ingredients:
1 bone-in picnic roast (pork shoulder, also called pork butt), about 5 pounds
Salt and pepper
2 tablespoons vegetable oil
2 medium-large onions, chopped coarse
5 medium garlic cloves, minced or pressed
1 (14.5 oz) can diced tomatoes
1 tablespoon chopped fresh oregano leaves or 1 teaspoon dried Mexican oregano
6 cups low-sodium chicken broth
1.5 cups of water
2 ounces dried ancho chiles (about 3 large)
3 (15 ounce) cans white or yellow hominy, drained and rinsed
Garnishes
2 limes, quartered
1/2 head lettuce, sliced crosswise into thin strips
6 medium radishes, sliced thin
1 small onion, minced
roughly chopped cilantro leaves
chopped fresh oregano or dried mexican oregano
1/4 cup pureed ancho chiles
flour or corn tortillas (or I like tortilla chips)
Directions:
trim skin and excess fat from meat and cut into large pieces of various sizes. dry thoroughly and season generously with salt and pepper
heat oil over medium heat and cook onions and 1/4 tsp salt until onions are softened. stir in garlic
add the meat and stir often until no longer pink on the outside. add tomatoes, oregano, broth, and 1/2 tsp salt. increase heat and bring to a simmer. cover, place in oven and cook until meat is tender, about 2 hours.
meanwhile, bring water to boil. remove stems and seeds from chiles and soak with hot water until soft, about 20 mins. puree chiles and liquid until smooth. pour through a strainer and reserve 1/4 cup for garnish
remove meat and bones from pot. stir in hominy and pureed anchos. cover and return to oven and cook until hominy is hot, about 45 mins.
meanwhile, when meat is cool, shred it. stir shredded meat into the stew. taste to adjust seasonings. ladle into bowls and serve with garnishes.
You can also sort of combine the two versions. I've done it before where I started with a raw piece of pork and sautéed that with the onions as in the first recipe, but then added the broth and enchilada sauce to finish it off. I've also done both versions in the slow cooker. I have a great slow cooker with a metal insert, so you can brown your meat and onions on the stove first, and then put everything else in to slow cook.

You can even make a meatless version! Here are two versions I made once - the one on the left has pork and chicken broth, the one on the right was made for some vegetarian friends, with vegetable broth and a variety of beans. It tasted great too!
Enjoy!
~ Lisa


Simple Poached Chicken + Garlic Broth
Poached chicken often gets a bad rap. A lot of people think it's bland and flavorless. But it doesn't have to be that way. I think poached chicken can be a kitchen lifesaver. You may have heard me say before that I always have cooked chicken in my fridge. There are so many quick and delicious meals you can make in just a few minutes if you already have cooked chicken. I often will roast chickens and pick the meat off, but if I haven't gotten around to doing that and I want some cooked chicken to use for a recipe (or just to eat!), then poaching is my next best go-to.

Poached chicken often gets a bad rap. A lot of people think it's bland and flavorless. But it doesn't have to be that way. I think poached chicken can be a kitchen lifesaver. You may have heard me say before that I always have cooked chicken in my fridge. There are so many quick and delicious meals you can make in just a few minutes if you already have cooked chicken. I often will roast chickens and pick the meat off, but if I haven't gotten around to doing that and I want some cooked chicken to use for a recipe (or just to eat!), then poaching is my next best go-to.
Poached chicken doesn't have to be bland or dry. I think the mistake most people make when poaching chicken, or when cooking chicken in just about any other method as well, is not enough salt. I was looking around the web at a few poached chicken recipes just to see how other people do it, and I was shocked at how little (or no!) salt most people use. Yuck. Of course you're going to end up with chicken that tastes like nothing. Chicken needs salt. It just does.
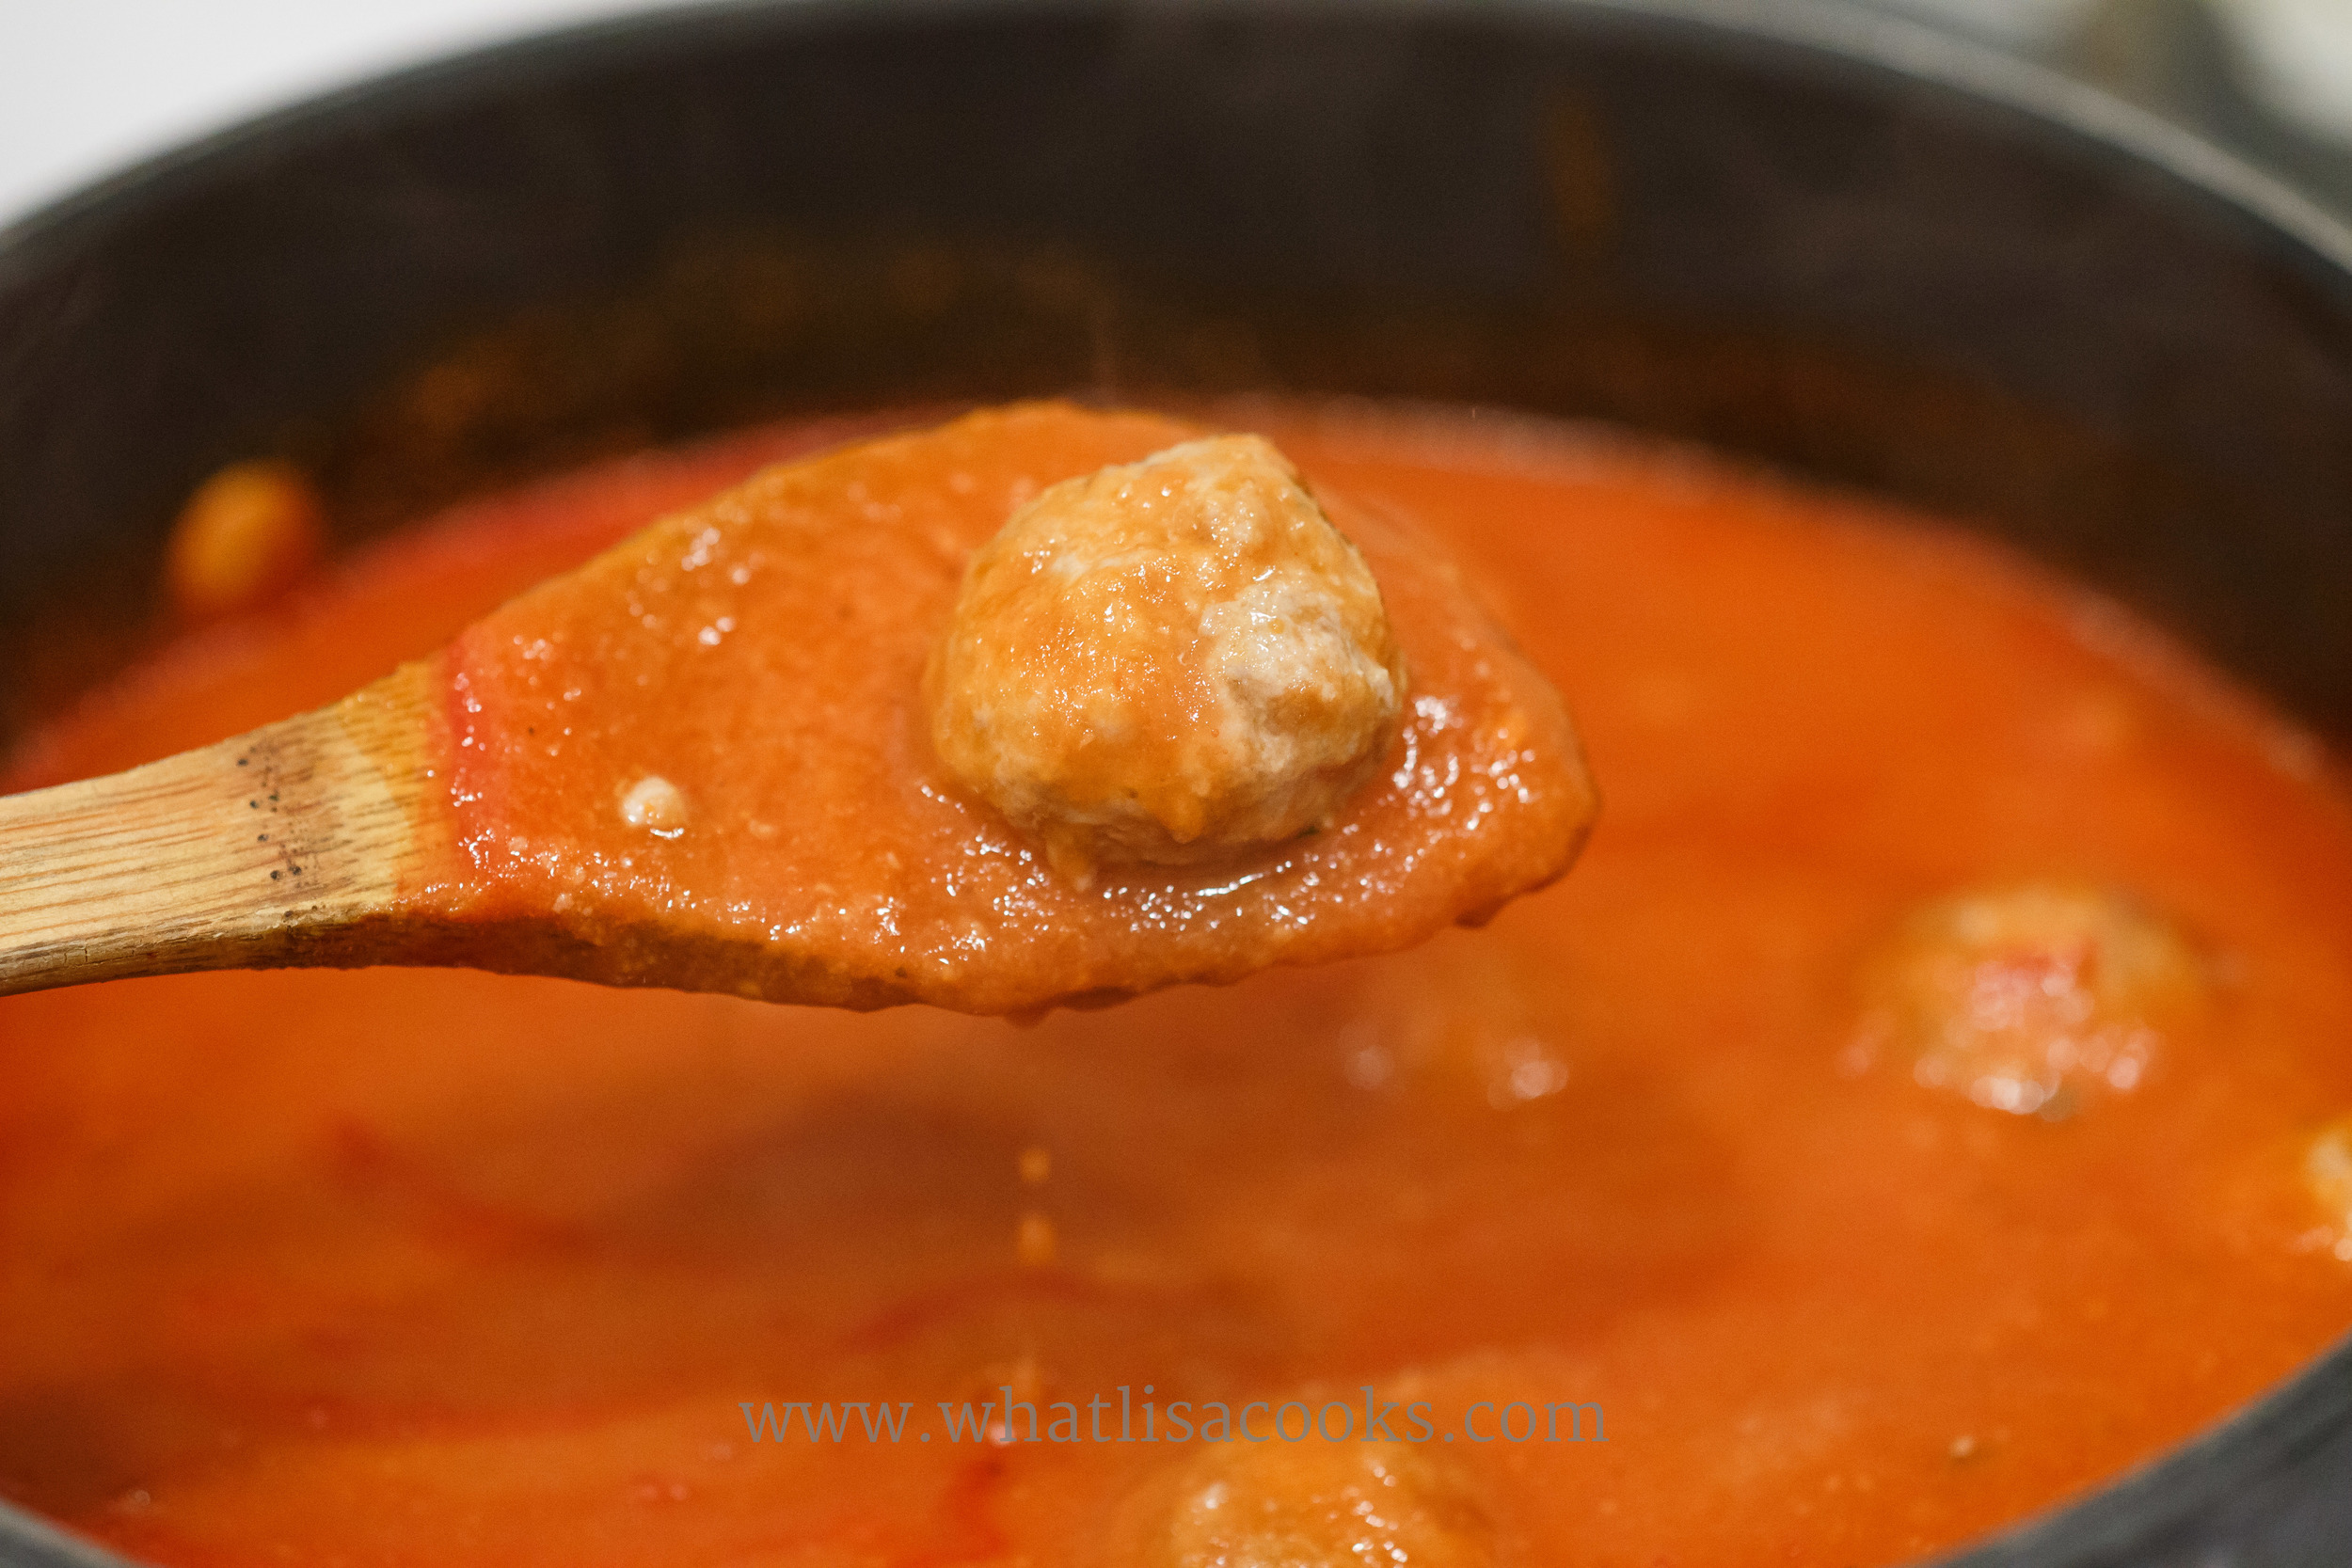
I needed some chicken today for the enchiladas I am planning to make for dinner tonight. So I poached some and thought while I was at it I would share with you how I do it. By adding some extra ingredients to the pot, not only do you get a more flavorful piece of chicken, but you also get a really delicious light broth.
My ingredients are just a guideline - you can put in whatever you like for flavoring, but this is just what I had handy today. Other veggies would be great, or parsley, or other herbs. I used green onions because I had them and I like the flavor, but a quarter of a yellow or white onion will work fine too. Add whatever flavors you like. Just don't skimp on the salt.
Here are the basic ingredients I used today:
1 carrot, broken in a couple pieces
1 stalk celery, cut in half
2 green onions, trimmed
1 1/2 T salt
1 T (about 3 cloves) crushed garlic, or more
a splash of white wine
2 chicken breasts
3 -4 cups of water - enough to fully cover the chicken in the pot
Put everything but the chicken in a medium stock pot and bring to a slight boil. Taste it. Your poaching liquid should taste salty. Not like drinking a mouthful of ocean water salty, but maybe slightly saltier than you would want a good broth to be - the chicken is going to absorb a lot of the salt and will leave your broth tasting just right. If the liquid doesn't taste salty, then add a little more salt.
Gently place your chicken breasts in the broth, making sure they are fully covered. If they aren't fully covered, add a little more hot water, or more wine. Now simmer for 10-15 minutes, depending on the thickness of the chicken. The pieces I got today were from some kind of mutant monster chicken - they were super thick, so I cooked them for 15 minutes. But small breasts might only need 10 minutes.

When you think they are done, take them out of the pot to rest. The way I tell if chicken is done is by pressing on it. If it really gives and feels very soft still, then it's not cooked, so put it back for a few more minutes. But if you press in the middle and it feels fairly firm, then it's done. This method requires a bit of practice and trial and error, but after you do it a few times you will get a sense for what a cooked piece of meat should feel like. I really try to avoid cutting into meat to check for doneness - that lets all the juices out and you end up with a very dry piece of meat. If you think it's cooked enough, then let it rest for about 10 minutes on a plate. It will finish cooking a little, and stay much more juicy.
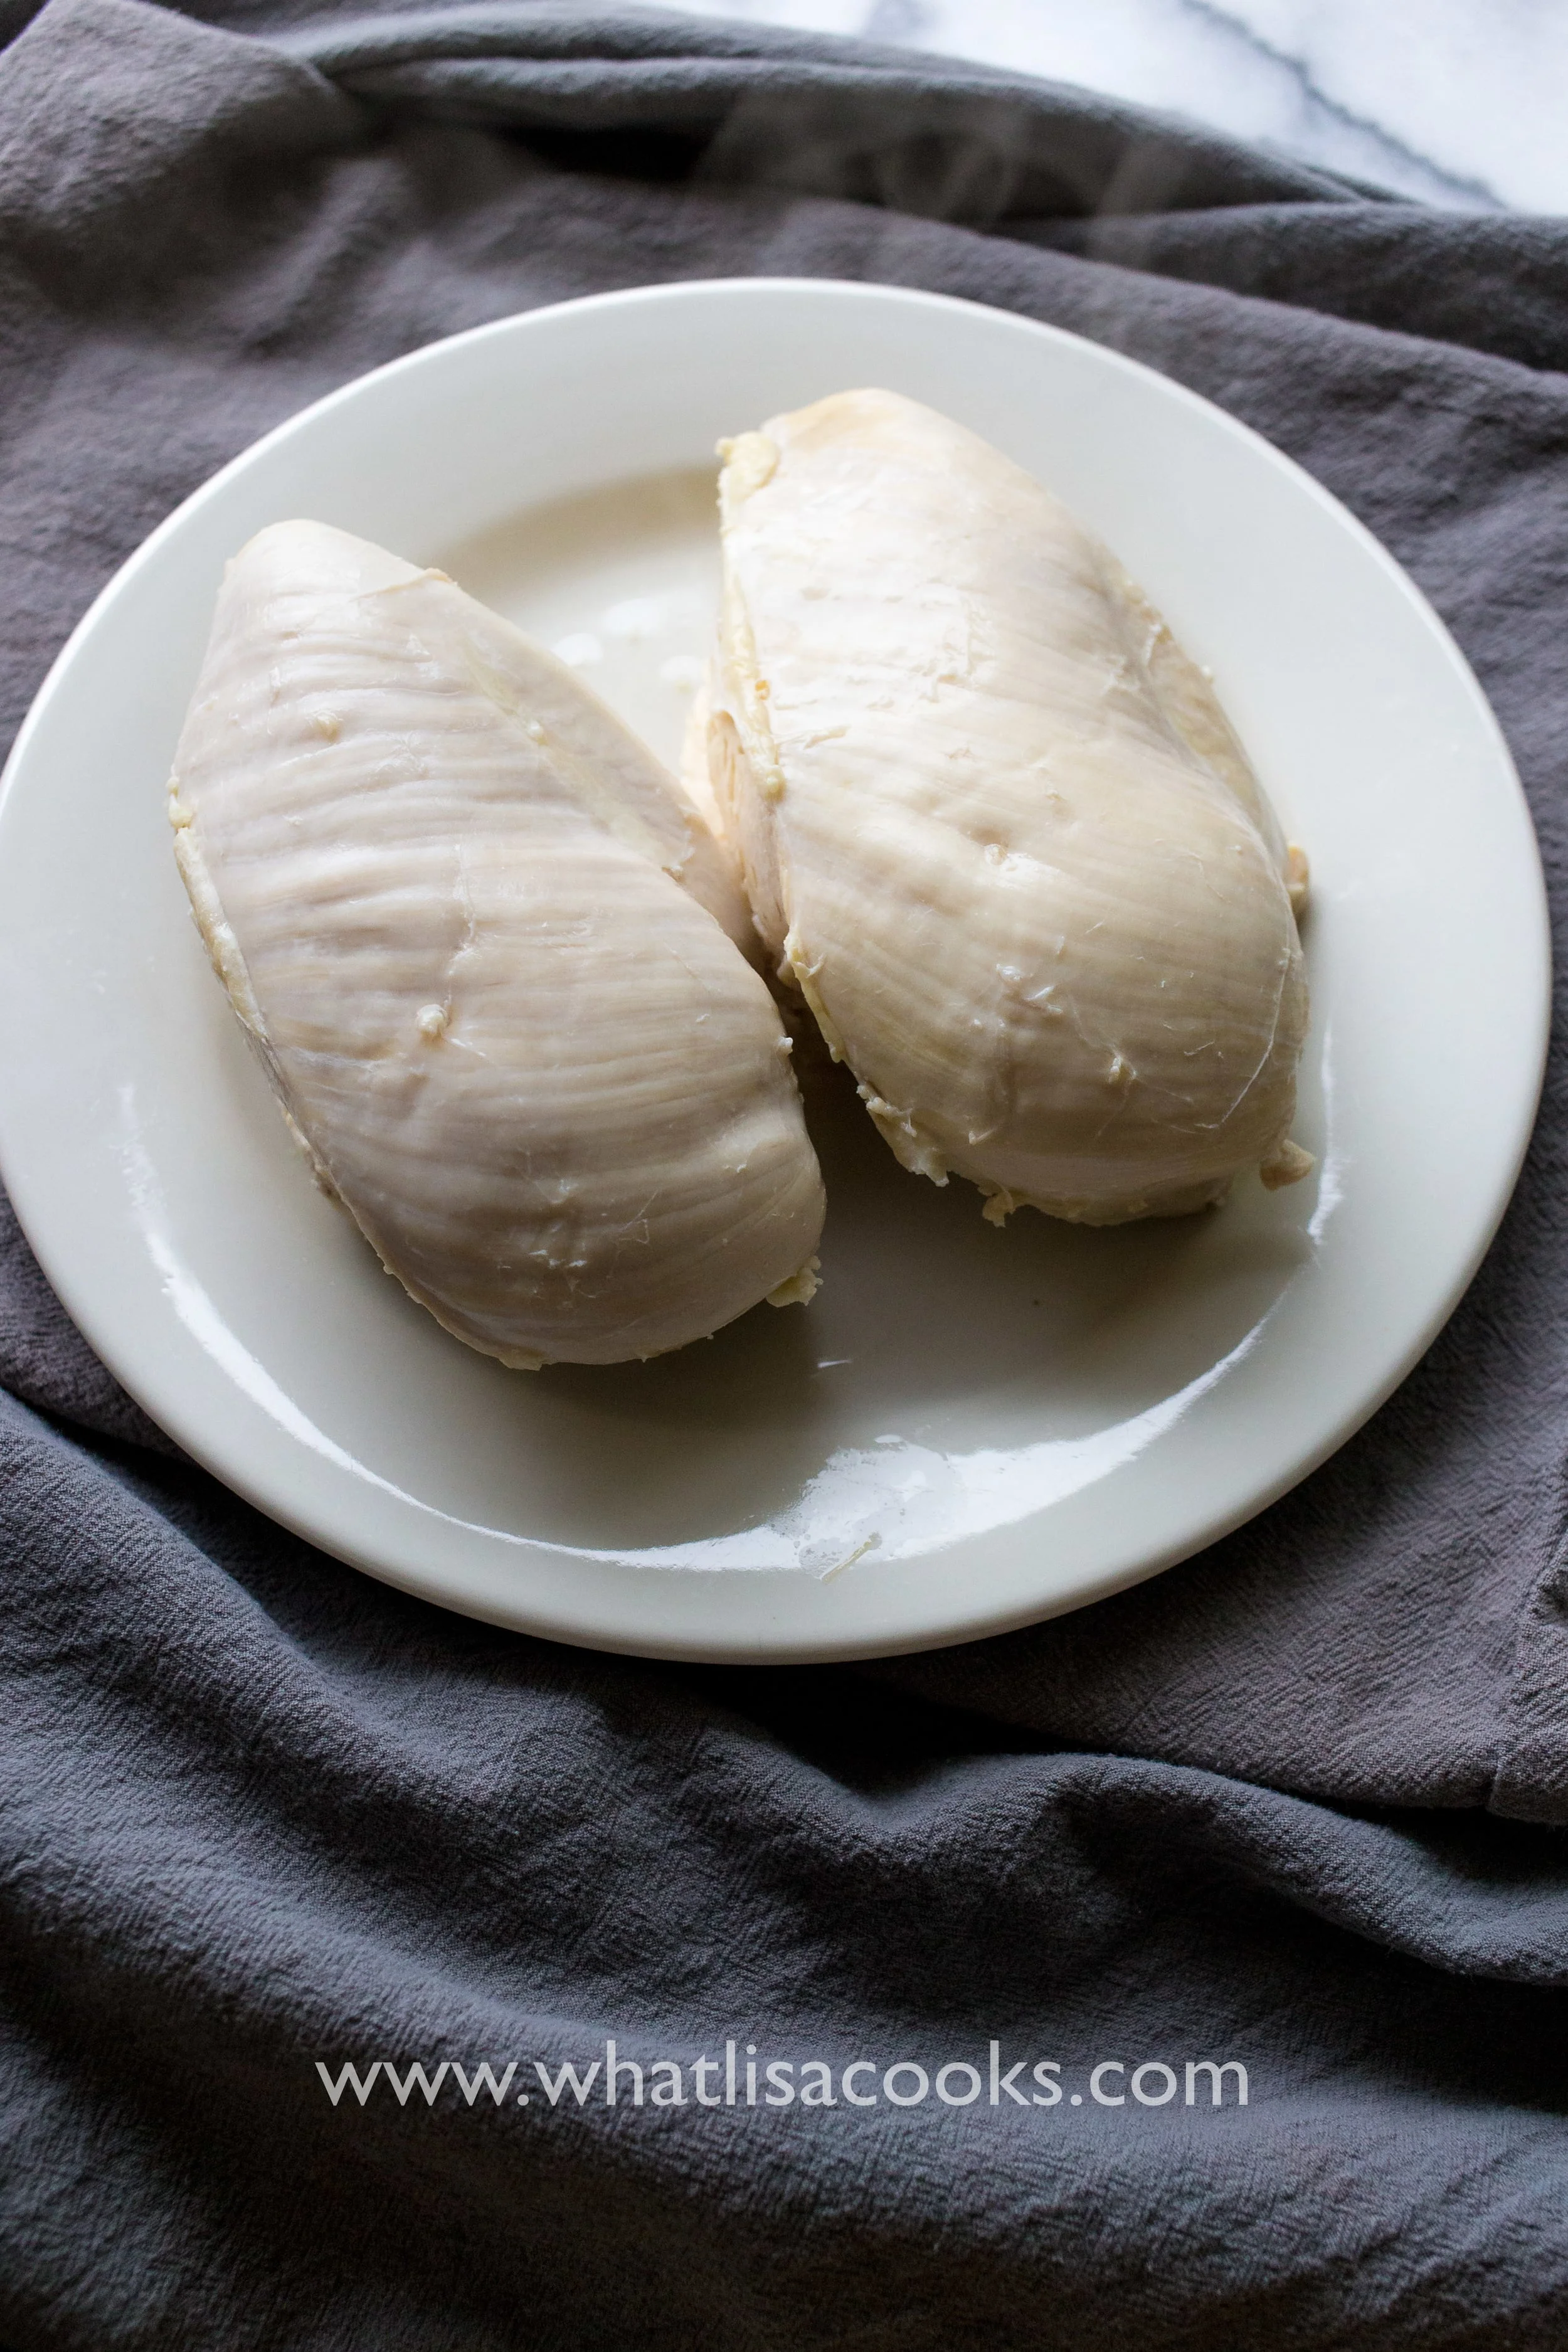

Now you can slice or dice the chicken to use in salads or on sandwiches. Or you can pull it apart into shreds for a soup or a casserole. The lightly flavored broth makes the basis for a delicious mild soup, or it's wonderful to just drink a cup on a rainy afternoon. You can also use it again - I actually added two more chicken breasts to my pot and cooked them in the same liquid, so now my broth has more chicken flavor. I will be using some of it as a base for a spiced tomato gravy that I use in my enchiladas, and the rest I will probably just drink.

Corn Dog Muffins
I think this may officially go down as the very best kid food item I have ever made. I have always loved corn dogs, and my kids love them too. I love the idea of making them at home, but I don't have a deep fryer, and I have no intention of getting one. So when I came across this idea of making corn dog muffins I just knew we had to have it. It's super easy - basically just good homemade cornbread with a piece of hot dog. Cooking in the oven as muffins means no mess from frying, and I loved that I could make different size options using different size muffin pans and cutting the hot dogs.
I think this may officially go down as the very best kid food item I have ever made. I have always loved corn dogs, and my kids love them too. I love the idea of making them at home, but I don't have a deep fryer, and I have no intention of getting one. So when I came across this idea of making corn dog muffins I just knew we had to have it. It's super easy - basically just good homemade cornbread with a piece of hot dog. Cooking in the oven as muffins means no mess from frying, and I loved that I could make different size options using different size muffin pans and cutting the hot dogs. I have a great corn bread recipe that I love - it's adapted from this recipe, with a few changes to make it the way I like it (I changed the oil to butter and reduced the sugar). It's just right - buttery, and just a little sweet. The touch of sweetness worked perfectly with the salty hot dogs.

Ingredients for the corn bread:
1 1/2 cups medium or coarse ground cornmeal
2 1/2 cups milk
2 cups unbleached white bread flour
1 tablespoon baking powder
1 teaspoon salt
1/2 cup sugar
2 eggs
1/2 cup melted butter, (cooled slightly so it doesn't cook your eggs)
And you'll need a package or two of good quality hot dogs. I only buy the Applegate brand.
Directions:
Preheat oven to 400 degrees F (200 degrees C). In a small bowl, combine cornmeal and milk; let stand for at least 5 minutes (longer is better).
Grease your pans with your preferred oil. I have a coconut oil spray that I like, butter would be great too. Or use muffin papers or silicon cups and then greasing won't be necessary.
In a large bowl, whisk together flour, baking powder, salt and sugar (if you use honey, mix that with the wet ingredients instead. Mix the eggs and butter in with the milk and cornmeal, and then combine the wet and dry ingredients. Mix until smooth. Spoon it into your prepared muffin cups to about 3/4 full.
Cut your hot dogs to the size you want and stick them in the center of each muffin cup.
Bake in preheated oven for 15 - 30 minutes until golden brown (depending on size of muffin - 15-20 for minis, 25-30 for big ones, just watch and make sure they don't get too brown), or until a knife inserted into the center of the cornbread comes out clean.
Notes:
Medium or coarse ground cornmeal is a must in this recipe. I tried it once with a finer grind and it was too heavy and dense. I usually buy Bob's Red Mill medium grind.
Soaking the cornmeal in the milk also makes a huge difference, the recipe calls for 5 minutes, I think longer is even better.
The original recipe for cornbread made one 9x13 inch casserole pan. I think this ends up with about 2 dozen standard size muffins, or more/less depending on size.
This recipe works great with gluten free flour!
I have not tried this with whole wheat flour. I think it would be pretty dense. But I am curious to try. Although I'm a big believer in everything in moderation, so I don't mind a little white flour in some cornbread occasionally.
I think you could easily substitute honey for the sugar, maybe just reduce the milk by a little.
Let them cool a little and pop them out of the pans, and serve with some good organic ketchup and/or yellow mustard. I of course had to make a double recipe because we love leftovers - and these things are so good that there would have been no leftover if I hadn't made lots extra. I've packed them in school lunches, and I've put a bunch in the freezer for another day.
And - next time you're making a big pot of soup or chili or stew, make up a batch of this cornbread without the hot dogs - it comes together pretty quick for a weeknight side.
Let me know what you think!


Weeknight Lemon Dijon Chicken Thighs
This is my favorite weeknight chicken recipe. I've made this for years without a recipe, but the last time I made it I finally took the time to scribble down what I put in it, and take a few pictures for you. It's so easy, once you've made it you don't really need a recipe.
Hands down my favorite way to cook chicken. It's so easy. This recipe has instructions for the oven below, but you can also let this marinade and then throw them on the grill for a summer dinner. I do them for about 7 minutes each side over medium heat. Use the leftover marinade to baste them a couple times on each side.

This is my favorite weeknight chicken recipe. I've made this for years without a recipe, but the last time I made it I finally took the time to scribble down what I put in it, and take a few pictures for you. It's so easy, once you've made it you don't really need a recipe.

The quantities are just a guideline - it really doesn't matter how much of each thing you add. It's all good.
Ingredients:
3-4 pounds chicken thighs (you can use other pieces as well, but thighs are my favorite)
1/2 cup white wine (and a little extra for the cook)
1/2 cup fresh lemon juice (and the squeezed lemon halves)
1 teaspoon salt, and a little more to sprinkle on top
a heaping tablespoon dijon mustard
1 teaspoon (or more) crushed or chopped garlic
fresh round pepper, to taste
Directions:
Preheat oven to 400.
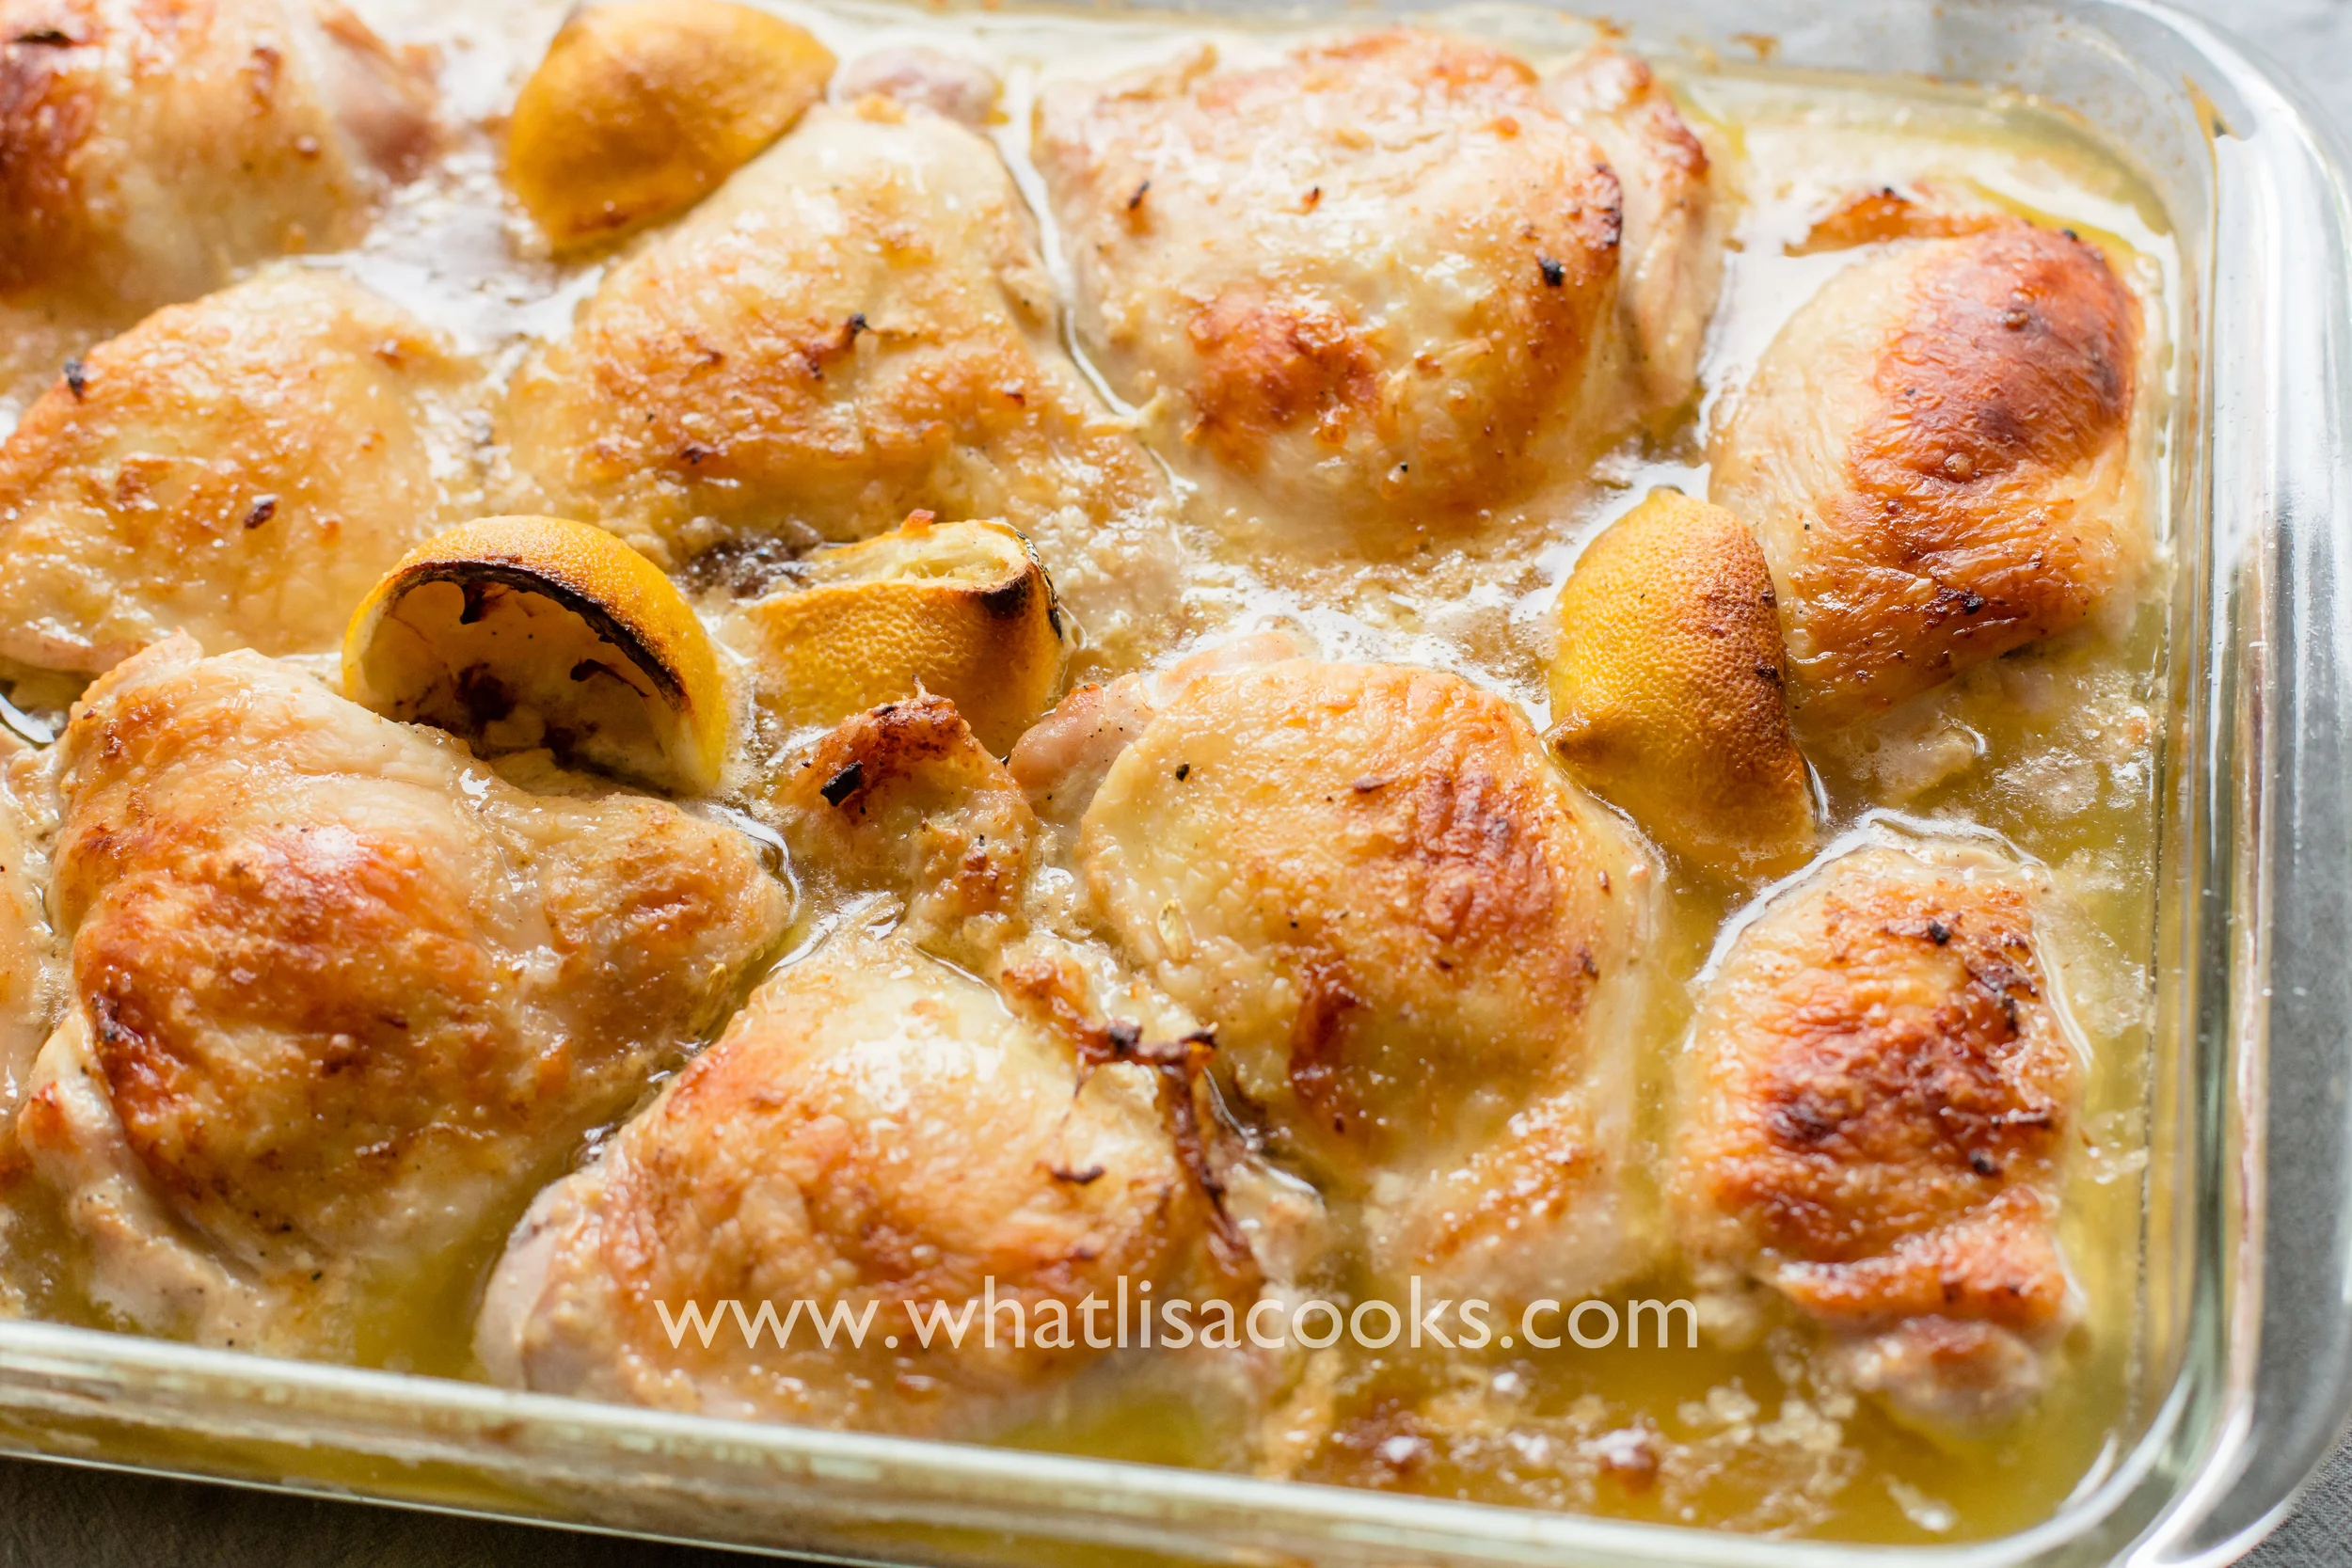
Put chicken pieces in zip top plastic bag. Add all the rest of the ingredients. Don't for get to add the pieces of lemon that you squeezed, they add great flavor. Close the bag securely and just massage it all around so it's well mixed and the chicken is well coated. If you have time, let this sit for an hour or more. If not, that's fine too. When you are ready to cook, just dump it all in a casserole dish or other oven safe pan. I like to sprinkle a little more salt on top, because I love that salty, crispy skin.
Cook for 35-45 minutes - depending on how hot your oven is (mine runs a little cold) - until all the juice looks clear and cooked (no red or pink juices from the chicken), and the skin is nicely browned. The nice thing about thighs is that it's harder to overcook them, you have to really overcook them in order for them to not be good. Also cooking with all this marinade helps too, it really keeps them juicy. If you decide to do this with white meat you will need to watch it more closely.
I like to serve this with some white rice or plain pasta on the side. The juices from the chicken, combined with the lemon juice, wine, and mustard, make the most amazing and delicious sauce, so you really don't need to do anything else. Steam a veggie or make a quick salad, and you have a super easy weeknight dinner.
After you're done - don't throw out those bones! Take the meat off the bones and save, and dump everything else that's left into a pot, cover with water, and simmer for a couple hours until you have broth. It's the most amazing lemony flavored broth and it is perfect for making soup.

Chicken nugget meatballs
A few weeks ago I had an idea to make some simple chicken meatballs. Most of my kids will eat meatballs, so it's usually a good easy weeknight meal for us. With some pasta and a salad, we've got a good dinner and it isn't much work. But I wanted to lighted them up a bit this time, so I thought I'd make them with chicken instead of my usual combination of beef & pork (or frozen!).

And in doing so, something magical happened...
I mixed these up and started browning them, and tasted one. I realized that it tasted an awful lot like a chicken nugget (in a good way!). I have one super picky child who eats nothing, but chicken nuggets are on her very short list.
So I asked her if she would be willing to taste this thing I just made that tastes just like a chicken nugget.
She agreed. And she liked it! I was giddy!
If you have an extreme picky eater, then you understand the joy you feel when you discover something they will eat that is homemade and relatively healthy.
I've made homemade chicken nuggets before, but it seemed so labor intensive that I didn't do it again. They had to be shaped like nuggets, and rolled in breading - a lot of work for nuggets. But for these I just used a cookie scoop to get the rough balls, and then finished rolling and dropped in a pan with some oil. I think because they had bread crumbs in the mix then they had a feeling of a crust, without having to actually crust them. It was easy and quick!
My original plan had been to plop all of these in a pot of sauce to finish cooking, but since she liked them I decided to not do that. I instead cooked them through and then put in a couple of oven proof dishes. I kept one dish of them plain, and the other I topped with sauce & cheese - so it had a bit of a chicken parmesan taste to it.
This is definitely one of those guideline type of recipes. This is the approximate ingredients that I used, but these quantities are not mandatory and really it's more of an eyeball type thing.
Ingredients:
- ground white meat chicken - around 2 pounds
- Italian style seasoned bread crumbs - a cup or so
- eggs - 2 or 3
- garlic powder - a teaspoon or so
- onion powder - a teaspoon or so
- fresh ground pepper
- oil for cooking
Directions:
Mix all ingredients together except the oil. The consistency should be bit like dough - you should be able to form it into shape without it falling apart or seeming too wet. It's the combination of bread crumbs + eggs that help hold this together. If your mixture seems too wet, add a bit more bread crumbs. Too dry, add another egg.
Generally for this kind of thing it's a good idea to cook a little bit to taste and check for seasoning before you cook the whole lot. Seasoned bread crumbs can often have a lot of salt in them, so I wouldn't salt this much if at all until you've tasted. Pinch off a bit and put it in a hot pan to cook, and then taste. Then add salt as needed. Then when you are happy with the seasoning you can shape into meatballs. I use a small cookie scoop, drop the scooped bit into my hands, finish shaping into a ball, and then put in my pan.
Brown on all sides in a pan with a bit of vegetable oil over medium heat. They likely won't be cooked all the way through, so you'll need to either turn down your heat and cook for another 5-10 minutes, or you can put them in the oven at 350 for 10-15 minutes.
You could also cook these from star to finish in the oven - I'd do a foil lined baking sheet, at 350 for probably 20-30 minutes.
We had ours with sauce & pasta. They'd be great just dipped in ketchup too.
Enjoy!
Lazy mom's fish tacos
Taco night is practically a ritual at our house. We take it seriously. But that doesn't mean it has to be a ton of work - it just means it has to be good!
We also don't want to have the same thing for taco night each week. I like to keep it as an easy meal, but mix up the ingredients a bit so it doesn't get boring. We do tacos with ground beef, or beans, or chicken cooked any number of ways, and one of my favorites is fish tacos.

This is one of my favorite weeknight dinners, and a super easy way to do taco night just a little different. If you like fish tacos, but feel like you can't have them at home - you need to try this.
Basically, you just find some good quality fish sticks and cook them in the oven according to the package directions. (I like to let them get a little crispy.)
We like the fish sticks from Costco, and Trader Joe's has some pretty good ones too. Use any ones you like. I've also done this with other kinds of frozen fish - frozen filets meant for fish & chips, or other kinds of breaded fish. Whatever you like works great - as long as it's quick and easy!

And then, you just do all the usual taco stuff - lettuce or cabbage, sour cream, cheese, tomatoes, avocado, green onion...
For fish tacos I like to add a squeeze of lime, and some fresh cilantro is really nice if you have it. Basically, anything goes!
This is a great meal to have kids help with - small amounts of cutting, picking off cilantro leaves, mashing avocados, filling bowls. They can really feel like they are participating in the meal, even though there is very little actual cooking involved. There are plenty of opportunities for lots of jobs for little hands.

My family loves this kind of meal because they all get to make their own. I have found with my kids that the most successful meals are the "make your own" type of meals - kids love having some control over what goes on their plate. I try to give them a guideline that they have to have some protein and they need to choose at least one vegetable, and beyond that they can control their own.
Let me know if you try it - and what kinds of combinations you come up with!
Lazy Mom's Fish Tacos
Ingredients:
- Good quality fish sticks (or other frozen fish that you like)
- Taco sized tortillas - flour or corn
- shredded lettuce or cabbage
- limes
- sour cream
- guacamole or avocados
- cilantro
- diced tomatoes
- green onions
- salsa
- any other toppings you like!
Optional:
Serve with chips, rice, beans - whatever extras you like.
Directions:
Cook fish according to package directions. Serve fish, tortillas, and all toppings buffet or bar style. For standard sized fish sticks we do 2 fish sticks in one taco sized tortilla. You could also use bigger tortillas and make fish burritos.


Freezing Pasta
One of the keys to success around a house with 4 little kids is being prepared. For meals on busy days that means having things prepared ahead of time. A couple days of the week when we are running around to therapy appointments or classes in the afternoon I try to get dinner made in the morning and have it ready for us when we get home at 5:30. But that just doesn't always happen. So my solution on those kinds of days is to have things in my freezer that are easy to pull out and quickly serve. One of those things is cooked pasta.
A few years back I noticed that Trader Joes was selling bags of frozen cooked pasta - you just pop them in the microwave and serve, with cooked pasta ready in just 3 minutes. I bought those for a while. But as little bodies and appetites grow and grow, buying packaged things like that gets expensive - one bag of pasta doesn't do it for us. So I freeze my own now.
Whenever I am cooking any kind of pasta, I always, always make extra and freeze it. I do this with any kind of pasta. Penne is a favorite, because it's sturdy enough that it can hold up to being tossed around in the freezer a bit. All you do is just toss your cooked pasta with a little oil or butter, let it cool, and then spread it out on a baking sheet to freeze without sticking together. Then dump it onto a ziploc bag. When you want to use it, pull out the amount you want and warm it up. You can do this in the microwave for a couple minutes. Or you can put a little hot water over it and let it sit for just a minute or two - this method works especially well if the pasta got a little dry in the freezer.
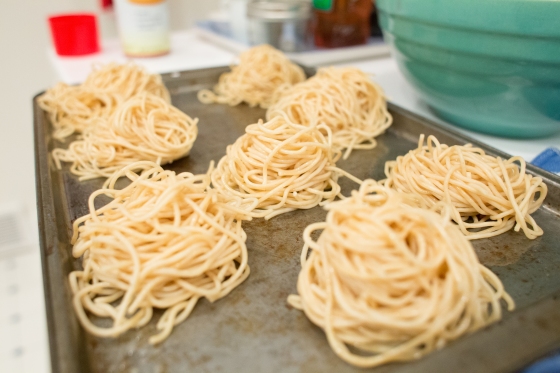
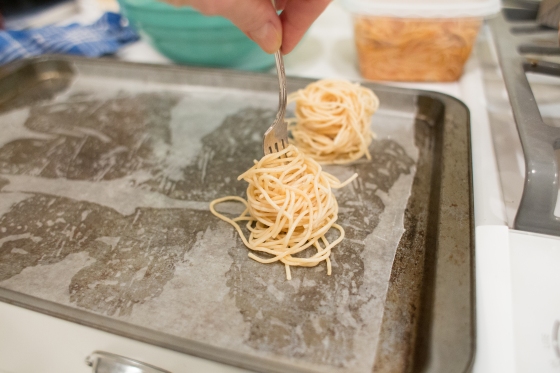
For longer pastas like spaghetti - below you will see what I do. Take a fork and spin individual little servings onto a baking sheet (lined with wax paper helps keep them from sticking). They look like little birds nests. Then freeze these and then bag them when frozen.
Having cooked pasta in the freezer means I can have a meal ready for hungry kids in less than 5 minutes - thaw the pasta, toss it with a little sauce, or some butter & cheese, throw in some frozen peas or chopped broccoli, maybe dice up some ham or salami - a balanced meal in minutes.
A quick and easy way to cook pasta!
We've always been told that pasta had to be cooked in a big pot with lots of water, and we never really questioned it. Until now.
I have seen mentions of this alternative method of cooking pasta here and there, and figured I had better give it a try.
The basic idea is that instead of using a bunch of extra water in a huge pot, you cook your pasta in a smaller pan with just enough water to get it cooked through - no excess. The starchiness in the water is not a problem, because that extra starch is part of what contributes to an extra creamy sauce that will really stick to your noodles. Restaurant chefs have known about that trick for a long time - they always add a ladle of pasta water to their sauce.
Basic cooked pasta:
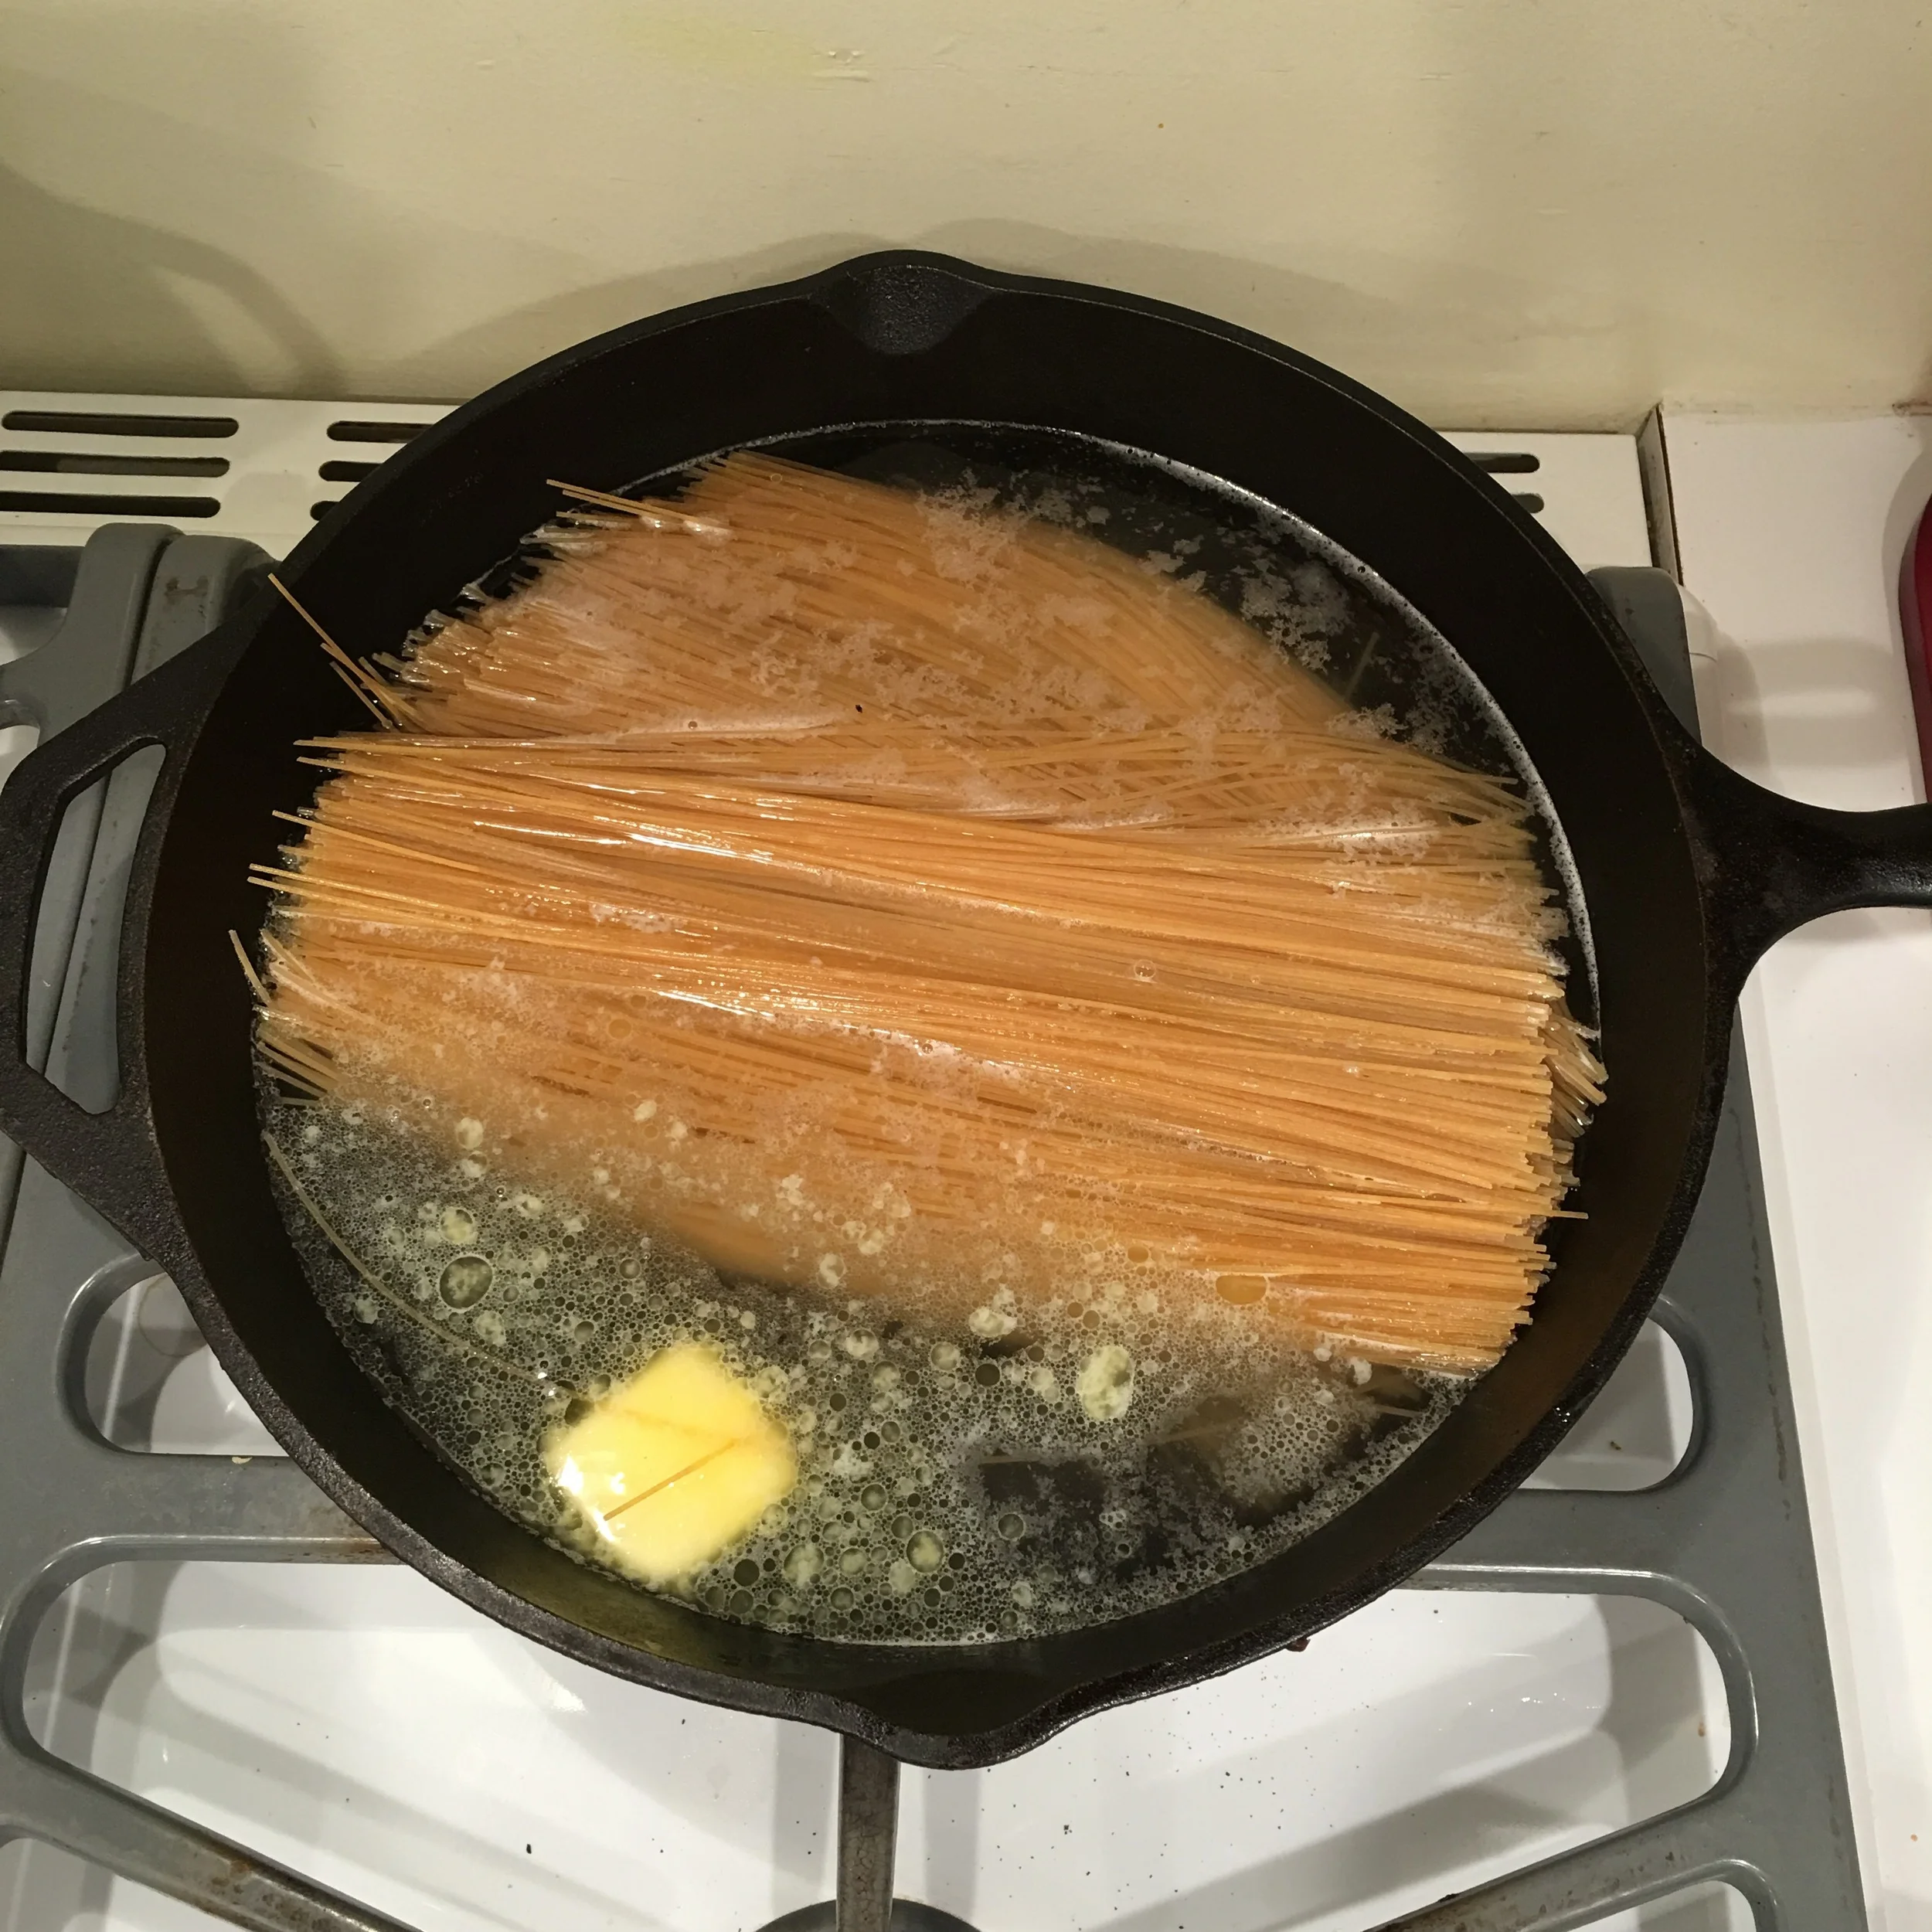
- 1 package (usually about a pound) of pasta
- 1 teaspoon salt
- 1 tablespoon butter
- 4-6 cups cold water (see notes below)
The butter might not be necessary in a non-stick pan, but I am using a cast iron pan so I always like to have a little oil in there.
The quantity of water will vary depending on your type of pasta and your desired end result. Here is used a very thin angel hair pasta and I just was serving it buttered, so I used only 4 cups. But for thicker pasta like penne you will need more water - so go up to 5 cups. If you are making a sauce then you will want to have a little water left in your pan after the pasta is fully cooked, to help blend in the sauce, so go up to 6 cups.
So - 4 cups for thin pasta, no sauce. 6 cups for thick pasta with sauce. Or adjust in between to suit your needs. As with everything, I think it's a bit of trial and error. If your water is all absorbed but your pasta is not yet fully cooked, then add a bit more hot water.
Directions:
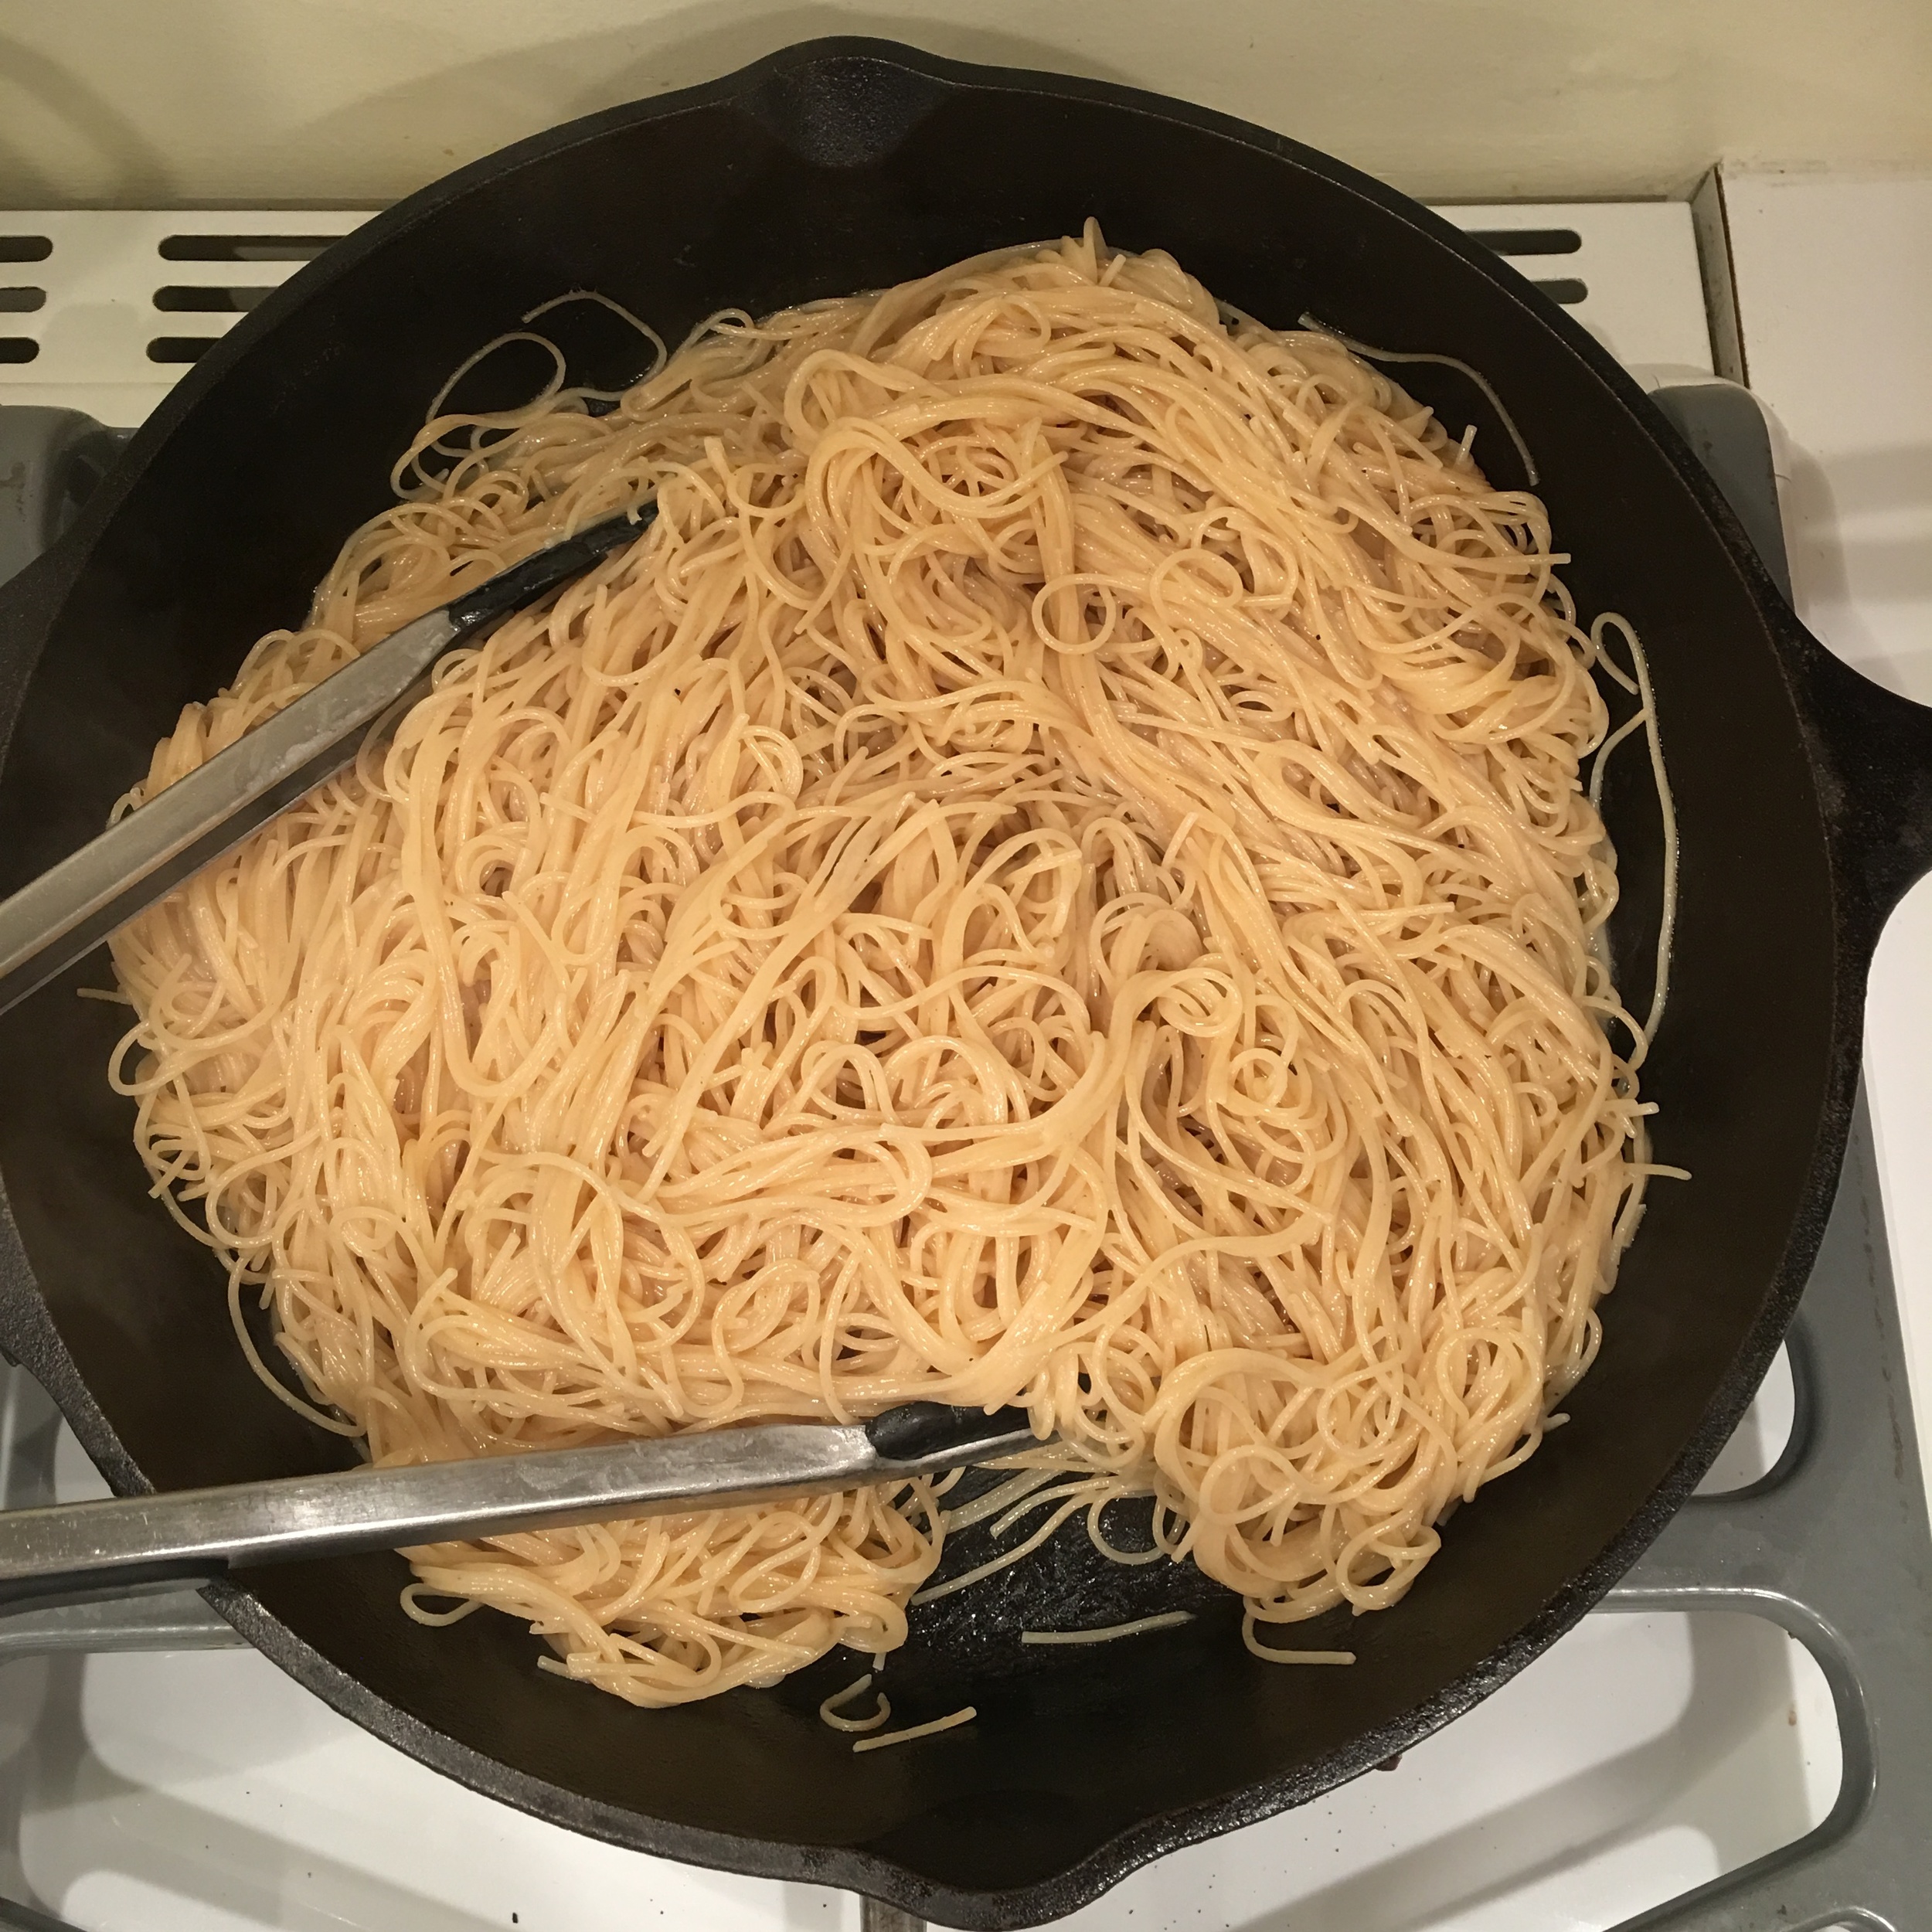
Place everything in a pan just big enough to contain it all and wide enough that the pasta can be fully submerged in the water.
Turn on the heat and bring up to a gentle simmer, stirring occasionally to ensure the pasta doesn't stick together, until the pasta is cooked to your liking.
It will take about 10- 12 minutes, depending on the thickness of the pasta.
And that's it! Perfectly cooked pasta in less time than it would take to even get a pot of water boiling.
Once it's done you can serve as is, or add your sauce. My kids are picky about sauce, some like it and some don't, so I tend to serve the sauce on the side. But you could just add a little cream and some herbs and parmesan cheese to this for a super quick and simple weeknight pasta dish, or toss in a jar of your favorite tomato sauce.
I love a tip that helps me get dinner on the table faster!
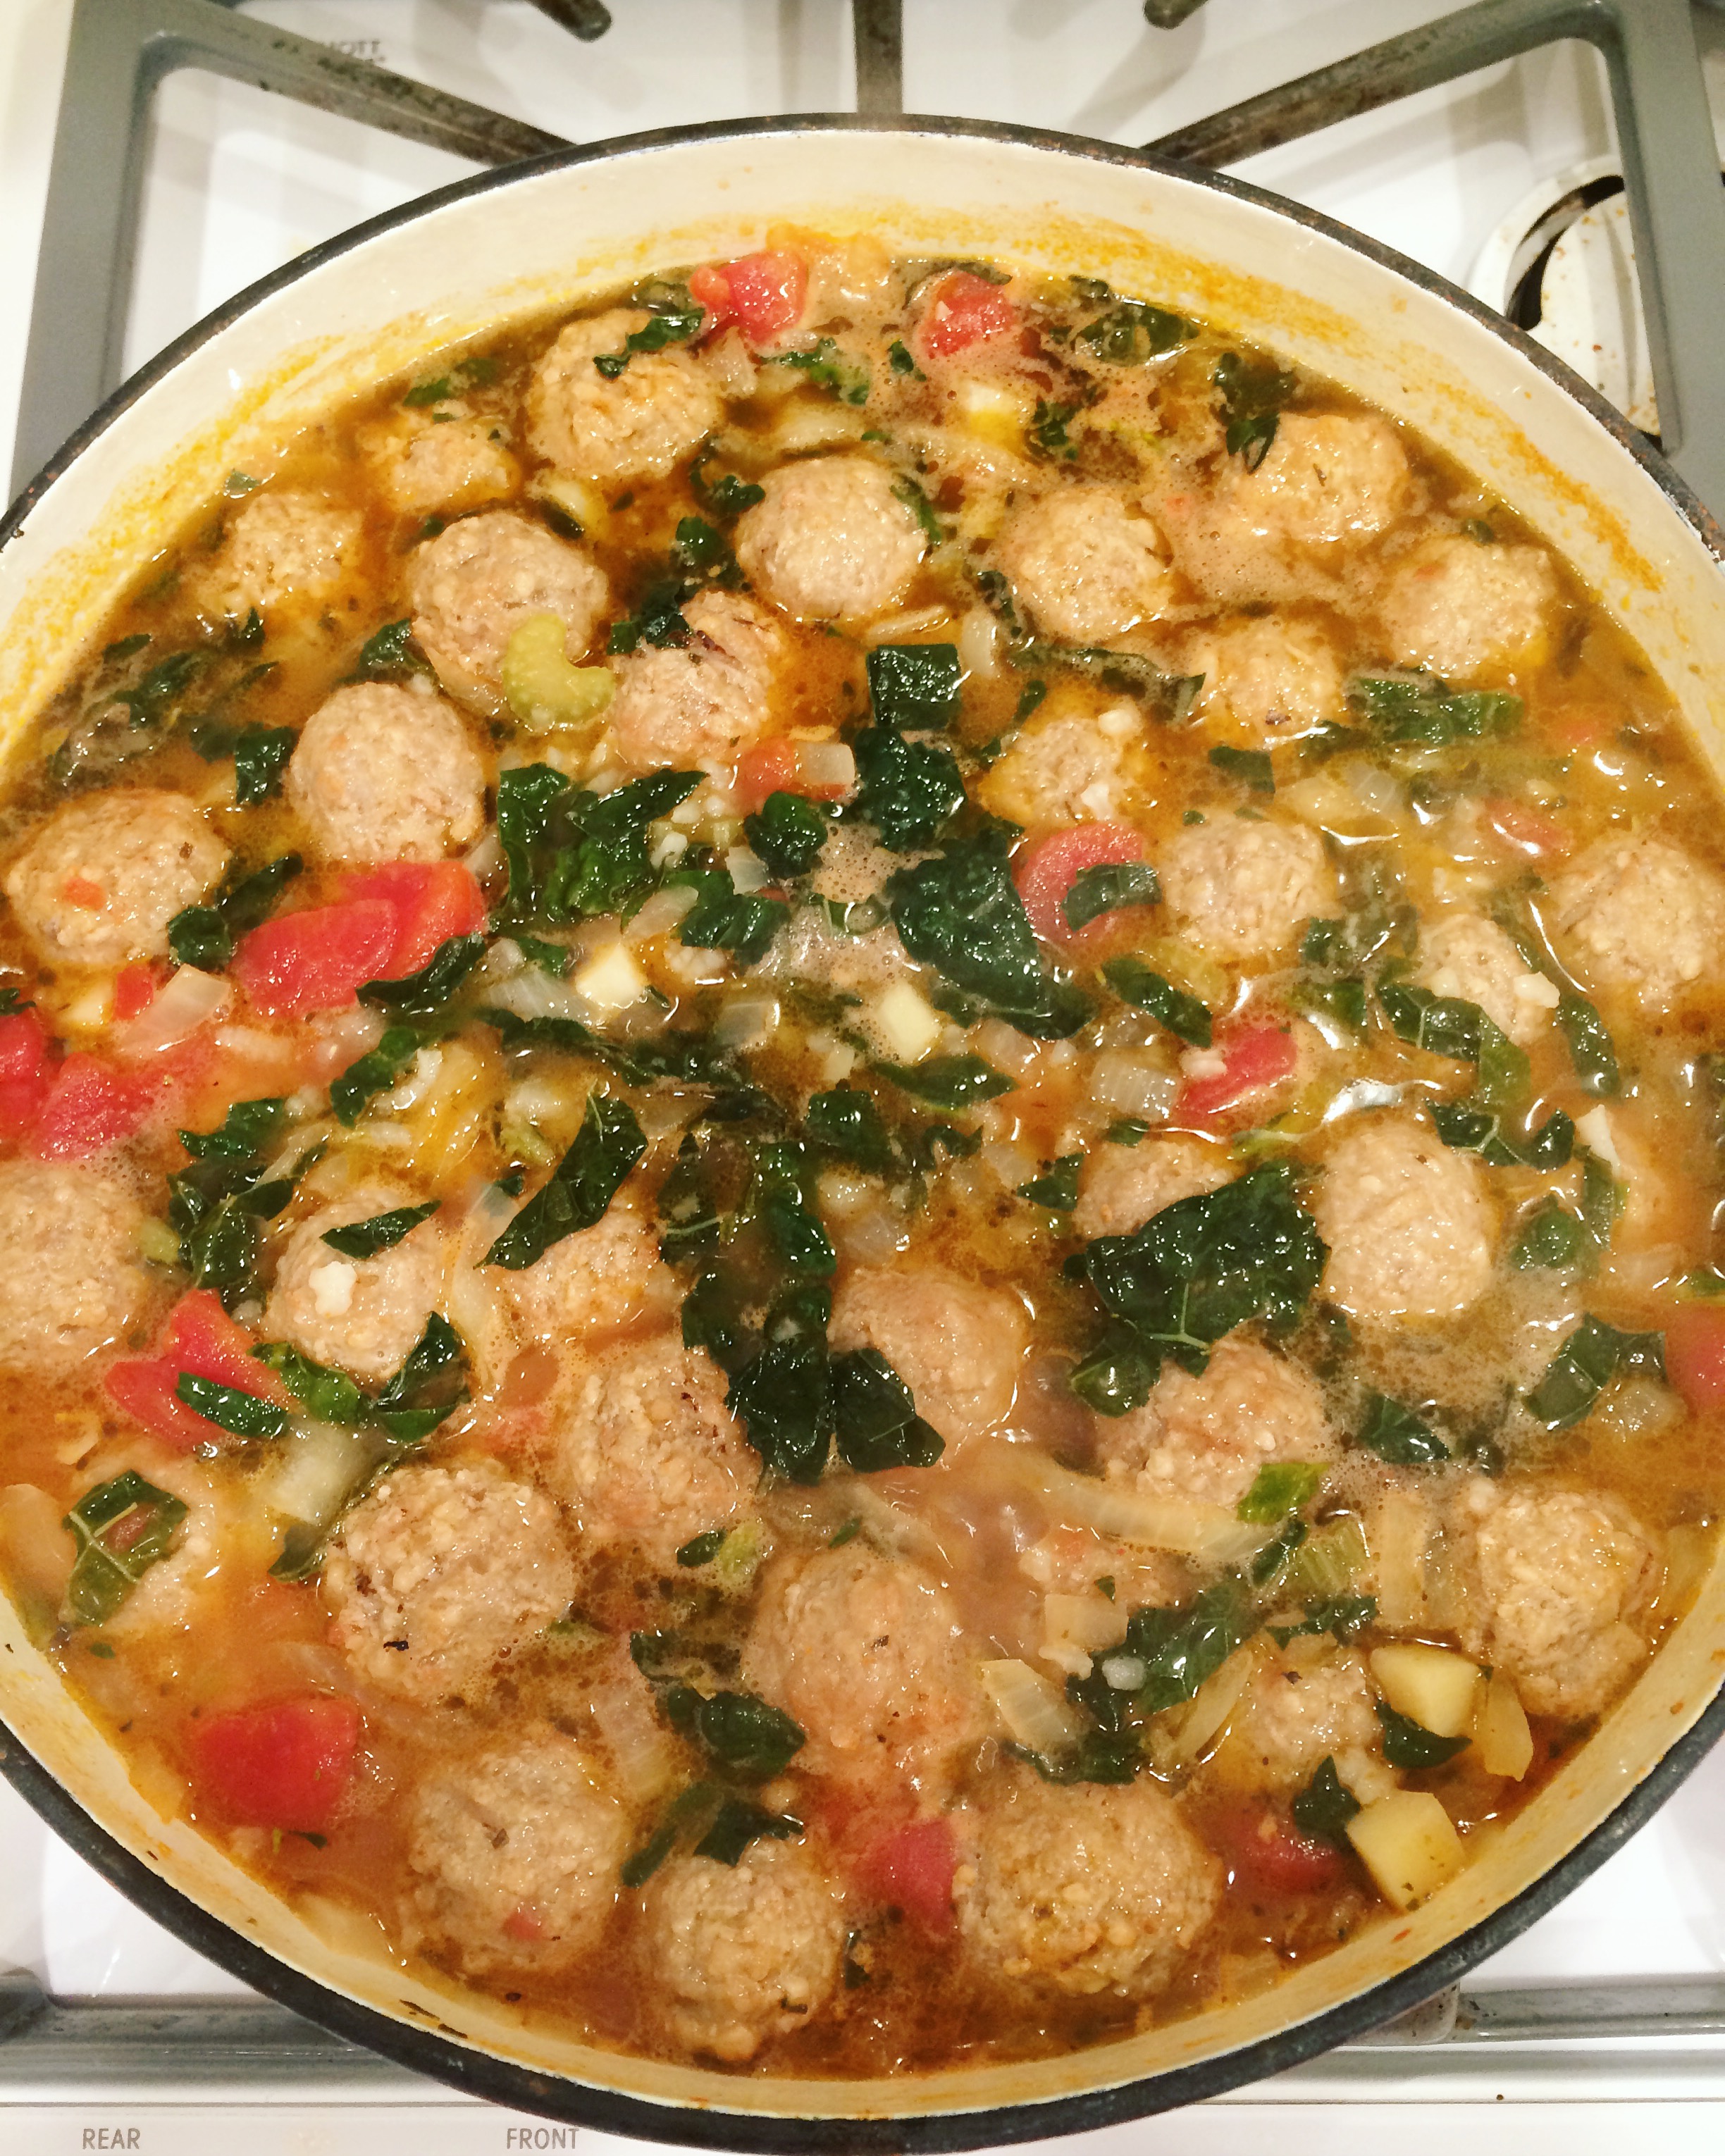
Easy weeknight meatball soup
This is a super quick and easy one that I made for dinner last week. It turned out so yummy that I figured I'd better share the recipe. This is the kind of soup I love to make, it's fast, it's healthy, and it's a big crowd pleaser.

This is a super quick and easy one that I made for dinner last week. It turned out so yummy that I figured I'd better share the recipe. This is the kind of soup I love to make, it's fast, it's healthy, and it's a big crowd pleaser.
I made a big pot. Because, soup. Why wouldn't you want a big pot? Leftover soup is even better than fresh soup, and it's a really easy and cost effective way to feed a crowd. But of course you could cut this recipe and make less.
As with all of my recipes - this is really flexible! My quantities are just a guideline for you to start with, but I very much encourage you to customize this with whatever you've got on hand, or whatever sounds good. Add more veggies, less veggies, leave out the tomatoes, swap the beef broth for chicken or turkey broth and use turkey meatballs - this is just a good basic technique that you can apply to any kind of soup.
Ingredients:
- 1/2 onion
- 2 stalks of celery
- 1 parsnip
- 1 bunch of kale
- a couple cloves of garlic
- oil for sautéing
- 2 quarts beef broth
- 1 can diced tomatoes
- 1 can tomato sauce
- 2 small bags frozen mini meatballs (mine were from Trader Joes)
- 1 tablespoon Italian seasoning
- 2 cups cooked rice or pasta (optional)
- salt to taste
Directions:
Chop or dice all of your veggies. Size doesn't really matter, it's just personal preference. If you like chunky soups, then cut them in bigger chunks. If you think your littles (like mine) are more likely to eat it with small bites of veggies, then cut them as small as you can.
Heat a good size soup pot, and then pour in just enough oil to cover the bottom. Saute all the veggies in the oil until beginning to soften. You can season with a pinch or two of salt to help them along. Once your veggies are cooked a little, add everything else except the salt. I hold off on the salt for a while because the saltiness of broths and meatballs can really very, so you want to let your soup simmer for a while and let all the flavors start to combine before you add more salt.

The rice or pasta is optional. I love this kind of soup with rice, I just think it makes it even more comforting. But it's really delicious without, so if you're trying to cut carbs go ahead and leave it out. Or sometimes when I make something like this I will serve it with a bowl of cooked rice or pasta on the side, so that I can have mine without the extra carbs and my kids can add carbs to theirs. You can also start with uncooked rice, but you'll want to add an extra 2 cups of broth for each 1 cup of dry rice.
This is so easy to make that it's a great one to have the kids help with. I chopped and sautéed the veggies, and one of my five-year-old girls did everything else.
Once everything is combine in the pot, then just let it simmer. You'll want to simmer it for at least long enough to get your meatballs all heated and cooked through, probably 20 minutes. But really the longer the better. This is totally the kind of things that you could put in your slow cooker and let it just simmer on low for several hours, or put it on a back burner of your stove. I like to let this kind of soup simmer for at least an hour if I have time, it all just tastes better that way, but even after 20 minutes it will be delicious. That's what makes this the perfect weeknight meal. After it has simmered for a while, and your meatballs have cooked and released some of their flavor in to the broth, give it a taste. It's at this point that you can add more salt or other seasoning if you think it needs it.
enjoy!

Slow Cooker Lentil & Sausage Soup Recipe
This lentil soup is hearty and comforting and great for those nights when you need something to warm your tummy. It's super easy to make and it has a great balance of veggies and the delicious taste you can only get from sausage. My kids, like most, are not big veggie eaters. But they eat this soup! They are suckers for anything with sausage in it. When I serve it to the kids I put a big dollop of sour cream on top - they seem to like it better with the creaminess, and it's a great way to cool it off quickly. One of my kids actually loves this so much that she requested the leftovers for breakfast the next day, and for snack when she got home from school.

This lentil soup is hearty and comforting and great for those nights when you need something to warm your tummy. It's super easy to make and it has a great balance of veggies and the delicious taste you can only get from sausage. My kids, like most, are not big veggie eaters. But they eat this soup! They are suckers for anything with sausage in it. When I serve it to the kids I put a big dollop of sour cream on top - they seem to like it better with the creaminess, and it's a great way to cool it off quickly. One of my kids actually loves this so much that she requested the leftovers for breakfast the next day, and for snack when she got home from school.
The beauty of this type of recipe is in its flexibility. You can make this however you want, so please use this recipe as a guideline, not as a strict rule. If you like more or less or something, go for it. Change the type of sausage (or use meatballs or chicken), try different veggies, and different spices. That's the great thing about soup - you can personalize it and never make it the same twice!

Ingredients:
- 1 package of sausage - usually a little over a pound.
- 1 onion
- 1 carrot
- 1 stalk of celery
- 2 cloves of garlic (or 2 teaspoons crushed)
- 3 quarts chicken broth
- 1 can diced tomatoes
- 1 1/2 cups dry lentils
- 1 head of cauliflower
- 1 bunch of kale, or other greens.
- salt & pepper to taste
- Other herbs or seasoning to taste.
This works with basically any kind of sausage you like. I usually use brats or Italian sausage because I like the flavor. But if you want a little spice you could use a spicy sausage. Or if you want to keep it a little lighter you could use a chicken sausage.
You can also use any kind of lentils. Different kinds will have different textures when cooked, and take different cooking times, so just experiment and use ones you like. Red and orange lentils cook faster and have a softer texture when cooked. Green and black ones tend to hold their shape better. The one pictured was a very generic package of green lentils, I often have those on hand because they are usually the cheapest.
If you have homemade broth (here's how I make it), then that will kick this up into the ultra amazing category - it just adds so much flavor. But this is still great with store bought broth, and obviously that makes it very easy.
You could totally leave out the tomatoes if you're not a tomato person. I like to add them because I think the slight acidity goes well with the lentils and sausage. It's not enough that it seems like a very tomato-ey soup, but it's just enough to add a depth of flavor.
I like to hold off on the salt until I've got it all put together and simmering, because depending on the type of sausage and broth you use, it salt level is really going to vary. Some are very salty, some are not. Get it all assembled and then give the broth a taste, and then season as you think it needs. And here's where you can get creative: add other spices to give it a totally different flavor. If you want an Indian type flavor, add some curry powder. Or add cumin and extra garlic. Or for a more Italian flavor add some basil and oregano, or just an Italian seasoning blend. Or add a little cumin and chili powder for more of a southwest flavor. The possibilities are endless. Or keep it simple with just salt and pepper and you will still love it!

Directions:
- If you are starting with uncooked sausage, squeeze them out of the casings into little lumps, the size of small meatballs. Heat a heavy bottom pot (or the insert for your stove-top slow cooker), and add sausage balls. You don't need oil because the sausage is going to release plenty of fat. Brown all over.
- Chop onion, carrot, celery, and garlic, and add to the pot with the browned sausage. Saute until onions are getting soft.
- Add chicken broth and can of tomatoes (with juice!). Bring to a simmer, and then add dry lentils.
- Chop cauliflower and greens and add to the pot.
- Cover and simmer for at least an hour.
I like to make this in my slow cooker. I have a slow cooker with a metal insert, so I can do all the browning and sauteing on the stove right in the slow cooker pot, and then move it to the cooker to simmer. (This is the slow cooker I have, and I love it!) I will throw this together in the afternoon, and then let it simmer on low for 3 hours or so while I go to the after school run around, and we come home to dinner ready to eat. But you can just as easily do this all on the stove.
Shortcut:
If you want to make this really fast, use pre-cooked lentils and cooked sausage. You can get a package of pre-cooked lentils at Trader Joes or most grocery stores. Use the whole package. Saute all your veggies, cut your sausage into chunks, and then add all the other ingredients. Cut the broth to just 1 1/2 or 2 quarts, depending on how brothy you like it. Simmer for 20-30 minutes, just until the veggies are cooked to your liking. It's an easy way to make a super quick weeknight meal.

Pizza Muffins and Meatball Muffins!!

These little guys really are irresistible! The meatball muffins are like a little bite size (or two bite!) meatball sandwich. Everything you want - a tasty meatball, a little drippy with sauce, melted cheese, and soft bread that gets a little soaked up with sauce - but in a much more manageable size, so it's not all running down your elbows.
The pizza version is the same, minus the meatball - just a couple bites of saucy and cheesy goodness. They are very much like my pizza rolls, only shaped a little different. I made these for my kids to have for dinner, and enough to save for a school lunch later in the week.
I don't think I can call these recipes, they're just too easy. These were really just something I threw together, but as soon as I shared it on IG and FB I had folks asking me for the recipe. So I guess these easy crowd pleasers are what you all want! I don't get as much opportunities to cook and photograph something as I'd like. This isn't one of those food blogs where people are cooking something just to photograph and blog about. No, here you are getting what we are actually eating. But this was a rare occasion when I was cooking something in the middle of the day to have ready for later, so I was able to actually get some nice photos of it for you.

The "Ingredients"
- Crescent roll dough
- Tomato sauce
- Cheese
- Cooked meatballs

I use Trader Joe's crescent roll dough. I think it has a much more 'homemade' flavor than the other brands, and even though it's still quite processed it at least doesn't have a big long list of unrecognizable stuff in it. It doesn't come out of the can very nicely, they almost always tear when it pops open. I'm guessing that this is because the package isn't lined with all that nice BPA, so it's a tradeoff I"m willing to make. You could use biscuits as well, or you could certainly do this with any kind of homemade dough. One can of dough has 8 rolls, so you'll need 1 1/2 for a dozen muffins. I made two pans, half with meatballs and half without, so 3 cans of dough and 12 meatballs.
My tomato sauce was just canned tomatoes, pureed with a blender. We had spaghetti and meatballs for dinner last night so I had heated up the meatballs in the sauce. I think you could use any kind of tomato sauce or pizza sauce.
The meatballs I used were a combination of some homemade, and some frozen from the store - I had a little bit of each. My homemade meatball recipe is here. If you're going to make meatballs for this I would suggest you make them small. The dough is very tender, so I don't think it will hold a big meatball. These meatballs were all cooked and cold from the refrigerator (not frozen).
And for cheese - well, I would have used shredded mozzarella, but I was out, so I just took some mozzarella string cheese and tore it into pieces. I think any kind of cheese you've got would be just great.
Directions:
- Line muffin tins with dough. For the crescent rolls, I used one piece per muffin space, and just folded and worked it around to shape like a little nest. I did not grease my pans at all because my pans are new and pretty well nonstick, and this dough has a lot of fat in it.
- Put in a small spoonful of sauce
- For the meatball muffins: place 1 meatball on top of dough.
- Cover with shredded or just pieces of cheese.
- If you have pieces of dough hanging over the sides, fold them over just a bit.
- Bake in a 350 oven for 12-15 minutes.
- Let cool for a few minutes before trying to remove from the pans, they are much easier to handle once the cheese has set up a little.
And that's it. Easy!